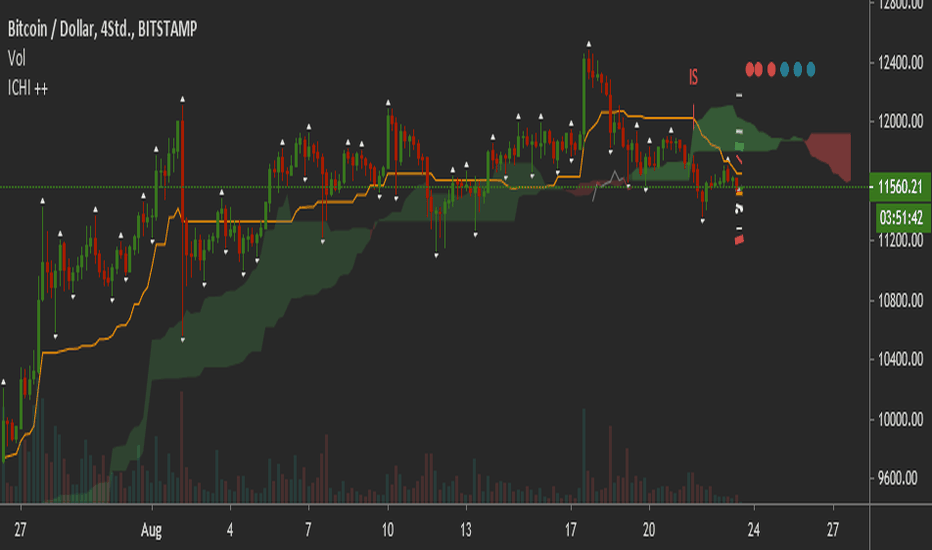
Support & Resistance Confluence Levels, Hold Record & ReversalOVERVIEW
Four lines. Two above price, two below. That is the whole chart.
Every other support/resistance tool has the opposite problem. It finds forty levels and leaves you to work out which two matter. Forty levels is not information, it is wallpaper — and a level you have to hunt for is a level you will not trade.
So this tool inverts the design. It does not ask "where are the levels?" It asks:
WHICH LEVEL WOULD I ACTUALLY TRADE, RIGHT NOW, AND WHY SHOULD I BELIEVE IT?
A price is only promoted to a level when SEVERAL INDEPENDENT METHODS AGREE ON IT. One method finding a level proves nothing — every method finds levels everywhere. The signal is AGREEMENT.
This is a research and framing tool. It is NOT a strategy, NOT a signal service, and NOT a validated edge.
THE SIX VOICES — four propose, two confirm
PROPOSERS. Each nominates candidate prices, independently:
◆ SWING PIVOT the classic. Where price actually turned.
~ KERNEL EXTREMUM the turning point of the SMOOTHED price (Nadaraya-Watson), which is the shape
rather than the noise. This is Lo, Mamaysky and Wang's method, and it finds
structurally different levels from a raw pivot. That independence is exactly
what makes agreement between the two worth something. Agreement between two
methods that make the same mistakes is worth nothing at all.
⇈ HIGHER TIMEFRAME a swing on the HTF. The level a bigger participant is watching.
▣ PRIOR PERIOD yesterday's high and low. Last week's high and low. The most watched prices on
any chart — and missing from almost every auto-S/R script on TradingView.
CONFIRMERS. They do not nominate, they vouch:
▪ VOLUME NODE the level sits where volume actually transacted. Real business was done here,
not merely a turning point.
○ ROUND NUMBER the psychological grid.
Candidates within an ATR tolerance merge, and the merged level inherits every voice that spoke for it. A level needs MIN VOICES to exist at all. Everything below that is DISCARDED, not hidden. Then only the nearest two above and two below are drawn.
The label tells you why the level is there: "◆~▣▪ 4v held 3/4 24,247.00" — four independent voices, tested four times, held three.
AND THEN THE PART NOBODY DOES: WE TEST WHETHER CONFLUENCE ACTUALLY RANKS
"Levels are stronger when several methods agree" is one of the most repeated claims in technical analysis and almost nobody has ever checked it. It is checkable. So the panel reports:
High confluence (3+) +0.24R n=61 PROVEN
Low confluence -0.03R n=88
Control (unconditional) +0.02R n=240
DOES CONFLUENCE RANK? YES — more voices IS better
And the control is DIRECTION-MATCHED. Reversals at support are overwhelmingly LONG on a drifting index — and a long-biased event set compared against a 50/50 control is handed the drift for free and calls it an edge. Longs are compared only with control longs, shorts only with control shorts, and the control is then blended back using the events' OWN direction mix. It is a subtle trap and it will manufacture an edge out of nothing if you let it.
And the verdict is a TEST, not a comparison. High confluence is measured against low confluence with a Welch t-test, and the difference must clear |t| > 1.96 before it is allowed to be a finding. Below that, the panel prints the least satisfying answer there is — NO DIFFERENCE — because that is the honest one. A tool that reports a 0.02R gap as a verdict is not measuring anything, it is decorating.
If the extra voices do not rank on your instrument, then on your instrument they do not rank, and no amount of agreement between methods will change that. That row is the reason this script exists.
THE HOLD RECORD — and why "held 3/4" is not what most scripts mean by it
A TEST IS AN EPISODE, NOT A BAR. Price arrives at the level and the test stays OPEN until price LEAVES it — back the way it came (HELD) or straight through (BROKE). A bar that closes INSIDE the zone has resolved nothing and is counted as nothing.
Counting every touching bar as a completed test drops an entire consolidation into the denominator as failures, and manufactures hold rates near 10% that say nothing about the level and everything about the counter. An unresolved test is neither a hold nor a break, exactly as an unresolved trade is neither a win nor a loss.
AND A TEST IS AN APPROACH, NOT A BAR TOUCHING A BOX. Price exits the zone (HELD), the next bar dips straight back in — and without a re-arm rule that counts as a brand-new test. Chop sitting on a level then logs a hundred "tests" that were really one event. Measured live before this was fixed: 224 tests of a single level on a 5m chart, and hold rates that all landed between 61% and 75% no matter which level you looked at. A statistic that cannot tell any two levels apart is not measuring the levels — it is measuring the bar size. Price must now travel clear of the zone before the level can be tested again. One approach, one test.
The volume filter gates the SIGNAL and never the RECORD. A level that holds on thin volume still HELD. Quietly dropping it from the numerator while leaving it in the denominator is how a hold rate gets manufactured.
IF TWO ZONES OVERLAP, THEY ARE THE SAME LEVEL
The merge tolerance is held to at least the combined zone half-widths. Otherwise two levels a fraction of an ATR apart refuse to merge and then draw overlapping boxes anyway, and the geometry contradicts itself on the chart for anyone to see. It is a small thing that quietly tells you the tool was never looked at.
A LEVEL IS AN ANCHOR, NOT A TRAILING AVERAGE
Levels merge as new candidates arrive, and the merged price is a COUNT-WEIGHTED mean: the tenth candidate moves the level by a tenth of the gap, not half of it. This sounds like a detail. It is not. A level that moves halfway toward every new candidate will slide toward price — because price is where new candidates come from — until it is no longer an anchor at all, but a trailing average sitting in the middle of the action, "tested" on every swing. The maths here is the difference between a level and a moving average with extra steps.
Levels are retired by DISTANCE, and confluence buys REACH. A level far from price is useless however many voices it has; a level at price is what you are trading. But eviction cannot simply drop the weakest, either — every level is BORN with one voice, so a weakest-first rule kills every new level in the cradle, before it can earn a second, and the chart slowly fills with ancient far-away fossils while nothing can form where price actually is. Confluence buys a level the right to be further away. It does not buy it immortality.
THE REVERSAL TRADE — because nobody looks at a level to admire it
Price tests the level and closes back out. Entry at the CLOSE, stop beyond the level, target a fixed R multiple.
ENTRY IS THE CLOSE, for the event and for the control alike. A rejection is a SIGNAL, not a fill.
Entering at the level — a better price — while the control enters at the close hands every level a
free head start, and it would "win" without the level having done anything at all.
THE R MULTIPLE IS FIXED so that the event and the control are measured on IDENTICAL geometry. A
variable target against a fixed-target control is not a comparison: the near target is reached more
often AND resolves inside the grading horizon more often, so the two are not even being asked the
same question.
THE NEXT OPPOSING LEVEL is drawn too, and separately tested: is it reached before the stop, and HOW
FAR AWAY IS IT IN R? A hit rate with no distance attached is a fact about the distance, not about
the levels — a target half a unit of risk away being reached often proves nothing.
Signals fire only at the levels actually on screen. Every level keeps its record; only the ones you are watching can fire. You do not trade a level twelve levels away from price.
And when a level BREAKS, you are told. A level holding is the reversal; a level giving way is the other half of why anyone draws one. Breaks are marked with an x and carry their own alerts — reported as pure information, with no trade framed and no claim made, because the break is not what this engine calibrated. Saying so is cheaper than pretending otherwise.
NON-REPAINT, AND ITS HONEST COST
Pivots confirm some bars late. The kernel extremum confirms a half-window late — a centred kernel looks into the future, and we refuse to. So a level appears some bars AFTER the swing that created it. That lag is the price of not repainting and it is paid deliberately.
Levels, tests, holds, breaks, signals and every calibration event are computed on CONFIRMED bars only. The HTF read uses lookahead_off. Nothing is drawn and then moved.
DATA AND SCOPE
Any symbol, any timeframe. ATR-normalised throughout. Volume improves the score but is NOT required — without it the volume-node voice simply abstains rather than guessing.
HOW TO USE
0. Turn the KEY on once (Dashboard & theme > Show the key). It explains the six glyphs. Turn it off
again — you only need it the first time.
1. MIN VOICES is the one input that matters. 1 gives you the forty-line wallpaper every other S/R
script gives you. 2 requires agreement. 3 shows only the prices several independent methods
arrived at on their own. Raise it until the chart shows levels you would actually trade.
2. Read the hold record. "Held 3/4" tells you more than any colour ever will.
3. READ THE CONFLUENCE VERDICT BEFORE YOU WEIGHT ANY OF IT. If the voices do not rank here, a level
is a LOCATION, not a probability — treat it as context, not as a signal.
4. Wait for the rejection: price into the level, close back out, on real volume.
5. Entry, stop and target are drawn. They are arithmetic, not advice.
ALERTS
Support held · Resistance held · Any rejection · Support broke · Resistance broke
EXPORTS (Data Window — consume from other scripts via input.source())
EXP_Sup1, EXP_Sup2, EXP_Res1, EXP_Res2, EXP_SupVoices, EXP_ResVoices, EXP_Signal, EXP_Entry, EXP_Stop, EXP_Target, EXP_ConfluenceEdge
CONCEPT CREDIT
Support/resistance and polarity are long-standing public trading concepts with no single author; the written tradition runs through Charles Dow, Richard Wyckoff and Edwards & Magee.
The TRADING-RANGE BREAK — the formal S/R rule — was first tested at scale by William Brock, Josef Lakonishok and Blake LeBaron, "Simple Technical Trading Rules and the Stochastic Properties of Stock Returns", Journal of Finance 47(5), 1992. Their findings were later shown to be vulnerable to data-snooping (Sullivan, Timmermann and White, 1999) — which is precisely why this tool MEASURES the rule on your instrument instead of asserting it.
Nonparametric kernel regression for level detection is from Andrew W. Lo, Harry Mamaysky and Jiang Wang, Journal of Finance 55(4), 2000; the Nadaraya-Watson estimator is due to Nadaraya and Watson (1964). ATR — J. Welles Wilder. Triple-barrier forward labelling — Marcos Lopez de Prado. Welch's t-test — B. L. Welch.
The confluence gate, the voice model, the episode-based hold record, the confluence-ranking test and the direction-matched control are the author's own. Clean-room implementation; no third-party Pine code is reused. Not affiliated with, nor endorsed by, any of the above.
HONESTY AND LIMITATIONS
Calibration is IN-SAMPLE, with no costs or slippage, and uses overlapping windows. A proven in-sample edge is NOT a guarantee out-of-sample. Real fills, spreads and commissions will reduce it.
The confluence gate is one rule among many — a different tolerance gives different levels.
Confluence is TESTED here, not assumed. If the panel says the extra voices do not rank, then on this instrument they do not, and no amount of agreement between methods will change that.
Both barriers on one bar: the STOP is assumed first — conservative, and the only assumption that cannot flatter the result. Unresolved trades at the horizon are marked to market, not booked as losses. Nothing is marked PROVEN below t = 1.96, and nothing is rated at all below the minimum sample.
Nothing in this script predicts price.
DISCLAIMER
Research and educational tool only. NOT financial advice, NOT a recommendation, and NO guarantee of results. Entry, stop and target output is arithmetic, not advice. Trading carries risk of loss. Test out-of-sample and make your own decisions. The author accepts no liability for any use. Indicateur

Adaptive Volume Confluence OscillatorWhat it is
One pane that fuses seven different reads of the bar into a single 0–100 confluence score, gates that score by a trend-vs-chop regime filter, confirms it against an auto-mapped higher timeframe, and — most importantly — forward-calibrates its own Buy/Sell signals against an unconditional base rate, so you can see whether the construction actually carries an edge on your instrument.
The seven votes: momentum sign · momentum vs its signal · money flow · trend structure (MA fan) · price location vs VWAP · trend slope · higher-timeframe bias.
The displayed wave is a volume-flow ribbon; the votes drive the score, the signals and the verdict. A plain-language verdict and a subtle pane tint make it readable at a glance (Simple view); a full analytic layer is available for advanced users (Pro view).
Why these are combined (mashup rationale)
A single oscillator whipsaws and a single signal over-fires. Combining helps only when the inputs key on different quantities and their agreement is checked. Each vote reads a different thing — momentum, momentum-vs-signal, volume flow, multi-MA structure, location vs a session mean, slope, and a higher-timeframe read — so the count that agrees carries more information than any one of them alone. A Kaufman Efficiency-Ratio regime gate suppresses conviction in chop, and a forward-calibration harness ties the whole construction back to realised forward outcomes.
An honest caveat, stated up front: the votes are not statistically independent. The oscillator itself embeds money flow, and vote 2 is derived from vote 1's series. Treat the score as a weight-of-evidence read, not as seven independent confirmations. The harness exists precisely so you can check whether the construction earns its keep on your instrument rather than taking the claim on faith.
How it works
Score — how many of the seven votes are bullish, scaled 0–100.
Regime — Kaufman Efficiency Ratio. Below the chop threshold, conviction dims, signals are withheld, and the verdict reads "WAIT – choppy".
HTF — the chart timeframe auto-maps to a confirming higher timeframe (~4–6×), requested with lookahead_off and offset by one bar while the live bar forms.
Signals — Buy/Sell fire only when the oscillator crosses its signal at a statistical OB/OS extreme and the score agrees and the regime isn't choppy and the visible wave isn't already at the opposite extreme.
Climax — a volume spike at an OB/OS extreme prints a Possible Bottom/Top exhaustion mark.
Divergence (Pro) — regular + hidden, from confirmed pivots on the momentum oscillator.
Calibration — each Buy/Sell is queued and resolved a fixed horizon later, then compared with the unconditional same-horizon base rate. The dashboard shows, per side: Hit %, Edge = Hit − Base, sample size, and a Wilson-gated star.
How to use it
Read the verdict and the score. Above the gate = bullish weight of evidence; below = bearish; in between, or in chop, the tool says WAIT — and it means it.
Treat Buy/Sell marks as context, not triggers. They already require the score, the regime and the wave to agree, but they remain a description of conditions — not a recommendation.
Read the Edge row before you weight any signal. If Buy/Sell Edge isn't clearly positive with an adequate sample and a star, this construction is not carrying an edge on this instrument — weight it down or ignore it. Do not tune the parameters until the Edge turns green: that is curve-fitting, and the harness is there to catch it, not to be defeated.
Combine with your own levels, structure and risk rules.
Universal across markets
Price / high / low are inputs, so the engine runs on any symbol or timeframe. The volume votes (money flow, climax, VWAP location) need real volume — prefer a futures contract or a stock. On a symbol with no volume the tool degrades gracefully: money flow is neutralised, the score falls back to the price-only votes, and the dashboard says "NO VOLUME", so you're never misled by a blank or a phantom reading.
Non-repainting
Votes read confirmed closes. The HTF series uses lookahead_off and is offset by one bar while the live bar forms. Divergences come from ta.pivot* and confirm a few bars after the pivot; once printed they don't move. The calibration harness logs and resolves only on confirmed bars, so its statistics never inflate intrabar. The live oscillator updates each bar, like any oscillator.
Concept credits
Super Smoother and Ultimate Smoother low-lag filters — John Ehlers. Chebyshev Type-I filter — classical DSP. Recursive (Kalman) smoothing — R. E. Kalman. Volume Zone Oscillator — Walid Khalil & David Steckler. Accumulation/Distribution money-flow multiplier — Marc Chaikin. Efficiency Ratio — Perry J. Kaufman. ATR — J. Welles Wilder. Wilson score interval — Edwin B. Wilson. VWAP, Hull MA and percentile rank — standard public methods.
Original implementation; not affiliated with, nor endorsed by, any third party. No third-party code is reused.
Honest limits
The score is context, not a guarantee, and the votes are correlated (see the caveat above). The Edge figures are in-sample, close-to-close, with overlapping forward windows and no costs — descriptive context, not a verified backtest. An Edge near zero, negative, or unstable across timeframes is the harness honestly telling you the signal has no reliable edge on that instrument. Nothing here predicts price.
Disclaimer
Research and educational tool only. Not financial advice and no guarantee of profitability or accuracy. Indicators describe past behaviour; they do not predict the future. Trading carries risk of loss. Test out-of-sample and make your own decisions. The author accepts no liability for any use of this script. Indicateur

Confluence Reaction Zones | ProjectSyndicateConfluence Reaction Zones reads seven classic indicators as a single contrarian composite, then commits a shaded support/resistance zone only where structure and sentiment agree at an extreme. Instead of drawing yet another line at every swing, it waits for a confirmed pivot, samples the composite at that pivot, and color-classifies the level by what the composite was doing when the level formed — deep-oversold support becomes a BUY-DIP zone, overbought resistance becomes a SELL-RIP zone, and everything in between is flagged MIXED. Every zone is ranked 0–10 with a star score, re-scored on each retest, and neutralized the moment price closes through it — and a live diagnostics panel shows the full seven-signal breakdown driving the read, so you can see exactly why a zone is the color it is on the pair and timeframe you trade.
🧠 Composite Core — the central idea. Seven engines — RSI, the EMA stack (9/21/50/100/200/250), MACD, ADX/DI, Ichimoku, Bollinger Bands, and OBV — are each graded onto a 1–5 tube level, where 5 is an oversold / exhausted extreme (a contrarian BUY read), 1 is an overbought extreme (a contrarian SELL read), and 3 is neutral. The seven levels are averaged into a single 0–100 Composite: high means the market is stretched to the downside and coiled to bounce; low means it is stretched to the upside and vulnerable to fade. This is a genuine fade-the-extreme model — it leans against the crowd at the point of exhaustion, not with it.
📈 Contrarian Zone Classification — where the composite meets structure. A zone is born on a confirmed swing pivot, and its class is set by the Composite sampled at that pivot bar. A support pivot that forms while the Composite is oversold becomes a high-conviction BUY-DIP zone; a resistance pivot that forms while the Composite is overbought becomes a high-conviction SELL-RIP zone; a pivot whose structure and Composite disagree is drawn as a dimmed MIXED zone. Because pivots are confirmed and the Composite is read at the settled pivot bar, the classification is fixed once the bar closes — the zones do not repaint.
🎯 Shaded Reaction Bands + Structural Behavior. Each zone is a multi-layer, double-shaded band sized in ATR, with a center line, an inside-edge label, and a live touch counter. Bands extend forward as price develops, tally each clean retest, and re-score on every test. The instant price closes beyond the zone by an adjustable invalidation offset, the level is neutralized — recolored to a muted tone (or dropped entirely) — so a broken level reads as spent context, never as a live signal. Opacity is graded by strength, so the strongest zones sit boldest on the chart.
⭐ 0–10 Zone-Quality Score. Every zone is scored and starred across contrarian-native factors: how far the Composite was from neutral at birth (extremity / conviction), relative volume at the pivot, rejection-wick fraction at the pivot, and buy/sell pressure alignment with the zone's direction — with additional credit accruing for each confirmed retest, capped at 10. Read the score as a confluence / cleanliness rank for thinning and prioritizing zones: it describes how textbook a reaction level is, not a guaranteed outcome.
🧭 Buy/Sell Pressure Split. A rolling intrabar volume split estimates the balance of buying versus selling over a configurable window. It feeds the zone score and prints live on the dashboard as a ▲ buy / ▼ sell percentage, so the participation behind a level is visible at a glance and factored into how the level is graded.
🎚️ Declutter & Conviction Controls. A tight set of dials governs how busy and how selective the chart is: Oversold / Overbought thresholds define what counts as an extreme; a Dedupe Separation (×ATR) filter stops new pivots from stacking bands and labels on top of existing same-side zones; Max Zones caps the live set; Keep-last-N-broken caps neutralized history so gray levels never accumulate into clutter; a Show MIXED toggle hides conflicted zones for a directional-only view; and the invalidation offset sets how decisively price must close through a level to kill it. Tighten for a clean, high-conviction chart; loosen for full structural context.
📊 Live Diagnostics Dashboard. A compact institutional panel tracks, in real time on your chart: the Composite score with a fill bar; the Verdict — BUY DIPS / SELL RIPS / NEUTRAL; the buy/sell pressure split; a full signal diagnostics table showing each of the seven engines at its current tier (L1 ⇊ OVERBOUGHT → L5 ⇈ OVERSOLD), color-keyed so you see instantly which inputs are driving the composite; the active BUY-DIP and SELL-RIP zone counts; and the nearest active zone with its class, star score, and distance in ATR. It is a live read of the engine's current state on your symbol — not a printed statistic.
🎨 Clean Themed Visuals. A dark institutional palette in three schemes — Classic (teal / red / amber), Ice (cyan / pink), and Emerald (green / red / gold) — colors the zone bands, center lines, labels, dashboard, and optional candle tint into one coherent look, so class and conviction read at a glance. Candles inside a live zone are tinted to its color, and small OS / OB dots mark the exact bars where the Composite flips into an oversold or overbought extreme — the moment a fresh contrarian setup arms.
🔔 Alerts. Fires on Composite oversold / overbought flips, on BUY-DIP and SELL-RIP zone retests, and on zone invalidations — formatted for manual or automated use — so you can be pinged when sentiment reaches an extreme or when price returns to a graded level rather than watching the chart.
🔧 Fully Customizable. Every component is exposed: the seven signal parameters (RSI length/source, EMA stack, MACD lengths and MA types, ADX/DI length and tolerance, Ichimoku periods, Bollinger length/MA/source, and the full OBV rise/fall/spike model); the oversold/overbought composite thresholds and pressure lookback; pivot strength, ATR length, zone height, dedupe separation, max zones, invalidation offset, MIXED visibility, broken-zone tone and history cap; gradient fill, candle tint, extreme dots; dashboard position and size; and all three themes.
🎯 Why this is different. Most support/resistance tools draw lines at pivots and leave interpretation to you — every level looks the same whether the market was exhausted or trending into it. This engine reads seven indicators as one contrarian composite, only commits a zone where a confirmed pivot lines up with a sentiment extreme, color-codes the level by that agreement, ranks it 0–10, re-scores it on every retest, and neutralizes it the instant it fails — then surfaces the entire seven-signal rationale on a live panel. You are looking at classified, ranked, self-invalidating levels with the reasoning attached, not an undifferentiated ladder of lines.
🚀 Where to use it. Symbol- and timeframe-agnostic — it runs on forex, indices, metals, crypto, and equities across intraday and higher timeframes. Because the score and pressure split use volume (OBV, relative volume, buy/sell balance), it is sharpest on instruments where volume is meaningful and degrades gracefully where it is only tick volume. Larger Pivot Strength yields fewer, more significant zones on higher timeframes; smaller values give a more reactive intraday map.
🎯 How to trade it
Apply it to a liquid instrument and let the zones and dashboard populate. Read the Composite and Verdict for the prevailing contrarian bias, and use the signal-diagnostics table to see which of the seven engines are actually stretched.
Favor BUY-DIP zones for longs and SELL-RIP zones for shorts, prioritizing higher star scores and, ideally, a Composite already leaning the same way — a fresh OS / OB dot near a matching graded zone is the intended confluence.
Treat each zone as a decision level: plan entries on a controlled retest into the band, define invalidation by a decisive close through it (the same event that neutralizes the zone on the chart), and manage targets against the next opposing zone or your own R model.
Use Dedupe Separation, Max Zones, Show MIXED, and Keep-last-N-broken to set chart density — stricter for a clean, high-conviction map; looser for full structure — and use the star score to focus on the cleanest reaction levels.
⚠️ Important — this is a decision-support tool, not a standalone buy/sell system, and it makes no performance guarantees. The 0–10 score is a confluence / cleanliness rank that describes how textbook a reaction level is; it is not a probability or a promise of outcome, and the dashboard is a live read of the engine's current state, not a backtest or forecast. Zones and their classification confirm on the closed pivot bar, so pivots print with the built-in confirmation lag and you should always wait for a settled level. Contrarian logic fades extremes and will be wrong in strong trends — always pair it with higher-timeframe context, your own analysis, and disciplined risk management, and test it on your market and timeframe before trading it live. Indicateur

Helix Lucky MTF Bias and Breakout DashboardHelix Lucky MTF Trend and Breakout Dashboard
📊 Overview
Helix Lucky MTF Trend and Breakout Dashboard is an overlay indicator designed to organize trend, momentum, breakout context, key levels, and multi-timeframe alignment into one chart-based dashboard.
The purpose of the script is not to combine unrelated indicators into a single display. The script separates market analysis into distinct layers so each component has a specific role:
1. Trend structure
2. Momentum confirmation
3. Breakout context
4. Multi-timeframe alignment
5. Key level awareness
6. Setup scoring
7. Optional visual confirmation tools
The result is a confluence-based workflow that helps traders review whether multiple independent conditions are aligned before making a trading decision.
🧩 How the Main Components Work Together
The script uses moving averages, VWAP, MACD, ZLSMA, UT Bot logic, Supertrend, ADX, RSI, and Opening Range Breakout logic as separate inputs within the same framework.
The moving average group provides basic trend structure by comparing shorter-term and longer-term averages. The default structure uses a fast EMA, medium EMA, and long SMA, but users can configure the moving average types and lengths.
VWAP provides session or higher-period price-location context. It can be anchored to the session, day, week, month, quarter, or year and may be displayed with standard deviation or percentage-based bands.
MACD is used as a momentum confirmation layer. The script includes a minimum separation filter so very small MACD differences can be filtered out instead of being treated the same as stronger momentum shifts.
ZLSMA is optional and can be used as an additional trend-direction filter.
The UT Bot component is used as the primary chart label engine. It uses an ATR-based adaptive trailing stop. The script adjusts the trailing distance using volatility, momentum, and volume conditions, then produces Buy or Sell labels when price crosses the trailing stop and the configured filters allow the signal.
Supertrend provides a separate trend-regime layer. This gives the user a second way to compare the UT Bot label against a broader trend condition.
ADX is used to evaluate whether trend strength is above the user-selected threshold. RSI can be used either in a classic 30/70 bias mode or with custom pullback zones.
The Opening Range Breakout component tracks whether price is above, below, or inside the selected opening range window. This helps separate trend-following conditions from range-bound conditions.
🧠 Why This Is More Than a Simple Mashup
Each component is assigned a different purpose. The script is designed so the same tools are not all treated as equal standalone signals.
Trend tools identify direction.
Momentum tools evaluate confirmation.
Volume and relative volume help evaluate participation.
Opening Range Breakout logic identifies range expansion.
The Bias Table compares selected conditions across multiple timeframes.
The Price Point Dashboard displays important reference levels and live context.
The scoring layer organizes these conditions into a rule-based summary.
This structure allows the script to reduce chart clutter while still showing how the underlying conditions agree or disagree.
🕒 Multi-Timeframe Bias Table
The Multi-Timeframe Bias Table displays up to eight selectable timeframes, including 1 minute, 5 minutes, 15 minutes, 30 minutes, 1 hour, 2 hours, 4 hours, and Daily.
Each row evaluates one condition, such as moving average structure, price relative to VWAP, MACD alignment, Supertrend direction, ZLSMA slope, RSI condition, ADX threshold, Opening Range Breakout status, and longer-period bias.
The table also includes an average agreement reading. This reading is not a prediction and does not represent a win rate. It simply shows how many selected conditions are aligned across the active timeframes.
By default, the script can hide timeframes below the current chart timeframe. This is intended to reduce lower-timeframe noise when viewing higher-timeframe charts.
📍 Price Point Dashboard
The Price Point Dashboard displays reference levels and market context in one location. These can include prior day high, prior day low, prior day close, pivot levels, moving averages, 52-week high, Fibonacci reference levels, VWAP information, Opening Range Breakout status, ATR, gap percentage, relative volume, and other selected dashboard fields.
The dashboard is intended to help users see where price is trading relative to important reference levels without manually adding each level to the chart.
📈 Trend Strength Score
The Trend Strength Score is a rule-based 0 to 100 score that measures how strongly the current bar aligns with selected bullish trend conditions.
The score uses five weighted components:
- EMA alignment
- VWAP location
- MACD alignment
- Supertrend direction
- ADX strength
The score is a summary of internal conditions only. It does not predict future price movement.
🎯 Trade Probability Score
The Trade Probability Score is a rule-based 0 to 100 setup-quality score. It is calculated from twelve weighted factors:
- Multi-timeframe alignment
- EMA stack
- VWAP location
- Price relative to the 200-period moving average
- MACD alignment
- Supertrend direction
- ADX strength
- Relative volume
- Opening Range Breakout status
- Relative strength versus a selected benchmark
- Volatility state
- Position relative to key levels
The score is intended to summarize confluence. A higher score means more of the script’s internal conditions are aligned. It does not mean that a trade will be profitable, and it should not be interpreted as a guaranteed probability of success.
💧 Liquidity Sweep Detection
The script can detect liquidity sweep conditions by checking whether price moves beyond a recent swing high or swing low and then closes back inside that level.
A Sweep High label indicates that price moved above a recent high and then closed back below that level.
A Sweep Low label indicates that price moved below a recent low and then closed back above that level.
These labels are intended to identify possible rejection behavior around recent swing points. They should be used as context, not as standalone trade signals.
⚖️ Relative Strength
The script includes relative strength comparison against configurable benchmark symbols. The default benchmarks are QQQ and SPY.
Relative strength is calculated by comparing the current symbol’s intraday return against the benchmark’s intraday return. A positive value means the current symbol is outperforming the benchmark over that comparison period. A negative value means it is underperforming.
🌡️ Volatility State
The Volatility State feature classifies the current volatility environment as Squeeze, Normal, or Expansion.
This is based on Bollinger Band width compared with Keltner Channel width and recent volatility behavior.
Squeeze indicates compressed volatility.
Normal indicates a standard volatility environment.
Expansion indicates that volatility has increased relative to recent conditions.
This feature is included to help users understand whether price is consolidating, behaving normally, or expanding in volatility.
🕯️ Candlestick Pattern Labels
The script includes optional candlestick pattern labels. These patterns are detected on the same timeframe as the chart. They are not calculated from a separate hidden timeframe.
Optional labels include:
- Bullish Engulfing
- Bearish Engulfing
- Hammer
- Shooting Star
- Morning Star
- Evening Star
- Inside Bar
- Tweezer Top
- Tweezer Bottom
- Doji
- Dragonfly Doji
- Gravestone Doji
- Sweep High
- Sweep Low
These labels are intended as additional context. They should not be treated as standalone entries without reviewing trend, momentum, volatility, and key-level context.
🛑 Suggested Stop Loss and Take Profit Reference Lines
The script can plot suggested stop loss and take profit reference lines after a UT Bot label appears.
The stop line is calculated from internal structure such as the UT Bot stop, Supertrend, VWAP, moving average, Donchian floor, and a minimum ATR-based risk floor depending on settings and context.
Take profit reference lines are based on R-multiple distances from the suggested stop. These are visual planning tools only. They do not place trades, manage positions, or execute orders.
🧭 How to Use the Script
A typical workflow is:
1. Select the chart timeframe and market being reviewed.
2. Review the Multi-Timeframe Bias Table to understand directional alignment.
3. Check whether the chart is trending, ranging, breaking out, or consolidating.
4. Review the Price Point Dashboard for key levels and market context.
5. Watch for a UT Bot Buy or Sell label if labels are enabled.
6. Compare the label direction with Supertrend, MACD, VWAP, ADX, and the Bias Table.
7. Review the Trend Strength Score and Trade Probability Score as confluence summaries.
8. Use the suggested stop and take profit reference lines only as visual planning tools.
9. Apply independent risk management and confirm the setup with your own analysis.
🌍 Timeframes and Markets
The script can be applied to different chart timeframes and TradingView-supported markets. Lower timeframes may produce more signals and more noise. Higher timeframes may produce fewer signals but can provide broader context.
The Multi-Timeframe Bias Table is intended to help users avoid looking at a single timeframe in isolation.
⚠️ Important Limitations
This script is an indicator, not a strategy. It does not place trades, backtest trades, manage orders, or connect to a brokerage account.
The scoring systems are rule-based summaries of current chart conditions. They are not win-rate models, machine-learning predictions, or guarantees of future results.
Signals, labels, and dashboard values can vary by symbol, timeframe, liquidity, volatility, and user settings.
The Bias Table is a live context dashboard and may update while the current bar is forming. This is expected behavior because some values are based on developing bar data.
The “Draw visuals only on bar close” setting gates the UT Bot entry visuals and suggested stop/take-profit drawings to confirmed bars. It does not freeze every live dashboard value while a bar is developing.
Liquidity Sweep labels can be gated to bar close using the Bar Close Only setting.
The script is designed for standard chart analysis. Signals on non-standard chart types may behave differently because those chart types can use synthetic price construction.
No signal, score, table reading, or label should be used as a guarantee of future price movement. Users should apply their own analysis and risk management.
🧾 Credits and Inspiration
This script was inspired by the concept of combining a multi-timeframe bias table, trend labels, and a price-level dashboard into one overlay.
The current script is a ground-up Pine Script v6 implementation with additional architecture, including the rule-based Trade Probability Score, Trend Strength Score, liquidity sweep detection, relative strength comparison, volatility state classification, configurable dashboards, candlestick pattern labels, and suggested risk-reference lines.
The script also uses common technical analysis concepts such as moving averages, VWAP, MACD, RSI, ADX, ATR, Supertrend-style trend logic, and Opening Range Breakout logic. These common concepts are organized into a single decision-support framework rather than presented as separate standalone indicators. Indicateur

ApexSignalPro SMC [ForexCracked]🔵 OVERVIEW
ApexSignalPro SMC is a confluence-scored Smart Money Concepts indicator that fires a signal only when multiple institutional footprints align on the same bar. Every signal carries a live score from 0 to 5 showing how many structural conditions agree — market structure, order blocks, fair value gaps, premium/discount location, and higher-timeframe bias.
Instead of the "every crossover is a signal" approach, it uses a strict confluence gate, a range-regime filter, and forced signal alternation — far fewer signals, much higher conviction. A live dashboard shows the score, active zones, and the last trade plan at a glance.
🔵 WHY THESE COMPONENTS ARE COMBINED
A break of structure alone, an order-block touch alone, or a single fair value gap all fire often and fail often. They become far more reliable when they occur together and agree with the higher-timeframe trend. Rather than overlaying five separate tools and leaving you to judge them, this script quantifies their agreement into one 0–5 score and only trades when enough align. Three principles guide it:
• Direction comes from market structure (BOS / CHoCH), not from price crossing smoothed averages
• Entries require confluence, never a single condition
• Signals alternate (BUY → SELL → BUY), never stacking the same direction in one leg
🔵 THE FIVE SCORED FACTORS (1 point each)
1️⃣ Market structure (BOS / CHoCH) points in the signal direction
2️⃣ Price is inside an unmitigated order block
3️⃣ Price is inside an unmitigated fair value gap
4️⃣ Correct half of the range — discount for longs, premium for shorts
5️⃣ Higher-timeframe EMA bias agrees
🔵 HOW A SIGNAL FIRES A BUY or SELL prints only when ALL of these are true:
• The confluence score meets your minimum (default 3 of 5)
• A strong-bodied candle closes in that direction
• The ADX regime filter confirms trending, not ranging
• The signal is opposite the previous one (forced alternation) Each signal draws Entry, Stop (beyond the nearest order block + ATR buffer), and Take Profit (configurable R:R), with pip labels.
🔵 HOW IT READS THE MARKET
• Market structure — confirmed swing pivots; a close beyond the last pivot is a BOS, the first break against structure is a CHoCH that flips the state
• Order blocks — the last opposing candle before an impulsive displacement (body > 1.2× ATR); tracked until mitigated or aged out
• Fair value gaps — three-candle imbalances filtered by a minimum ATR size; removed when filled
• Premium / discount — the swing-range midpoint splits discount (below) from premium (above) • Regime — ADX must exceed your minimum, suppressing signals in flat ranges
🔵 HOW TO USE
• Favour score 4–5 signals; treat score 3 with extra confirmation
• Require the dashboard HTF bias to match the signal for trend-aligned entries
• Use retests of unmitigated OBs or FVGs in the trend direction as continuation entries
• Size each trade off the drawn stop distance at a fixed account risk
• Raise Min Confluences to 4 for fewer, stronger signals
🔵 RECOMMENDED SETTINGS
• Swing Length: 5
• Higher Timeframe: 240 (H4) on H1 charts, D on H4 charts
• HTF EMA: 50 · OB Max Age: 20 · FVG Min Size: 0.3× ATR
• ADX Min: 22 · Min Confluences: 3 · SL Buffer: 0.5× ATR · R:R: 2.0
🔵 BEST / WEAKEST CONDITIONS ✅ Trending majors, gold, and indices on H1–H4; London / New York overlap ⚠️ Low-volatility ranges, gapped markets, and sub-5-minute noise
⚠️ DISCLAIMER ApexSignalPro SMC structures signals from Smart Money Concepts. It does not predict future price movement. Results depend on market conditions, settings, and your own execution and risk management. Shared for educational and research purposes; not financial advice. Indicateur

VWAP Confluence Engine | AnonycryptousVWAP Confluence Engine | Anonycryptous
Description & user manual
Why this indicator is different
Most traders run VWAP and RSI as two separate tools. VWAP tells you where price is relative to the volume-weighted average. RSI tells you about momentum. The problem is that these two readings constantly disagree, and when they do, the trader is left guessing which one to trust. Price sits above VWAP while RSI turns down. RSI pushes above its midline while price is still below VWAP. Every one of those moments is a decision made under conflicting information, and that is exactly where most intraday accounts bleed.
The VWAP Confluence Engine removes the guessing. Instead of showing you two panels that argue with each other, it forces agreement before it shows a directional state. Three independent measurements have to point the same way: price relative to VWAP, a volume-weighted RSI, and the Money Flow Index. When all three align bullish, the candle is painted in the bull color. When all three align bearish, it is painted in the bear color. When they disagree, the candle is neutral, and that neutral state is the most important output in the whole system. It is the market telling you it has not decided, and that you should not decide either.
This turns a chart full of conflicting signals into a single color-coded read. One glance tells you direction, momentum, and participation at the same time.
But direction alone is only half of a trade. A signal in the wrong location is a trap, no matter how clean the momentum looks. So the engine also maps support and resistance zones from swing pivots, flips those zones as price reclaims or loses them, and tells you in a dashboard where the nearest level sits above and below. A bull agreement firing directly into a heavy resistance zone is a very different proposition from the same agreement firing off a reclaimed support. The indicator gives you both pieces in one view.
And because a single timeframe is never the whole story, a compact multi-timeframe bar shows the same agreement logic across six timeframes at once. When every timeframe is the same color, the decision is easy. When they are mixed, that is information too.
Important notice
The VWAP Confluence Engine generates visual states based on VWAP position, volume-weighted momentum, money flow, and price structure. These states are not financial advice. They do not predict future price movement. They do not guarantee profitability. All trading decisions are made entirely by the user. Always manage your own risk. Always apply your own judgment.
1. Overview
The VWAP Confluence Engine is an overlay indicator that combines VWAP, a volume-weighted RSI, and the Money Flow Index into a single three-way agreement system, then places that agreement in the context of support and resistance structure and higher timeframe trend.
What it includes:
- Anchored VWAP with selectable reset period (hour, 4 hours, day, week, month)
- Volume-weighted RSI that scales price change by relative volume
- Money Flow Index as an independent confirmation layer
- Three-way agreement candle coloring: bull, bear, and neutral
- Gradient fill between VWAP and price that intensifies with distance
- Support and resistance zones from four independent pivot lengths, with zone flip logic
- Divergence detection with a box drawn on the price chart
- Higher timeframe filter that can gate signals to trade only with the larger trend
- Sentiment transition markers on the exact bar agreement changes
- Two configurable EMAs for optional extra confirmation, independent of the signal engine
- Main dashboard with agreement state, VWAP position, VW RSI, MFI, divergence, nearest levels, and a dedicated higher timeframe section
- Compact multi-timeframe bar across six configurable timeframes
- Optional background coloring
- Alerts for agreement changes and divergence
2. Core logic
2.1 The three-way agreement
Everything in this indicator is built around one question: do all three measurements agree?
The three measurements are:
- VWAP position. Is price above or below the anchored VWAP.
- Volume-weighted RSI. Is momentum above or below its midline.
- Money Flow Index. Is money flow above or below its midline.
A bull state requires price above VWAP, VW RSI above the midline, and MFI above the midline at the same time. A bear state requires all three below. Anything else is neutral.
This is deliberately strict. The indicator does not paint a color unless all three independent readings confirm each other. That is why the neutral state matters so much. It is not a weakness in the signal, it is the signal. It marks the stretches where price is chopping, where momentum and money flow disagree, and where forcing a trade usually ends badly.
2.2 Volume-weighted RSI
Standard RSI treats every bar equally. A move on thin volume and a move on heavy volume produce the same RSI value if the price change is the same. The volume-weighted RSI multiplies each bar's price change by its relative volume, the ratio of that bar's volume to a smoothed average, before the smoothing step. Moves on strong participation push the oscillator harder. Moves on weak participation barely register. The result reflects who was behind the move, not just that a move occurred.
2.3 Money Flow Index
The MFI is calculated from typical price multiplied by volume, producing positive and negative money flow that is converted to a 0 to 100 index. It responds differently from the VW RSI because it weights price level rather than price change. Requiring both to agree means two independent volume-based calculations have to arrive at the same conclusion, which is a stronger condition than either one alone.
3. VWAP and the fill
The VWAP is anchored to a selectable period. Day is the default and the most useful for intraday scalping, resetting at each session open. Week and month give longer-term institutional reference levels. Hour and 4 hours give shorter references for very fast trading.
The fill between VWAP and price is drawn with a gradient. Near VWAP it is almost invisible. The further price travels from VWAP, the more the fill intensifies, up to a configurable maximum. This gives an immediate visual sense of how stretched price is from its volume-weighted average without adding any clutter when price is hugging the line. The fill color follows the agreement state.
4. Support and resistance zones
The engine detects swing highs and lows using four independent pivot lengths, each of which can be toggled and adjusted. Instead of drawing thin lines, it draws zones with a thickness based on the average true range, so each level is a band rather than a single price.
The zones flip color based on where price is relative to them:
- When price is above a zone, it is drawn in the bull color, acting as support.
- When price is below a zone, it is drawn in the bear color, acting as resistance.
- When price is inside a zone, it is drawn in the neutral color, marking active interaction.
This flip logic reflects a basic principle of price structure: old resistance becomes new support once it is reclaimed, and old support becomes new resistance once it is lost. The zone color always tells you which role the level is currently playing.
The maximum number of zones shown per pivot length is configurable, so the chart stays as clean or as detailed as you want.
5. Divergence
Divergence is detected by comparing pivots in the VW RSI against pivots in price.
Bearish divergence: price makes a higher high while VW RSI makes a lower high. Momentum is weakening as price extends.
Bullish divergence: price makes a lower low while VW RSI makes a higher low. Selling pressure is fading even as price continues down.
Sensitivity controls the pivot lookback window. High uses a 3-bar window for more signals and more noise. Medium uses 5 bars. Low uses a 10-bar window for fewer, higher quality signals.
When a divergence confirms, a box is drawn on the price chart spanning the full high-to-low range of the swing involved, with a small label naming the divergence type. This shows not just that a divergence happened, but exactly where on the chart it occurred. The dashboard also reports the current divergence state.
6. Higher timeframe filter
The higher timeframe filter, when enabled, requires the higher timeframe to agree with the current direction before a candle can be painted bull or bear. On a lower timeframe this prevents counter-trend coloring during a pullback inside a larger trend.
The filter can be turned off entirely. With it off, candle coloring is based only on the current timeframe's three-way agreement. This is a deliberate choice left to the trader: strict alignment with the higher timeframe, or faster response on the current one. The dashboard always shows the higher timeframe bias regardless of whether the filter is gating signals, so the context is available either way.
7. Multi-timeframe bar
The multi-timeframe bar is a compact panel showing the agreement direction across six timeframes at once. Each slot is fully configurable, defaulting to 5m, 15m, 1h, 4h, D, and W. Each shows a colored triangle, up for bull, down for bear, a dot for neutral, with the timeframe label colored to match.
This is the fastest read in the indicator. When every timeframe is the same color, alignment is strong and the decision is simple. When the shorter timeframes are one color and the higher ones another, price is at a transition or in conflict, and the bar shows that at a glance.
8. Sentiment transitions
When the agreement state changes, a small marker is plotted on the exact bar where it happened. A triangle up when the state flips to bull, a triangle down when it flips to bear, a dot when it drops into neutral. These mark the moments the read changed, which is often more actionable than the state simply being green or red for many bars in a row.
9. Dashboard reference
The main dashboard updates on every bar and shows:
Agreement - the current three-way state: bull, bear, or hold.
VWAP - whether price is above or below the anchored VWAP.
VW RSI - current volume-weighted RSI value, colored by position.
MFI - current Money Flow Index value.
Divergence - active divergence state, if any.
Near Support - nearest zone level below current price.
Near Resist - nearest zone level above current price.
VWAP Anchor - the current VWAP reset period.
The higher timeframe section, which can be toggled, adds for the selected higher timeframe: its agreement state, VWAP position, VW RSI, MFI, whether the higher timeframe filter is active, and a warning if the current chart timeframe is below the recommended minimum for the system.
10. How to use
10.1 The core read
Wait for agreement. A bull or bear colored candle means all three measurements confirm each other. A neutral candle means they do not. The single most valuable habit this indicator encourages is to simply stand aside when candles are neutral. Those stretches are where the market has not chosen a direction, and where forcing a trade tends to produce the worst outcomes.
10.2 Location matters as much as direction
A colored candle tells you the direction is confirmed. The support and resistance zones tell you whether the location is any good. A bull agreement firing straight into a heavy resistance zone above is a low quality entry, even though the momentum looks clean. The same bull agreement firing off a zone that has just flipped from resistance to support is a far better proposition. Read the two together, never direction alone.
10.3 Using the higher timeframe
If you want to trade only in the direction of the larger trend, enable the higher timeframe filter. Colored candles will then only appear when the current and higher timeframe agree. If you prefer to react faster and judge context yourself, leave it off and use the higher timeframe section of the dashboard and the multi-timeframe bar as reference rather than as a hard gate.
10.4 Divergence as context
A divergence box is a warning that momentum and price have started to disagree, not an instruction to enter. The most reliable approach is to wait for a divergence box near a support or resistance zone and then look for the agreement state to actually flip before acting. Divergence can persist for many bars before price responds.
10.5 Illustrative bull scenario
Educational example only. Not a trading recommendation.
Price pulls back to a support zone that flipped from resistance a few sessions earlier. The multi-timeframe bar shows the higher timeframes already bullish. A bullish divergence box appears at the zone. On the next bar the agreement state flips to bull, painting the candle and plotting a transition triangle. Direction, location, momentum, and higher timeframe are all pointing the same way at the same place.
10.6 Illustrative bear scenario
Educational example only. Not a trading recommendation.
Price rallies into a resistance zone overhead. VW RSI and MFI are both rolling over. A bearish divergence box is drawn across the swing. The agreement state flips to bear and a transition triangle down prints. The higher timeframe section confirms a bearish bias. The setup has direction, structure, and higher timeframe agreement in one location.
11. Recommended use
This system is built for intraday trading and works best on the higher intraday timeframes rather than the very fastest ones, where noise overwhelms the agreement logic. The dashboard includes a timeframe check that flags when you are below the recommended minimum. Pivot settings for the support and resistance zones can be tuned per instrument and timeframe; smaller pivot lengths surface shorter-term levels, larger ones surface major structure.
12. Settings reference
VWAP: anchor period, line color, line width.
VW RSI: length, volume smoothing, midline, overbought and oversold levels, divergence sensitivity, divergence toggle and hold, divergence box toggle and transparency.
MFI: enable, length, midline.
HTF filter: enable, timeframe, RSI midline.
S/R zones: show toggle, four pivot lengths with individual show toggles, max zones per pivot, zone thickness by ATR, zone transparency.
Visuals: bull, bear, and neutral colors, candle coloring toggle, VWAP fill toggle and transparency, background color toggle and transparency, sentiment transition toggle.
Moving averages: two EMAs, each with show toggle, length, color, transparency, and width. The EMAs are an optional visual aid for extra confirmation only. They are not part of the agreement engine and do not influence candle coloring, signals, or any other calculation.
Dashboards: main dashboard show, position, size, HTF section toggle, HTF section timeframe. Multi-timeframe bar show, position, size, and six configurable timeframe slots.
13. Disclaimer
This indicator is provided for educational and informational purposes only. Nothing in this document or in the indicator output constitutes financial advice or any form of recommendation. Trading financial instruments involves substantial risk of loss. Past performance is not indicative of future results. You may lose all of your invested capital. Anonycryptous accepts no responsibility or liability for any losses incurred as a result of using this indicator. Indicateur

Viprasol Liquidity Trail Matrix with Signal TargetOverview
The Viprasol Liquidity Trail Matrix with Signal Target is a trend-following signal engine that combines a volatility-adaptive trailing "liquidity" band structure with a Cardwell-style RSI regime filter, then turns confirmed pullback-and-continuation events into fully managed trade plans — entry, stop, three scaled targets, break-even logic, and an honest performance read-out. It is built for discretionary traders who want a single tool that answers three questions at once: what is the trend, is momentum backing it, and if a signal fires, exactly where are my entry, stop and targets.
This is an open-source, credited derivative. See the Credits & Originality section at the end — the trailing-matrix and Cardwell-RSI concepts are adapted from prior open-source work under CC BY-NC, with substantial original additions layered on top.
How It Works
Step 1 — Liquidity Trail Matrix (adapted)
A volatility trailing stop (ATR-scaled) defines the active trend and flips only when price closes decisively through it. Around that trailing line the script projects a ladder of "liquidity bands" spaced in ATR units, forming the retest zone price tends to revisit before continuation. In an uptrend the bands sit below price as stacked support; in a downtrend, above price as resistance. Because the spacing is ATR-based, the whole structure widens in volatile conditions and tightens in quiet ones.
Step 2 — Cardwell RSI Regime (adapted)
RSI is classified into a directional regime using Andrew Cardwell's range-rules principle: in a healthy uptrend RSI holds its 40-80 band, in a downtrend it works the 20-60 band. The regime flips bull when RSI thrusts through the upper trigger and bear when it breaks the lower trigger, holding state in between. Signals are only allowed in agreement with the regime, so the momentum context must confirm the trend before anything fires.
Step 3 — Confluence gating (adapted + new)
Before a signal is eligible it must pass a confluence gate: trend agreement, RSI regime agreement, an ADX minimum (chop filter), and an optional higher-timeframe bias pulled non-repainting (previous HTF bar, lookahead off). A minimum confluence score suppresses low-quality setups.
Step 4 — Retest entry + Signal Target (adapted)
When the confluence conditions hold and price pulls back into the band zone then closes back in the trend direction, a signal fires on the confirmed bar. The engine sets a structural stop, then projects TP1/TP2/TP3 as R-multiples of that risk and draws them on the chart with price and percent labels. Break-even logic moves the stop to entry after TP1.
Step 5 — Honest trade management + statistics (new)
Original additions in this release:
- One-trade-at-a-time engine: a trend flip no longer force-closes a trade. A position runs to its stop or final target, and a new entry only opens once the previous one is fully resolved. A reversal toggle restores the old flip-reversal behaviour if preferred.
- Max-bars-in-trade timeout so a lingering position cannot block the engine indefinitely.
- Hide-on-hit targets: each target line and label is removed the instant it is touched, keeping the chart clean.
- Staggered target labels so ENTRY/SL/TP1/TP2/TP3 never overlap.
- Session filter and post-stop cooldown (both optional, off by default).
- Honest performance panel: Avg R and Profit Factor computed on a transparent one-third-scale-out model, plus Max Drawdown in R and best/worst streak — so the win-rate (which counts a trade a win once TP1 is touched) is read alongside true expectancy.
- Suggested position size from an account-size and risk-percent input.
Non-repainting: trend, structure, signals and targets confirm at bar close; higher-timeframe data uses lookahead off on the previous bar.
Key Features
- Volatility-adaptive trailing liquidity-band matrix
- Cardwell RSI regime filter
- ADX chop filter + optional non-repainting HTF bias
- Range-distributed volume profile (POC / Value Area / low-volume nodes)
- Retest-continuation signals with confluence scoring
- Entry / SL / TP1-TP2-TP3 with R-multiple targets, break-even and hide-on-hit visuals
- One-trade-at-a-time management with optional reversal, timeout, session filter and post-stop cooldown
- Honest stats: win rate, Avg R, Profit Factor, Max Drawdown (R), streak, suggested size
- Multi-section dashboard, trend-tint candles, and a full alert suite with optional webhook JSON
How to Use
1. Add to any liquid symbol and timeframe. Confirm the dashboard reads a clear trend and RSI regime.
2. Wait for a LONG/SHORT marker — it only fires on a confirmed retest that passed the confluence gate. The number on the marker is the confluence score.
3. Trade the drawn plan: entry, stop, and TP1/TP2/TP3. The dashboard mirrors the live levels and, once trades close, shows Avg R / Profit Factor / Max DD so you can judge the edge honestly.
4. Tune selectivity with ADX Minimum and Min Score; tune trade behaviour with the reversal, timeout, session and cooldown settings.
Settings
- Trend Engine: ATR length, trail factor, band count and spacing
- Signals: min score, retest window, cooldown, integration mode, reversal toggle, session filter, post-SL cooldown
- RSI Regime: length, bull/bear triggers, confirm bars, integration mode
- Risk Management: SL mode, break-even, max bars in trade, account size, risk %
- Signal Targets: R-multiples for TP1/TP2/TP3
- Volume Profile / HTF / Dashboard / Colors: display and behaviour toggles, all with tooltips
Alerts
Dynamic alerts (ticker, timeframe, price, score, levels, RSI, regime) for: Long entry, Short entry, TP1/TP2/TP3 hit, break-even, stop-out, reversal, trend flips, and regime shift. Entry alerts can emit webhook-ready JSON.
Limitations & Disclaimer
This is an analysis and trade-planning tool, not a promise of profit. The built-in statistics are a session-level model (they reset on chart reload), assume idealised fills with no slippage or commission, and use a one-third-scale-out assumption for Avg R — real results differ. Signals confirm at bar close and do not repaint historically, but the still-forming bar is provisional until it closes. No indicator predicts the future; always combine with your own risk management. Nothing here is financial advice.
Credits & Originality (CC BY-NC 4.0)
This script adapts and builds upon prior open-source work and is published open-source, free, for non-commercial use, with attribution as required by the licence:
- "Liquidity Trail Matrix" by WillyAlgoTrader — the trailing liquidity-band structure concept.
- "Cardwell Range Analyze" by MarkitTick — the Cardwell RSI range-regime concept.
Changes made by Viprasol (this version): combined the two engines into one workflow and added the confluence gate, non-repainting HTF bias, range-distributed volume profile, R-multiple Signal Targets with break-even and hide-on-hit visuals, one-trade-at-a-time management with reversal toggle / max-bars timeout / session filter / post-stop cooldown, the honest statistics panel (Avg R, Profit Factor, Max Drawdown R, streak) and suggested position size, plus the multi-section dashboard and dynamic/webhook alerts.
Licence: Creative Commons Attribution-NonCommercial 4.0 (creativecommons.org). Educational, non-commercial use only. Not financial advice.
Indicateur

Gaussian RSI | NAL1. Overview
Gaussian RSI | NAL is a smoothed momentum-regime indicator built around an RSI engine filtered through a Gaussian weighting model. Instead of plotting raw RSI, the indicator applies Gaussian smoothing to reduce noise and create a cleaner momentum line.
The signal is then refined with an optional Gaussian confluence filter. This adds a second smoothing layer that acts as a directional confirmation structure, helping separate stronger momentum regimes from weaker internal fluctuations.
2. Calculation
The indicator starts by calculating RSI from the selected source. This creates the base momentum reading used by the rest of the model.
The RSI is then passed through a Gaussian filter. The Gaussian filter weights the lookback window using a bell-curve style distribution, creating a smoother momentum line while still preserving directional movement.
A second Gaussian filter can also be applied as a confluence line. This creates a slower reference layer for the Gaussian RSI, allowing the indicator to judge whether the current RSI structure is aligned with its own smoothed trend.
The bullish condition requires the Gaussian RSI to move above the upper threshold. When confluence is enabled, the Gaussian RSI must also be above the Gaussian confluence line.
The bearish condition requires the Gaussian RSI to move below the lower threshold. When confluence is enabled, the Gaussian RSI must also be below the Gaussian confluence line.
The final state holds its previous direction when neither condition is active. This creates a cleaner regime output instead of constantly flipping to neutral between threshold zones.
3. Key Features
Gaussian-smoothed RSI momentum engine.
Optional Gaussian confluence filter.
Upper and lower threshold-based regime detection.
State-based candle coloring and RSI coloring.
Glow-style RSI plot, regime fills, confluence line, and transition labels.
Designed to reduce raw RSI noise while preserving momentum structure.
4. Use
Gaussian RSI is designed to identify when momentum begins shifting into a stronger bullish or bearish regime. A move above the upper threshold reflects bullish momentum pressure, while a move below the lower threshold reflects bearish momentum pressure.
The confluence filter adds an additional layer of structure by requiring the Gaussian RSI to align with its own smoother reference line. This can help separate cleaner momentum expansions from weaker internal movement.
This indicator is best used as a specialized momentum module within a complete strategy framework. Its role is to isolate a refined RSI-based momentum layer, where the full value comes from how the signal is integrated into a broader process for regime, timing, and execution.
Indicateur

NSE/BSE Key Support & Resistance | MTF Pro-3.1Advanced pivot-based Support & Resistance with multi-timeframe confluence, strength scoring, volume-confirmed breaks, and adaptive zone visuals — built specifically for Indian stock market (NSE/BSE).
Overview
Most S&R indicators draw every pivot as an equal horizontal line and extend it infinitely to the right — creating cluttered, unreadable charts. This indicator solves that by scoring every level based on how strongly price rejected it , merging overlapping levels from different timeframes into a single confluence zone, and only showing the levels that actually matter.
Built and tuned specifically for NSE and BSE stocks, indices (Nifty 50, Bank Nifty, Sensex), and F&O instruments.
Key Features
🔷 Multi-Timeframe Support (4 TFs)
Enable up to 4 independent timeframes simultaneously. Each timeframe's pivots are detected separately and tagged in the label — , , , . You choose which timeframes to activate.
🔷 Cross-TF Confluence Merge
When two different timeframes produce a pivot at nearly the same price (within ATR proximity), they automatically merge into a single stronger zone instead of drawing two overlapping boxes. The label shows both sources — — and the level receives a confluence strength bonus. These merged zones are your highest-priority trade levels.
🔷 Advanced Strength Scoring
Every level carries a live strength score (★) that accumulates over time. Each touch is scored individually based on:
Wick size relative to candle range (how strongly price rejected)
Distance of close from the level (how convincingly price pulled back)
Whether volume was above average on that candle
Whether a strong body / engulfing candle formed
A barely touching wick scores ~0.5. A high-volume hammer rejection scores ~5–6. The score drives both zone opacity and zone width — strong levels appear bold and wide, weak levels fade visually.
🔷 Volume-Based Break Filter
A level is only invalidated when price closes beyond it and volume meets a configurable threshold (default: 1× average volume). Low-volume spikes through a level are ignored as false breakouts — the zone remains valid. Break alerts include the volume ratio so you know the conviction behind the move.
🔷 Adaptive Zone Visuals
No right extension — zones terminate at the current bar (valid) or the break bar (broken). No infinite lines cluttering the right side of your chart.
Opacity scales with strength — strongest levels are most visible, weakest levels are nearly transparent.
Zone width scales with strength — high-confidence zones are wider, giving a visual sense of the price area's importance.
🔷 Clean Labels
Each label shows the full picture at a glance:
21450.00 ★6.5 ×3
Timeframe source | Price | Strength score | Touch count
Settings Guide
SettingWhat it doesPivot LengthBars each side to confirm a pivot. Higher = fewer, stronger levelsMin StrengthHide levels below this score. Raise to show only confirmed levelsATR Merge DistanceHow close two levels must be to merge into oneInvalidationClose-based (reliable) or Wick-based (faster) break detectionVolume Break FilterRequire above-average volume to confirm a breakoutMin Volume MultiplierHow many times average volume needed to confirm a breakMax Active LevelsCap total zones shown on chartStrength → Zone OpacityToggle adaptive opacity based on strength score
How to Use
Bounce trades — price enters a green (support) zone → wait for a rejection candle with volume → enter above the rejection candle high, SL below zone bottom.
Rejection trades — price enters a red (resistance) zone → wait for a bearish candle with volume → enter below candle low, SL above zone top.
Breakout trades — price closes beyond a zone with high volume (break alert fires) → wait for pullback to the broken level → trade in the direction of the break.
Highest priority setups — zones tagged or with ★ score above 5 and multiple touches. These are the levels institutional money respects.
Alerts
The indicator fires alert() calls for:
Break confirmed — includes ticker, price, and volume ratio
Retest — includes ticker, price, and touch quality score
Set alert condition to "Any alert() function call" in TradingView's alert dialog.
Notes
Designed and tested on NSE/BSE equities and F&O stocks
Works on any timeframe from 1 minute to Weekly
All calculations are original — pivot detection, strength engine, confluence merge, and volume filter are built from scratch in Pine Script v6 Indicateur

Smart Money Concepts Engine [Quantum Algo]Smart Money Concepts Engine
====================================================
🔶 OVERVIEW
Smart Money Concepts Engine is an all-in-one smart money concepts (SMC) indicator that unifies market structure, order blocks, fair value gaps with inversions, liquidity, and premium and discount analysis into a single engine — and then goes one layer deeper than drawing tools: it scores the confluence of everything on the chart into a transparent zero-to-one-hundred Confluence Score, and narrates the current market read in plain language on a live dashboard.
Most smart money indicators draw concepts and leave the interpretation to you. This engine interprets. At any moment the dashboard answers the questions an institutional-style trader actually asks: What is the structure doing on both tiers? Has liquidity been taken? Is price in premium or discount? Are there fresh zones nearby? How much of this stacks together right now?
🔶 WHAT ARE SMART MONEY CONCEPTS?
Smart money concepts describe how large market participants leave footprints in price: they break structure to reveal intent (Break of Structure and Change of Character), they enter from unmitigated zones of prior aggression (order blocks), they leave imbalances behind fast moves (fair value gaps), they engineer stop runs above equal highs and below equal lows (liquidity sweeps), and they favor buying in the discount half of a range and selling in the premium half. This engine detects, draws, and tracks the life cycle of every one of these elements.
🔶 WHY THIS SCRIPT IS ORIGINAL
1. Confluence Score. A transparent zero-to-one-hundred score built from five weighted, observable conditions: swing and internal structure alignment (25), correct premium or discount positioning for the bias (25), a fresh order block near price (20), imbalance confluence (15), and a recent liquidity sweep in the supportive direction (15). Every point is explainable — nothing is a black box.
2. Narrative engine. The dashboard writes the market read as a plain-language story that updates live, for example: "Bullish structure — sell-side taken — price in discount — demand below." No interpretation gap between what the chart shows and what it means.
3. Zone life cycle everywhere. Order blocks are born fresh, brighten when tested, and are removed the moment they are mitigated — the chart only ever shows zones that still matter. Fair value gaps flip into inversion zones when violated and are removed on the second violation. Equal highs and equal lows are struck through and relabeled the moment they are swept.
4. Volume-graded zones. Every order block is labeled with the relative volume of its origin candle (for example "Demand · 1.8× Volume"), so zone quality is visible at a glance.
5. Dual-tier structure. Swing structure (Break of Structure and Change of Character with lines and labels) and internal structure (compact context markers) are tracked as two independent bias states — and their agreement or disagreement feeds the score.
6. Graded zone-tap signals. When price returns to a fresh zone while both structure tiers align and price sits on the correct side of equilibrium, the engine prints a signal stamped with the live Confluence Score. High-scoring signals are highlighted in the accent color.
7. Anti-clutter engineering. Sweep detection carries per-level memory and a cooldown so the same level can never stack duplicate labels. Every drawing family is capped by input, keeping the chart readable and the auto-scale anchored to current price.
🔶 HOW IT WORKS
Market structure: Swing highs and lows are confirmed with a symmetric pivot lookback. A candle close through a confirmed swing level prints a Break of Structure (BoS) in trend continuation or a Change of Character (CHoCH) on reversal, on both the swing tier and the internal tier. All events are evaluated on closed bars only, so structure and signals do not repaint.
Order blocks: On every swing structure break, the engine locates the origin candle of the move — the last opposite candle before the impulse — and projects it forward as a demand or supply zone, graded by the relative volume of that candle. Zones brighten on first touch and are removed when price closes through them.
Fair value gaps: Three-candle imbalances above a minimum size (measured in Average True Range) are boxed. When price closes through a gap, it flips into an inversion zone acting in the opposite direction; a second violation removes it. Gap detection runs in the background for the Confluence Score even when drawing is disabled.
Liquidity: Consecutive swing highs or lows within a tolerance form Equal Highs (EQH) or Equal Lows (EQL) — resting liquidity lines that follow price. A wick through the level with a close back inside marks a sweep: the line is struck through, relabeled, and the event feeds the score. Single-pivot stop hunts are detected the same way, with per-level memory preventing duplicates.
Premium and discount: The range between the last confirmed swing high and low is mapped into premium, equilibrium, and discount, with deeper tinting in the extreme quartiles. The dashboard reports the live position as a percentage of the range.
Dashboard: A compact, fully themeable panel shows swing bias, internal bias, last event, range position, liquidity status, fresh demand and supply counts, imbalance count, the Confluence Score with a strength meter, and the narrative. Text size, position, and every color are adjustable, and long narrative text wraps inside its cell to keep the panel compact.
🔶 HOW TO USE IT
1. Works on any market — cryptocurrency, forex, gold, indices, stocks, futures — and any timeframe. The engine adapts structure size through the swing and internal length inputs.
2. Read the dashboard top to bottom: bias on both tiers, what just happened, where price sits in the range, and whether liquidity has been taken.
3. The highest-quality condition is full alignment: both tiers agree, a sweep has occurred against the move, price trades on the correct side of equilibrium, and a fresh volume-graded zone waits nearby — exactly what the Confluence Score measures.
4. Treat zone-tap signals as locations of interest stamped with their context quality, not as automatic entries. A score above eighty means nearly everything aligns; below fifty means the setup is thin.
5. Use inversion zones as polarity flips: a violated imbalance often acts as support or resistance from the other side.
6. Fair value gap drawing is off by default for a cleaner chart; enable it in settings — the score uses gap information either way.
🔶 SETTINGS
- Swing and internal structure lengths, structure events to keep.
- Order blocks: origin candle lookback and zones to keep.
- Fair value gaps: minimum size, inversion tracking, gaps to keep (drawing off by default).
- Liquidity: equal level tolerance and levels to keep.
- Premium and discount map with adjustable extension.
- Zone tap signals and signals to keep.
- All chart colors, plus a fully themeable dashboard: position, four text sizes, title band, background, frame, grid, and three text colors.
🔶 ALERTS
- Bullish / Bearish Break of Structure
- Bullish / Bearish Change of Character
- Buy-Side / Sell-Side Liquidity Sweep
- Demand Zone Tap / Supply Zone Tap (score-stamped)
- Fair Value Gap Inversion
🔶 FREQUENTLY ASKED QUESTIONS
Does the indicator repaint? No. Structure events, sweeps, inversions, and signals are evaluated on closed bars at confirmed pivots. Pivot confirmation introduces intentional lag equal to the structure length.
What does the Confluence Score mean? It is a transparent sum of five weighted conditions, not a prediction. It measures how much of the smart money checklist is currently aligned — a context meter, not a probability of profit.
Why did an order block disappear? It was mitigated: price closed through it. The engine removes dead zones so the chart only shows levels that still matter.
Why do sweeps print only once at a level? Each swing level carries sweep memory and a cooldown, preventing the duplicate label stacking common in liquidity tools.
Which markets and timeframes work best? All markets with candle data. Higher timeframes produce larger, cleaner structures; the internal tier keeps lower timeframes readable.
🔶 CREDITS
The smart money concepts implemented here — order blocks, fair value gaps, liquidity sweeps, break of structure, change of character, and premium and discount — are trading concepts popularized by the Inner Circle Trader methodology of Michael J. Huddleston, with intellectual roots in the market logic of Richard D. Wyckoff. This script gratefully acknowledges that lineage. The confluence scoring model, the narrative engine, the zone life cycle system, the volume grading, the anti-duplication sweep memory, and all code in this script are original work
🔶 LIMITATIONS
Structure detection is only as good as the chosen pivot lengths; very noisy instruments may need larger values. Volume grading is less meaningful on symbols with unreliable volume reporting. Removed zones are not kept as historical artifacts. The Confluence Score measures alignment, not outcome. No indicator replaces independent analysis.
🔶 DISCLAIMER
This script is provided strictly for educational and informational purposes. It is not financial advice, an investment recommendation, or a solicitation to buy or sell any financial instrument. Past behavior of any structure event, zone, or signal does not guarantee future results. Trading involves substantial risk. Always do your own research and manage risk independently. Indicateur

EMA Pro+ Suite# EMA Pro+ Suite
**A multi-layer EMA confluence framework for reading market state at a glance.**
---
## What It Is
EMA Pro+ Suite is an overlay indicator built around three exponential moving averages — a Fast (10), Mid (20), and Slow (50) EMA — organized into a structured three-layer state engine that tells you the current market regime, momentum direction, and whether price is in or out of alignment with that regime. Rather than treating each EMA in isolation, the suite reads them together as a system and surfaces a single, coherent market state at all times.
A corner dashboard table updates in real time, giving you an instant read on bias, momentum, alignment, EMA slopes, and price extension — without having to scan the chart manually.
---
## How It Works
The indicator evaluates three distinct layers on every bar:
**Layer 1 — Bias (Trend Regime)**
Defined by price relative to the 50 EMA. Price above = bullish bias. Price below = bearish bias. This is the macro filter — it determines which direction setups should be taken in.
**Layer 2 — Momentum**
Defined by the 10 EMA relative to the 20 EMA. When the fast EMA is above the mid EMA, momentum is bullish. When below, momentum is bearish. Momentum alignment with bias is the confirmation layer.
**Layer 3 — Price vs Fast EMA**
When bias and momentum are aligned but price is on the wrong side of the 10 EMA, the indicator flags a potential pullback or exhaustion condition. In a full bull regime, price dipping below the 10 EMA may represent a high-quality entry opportunity — or an early warning of trend exhaustion. Context determines which.
**Slope Engine**
Each EMA is evaluated for slope using a configurable lookback. RISING / FLAT / FALLING is displayed per EMA in the dashboard. A momentum flip on flat EMAs carries significantly less weight than one on rising or falling EMAs — this is critical for filtering out noise in ranging conditions.
**Price Distance from 50 EMA**
Tracks how extended price is from the slow EMA as a percentage. Large positive or negative readings flag mean reversion risk.
**Bar & Background Coloring**
- Green background + green bars = full bull alignment
- Red background + red bars = full bear alignment
- Yellow bars = conflicting bias and momentum (mixed / transitional state)
- Aqua bars = bull regime, price pulling back below 10 EMA
- Fuchsia bars = bear regime, price popping above 10 EMA
**Cross Signals**
- `M↑` (green) — 10 EMA crossed above 20 EMA in bull zone. Aligned, higher conviction.
- `M↓` (red) — 10 EMA crossed below 20 EMA in bear zone. Aligned, higher conviction.
- `M↑ 🐻` (orange) — Bullish momentum flip firing in bear zone. Counter-trend, lower conviction.
- `M↓ 🐂` (orange) — Bearish momentum flip firing in bull zone. Counter-trend, lower conviction.
**Multi-Timeframe Support**
All three EMAs can be calculated on a higher timeframe and plotted on the current chart. Use this to anchor your bias to the HTF structure while reading entries on a lower timeframe.
---
## Possible Ways to Use It
**Trend Following**
Wait for full alignment — green background, green bars, all three slopes RISING. Only look for long entries. Use the 10 EMA pullback (aqua bars) as a potential entry trigger. Reverse logic for shorts.
**Momentum Flip Entries**
Use aligned `M↑` / `M↓` signals (green/red) as entry triggers when bias and slope confirm. Discard or fade counter-trend orange signals unless you have a specific reason to trade against the regime.
**Regime Filter for Other Systems**
Use the bias layer (price vs 50 EMA) as a filter for another strategy. Only take long signals from your primary system when EMA Pro+ shows bull bias, and vice versa.
**HTF Confluence**
Set the EMA Timeframe to a higher timeframe (e.g. 4H or Daily) while trading on a 15m or 1H chart. The dashboard will show the HTF regime, giving you a structural anchor for your intraday reads.
**Avoiding Chop**
When all three slopes read FLAT and bars are yellow (mixed alignment), the market is in a transitional or ranging state. Consider standing aside or reducing position size until a clear regime re-establishes.
**Mean Reversion Awareness**
When Dist 50 shows a large positive or negative reading, price is extended from the slow EMA. In trending markets this can persist — but it raises the bar for adding to positions and flags potential snapback risk.
---
## Settings
| Setting | Description |
|---|---|
| EMA Timeframe | Blank = current chart timeframe. Enter any TF (e.g. 60, 240, D) for MTF mode. |
| Fast / Mid / Slow EMA Length | Default 10 / 20 / 50. Fully adjustable. |
| Slope Lookback | Number of bars used to calculate EMA slope. Increase on lower timeframes to reduce flat readings. |
| Show EMA Lines | Toggle the three EMA plots. |
| Show Bias Background | Toggle the green/red background tint. |
| Color Bars by State | Toggle bar coloring. |
| Show Cross Signals | Toggle M↑ / M↓ labels on chart. |
| Show Dashboard Table | Toggle the corner HUD. |
| Table Position | Top Right / Top Left / Bottom Right / Bottom Left. |
| Bar Close Reminder Alert | Fires a reminder alert on every bar close to check the setup. |
---
## Alerts
- Momentum Flip Bullish — Bull Zone (aligned)
- Momentum Flip Bullish — Bear Zone (counter-trend)
- Momentum Flip Bearish — Bear Zone (aligned)
- Momentum Flip Bearish — Bull Zone (counter-trend)
- Price Reclaimed 50 EMA (bias flipped bullish)
- Price Lost 50 EMA (bias flipped bearish)
- Bull Pullback Signal (bull regime, price below 10 EMA)
- Bear Pullback Signal (bear regime, price above 10 EMA)
- Bar Close Reminder
---
## Disclaimer
This indicator is provided for educational and informational purposes only. It does not constitute financial advice, investment advice, or a recommendation to buy or sell any asset. All trading involves substantial risk of loss. Past performance of any signal, strategy, or system is not indicative of future results.
EMA Pro+ Suite is a tool to assist with technical analysis — it does not predict price, guarantee accuracy, or remove the inherent uncertainty of financial markets. No indicator eliminates risk. You are solely responsible for your own trading decisions.
Always conduct your own research, apply proper risk management, and consider consulting a licensed financial professional before making any trading decisions. Only trade with capital you can afford to lose. Indicateur

Fib OTE + FVG Confluence [Viprasol]Fib OTE + FVG Confluence — high-probability ICT entries where two edges agree
═══════════════════════════════════════════════════════════
THE IDEA
═══════════════════════════════════════════════════════════
A Fair Value Gap is a good entry zone. An OTE (Optimal Trade Entry) retracement is a
good entry zone. But an FVG that sits INSIDE the OTE — that's the setup ICT traders
actually wait for. This tool maps the higher-timeframe OTE / premium-discount zone,
detects Fair Value Gaps, and does the one thing that matters: it highlights and ALERTS
you when price taps an FVG that lands inside the OTE.
═══════════════════════════════════════════════════════════
HOW IT WORKS
═══════════════════════════════════════════════════════════
1. HTF OTE MAP — From the previous candle range of your chosen higher timeframe
(non-repainting), it builds the Fibonacci map: the OTE band (default 0.618-0.786),
the equilibrium line (0.5) that splits premium from discount, and a directional bias
(Auto from the last HTF candle, or force Long/Short). In a long bias the OTE sits in
discount (below equilibrium) — where you want to buy; in a short bias it sits in
premium.
2. FAIR VALUE GAPS — Standard 3-candle imbalances (bullish `low > high `, bearish
`high < low `), with an optional displacement filter and a minimum-size filter to
cut noise. Each gap is drawn as a box and tracked until filled (Wick / Close /
Average mitigation).
3. CONFLUENCE — the point of the tool. A gap is "confluent" when it overlaps the OTE
band (strict) or, in the looser mode, when a bullish gap sits in discount / a bearish
gap sits in premium. Confluent gaps are highlighted with a ★. Turn on "Show ONLY
Confluent FVGs" and the chart reduces to just the high-probability zones.
4. ALERTS — Get notified when price TAPS a confluent FVG (and optionally when one
forms). One alert, delivered via app / email / SMS / webhook (Text or JSON message).
═══════════════════════════════════════════════════════════
ALERTS SETUP
═══════════════════════════════════════════════════════════
Create one alert → Condition: "Fib OTE + FVG Confluence" → "Any alert() function call",
then pick your delivery (app/email/SMS/webhook) in the dialog. Switch Message Format to
"JSON (webhook)" for bot/automation-friendly output. Messages carry direction, event
(FORMED/TAPPED), and the gap's price range.
═══════════════════════════════════════════════════════════
SETTINGS
═══════════════════════════════════════════════════════════
• HTF Fibonacci / OTE: timeframe, bias (Auto/Long/Short), OTE start/end, show map, colors.
• Fair Value Gaps: min gap %, displacement filter, fill mode, show-only-confluent, colors, box extend.
• Confluence & Alerts: confluence rule (Inside OTE / Favored half), highlight color, form/tap
alert toggles, frequency (once-per-bar-close = no repaint), Text/JSON.
═══════════════════════════════════════════════════════════
HOW TO USE
═══════════════════════════════════════════════════════════
1. Set the OTE higher timeframe (e.g. Daily on an intraday chart).
2. Let Auto bias pick direction, or force Long/Short to your plan.
3. Enable "Show ONLY Confluent FVGs" to see just gaps inside the OTE.
4. Create the alert and wait for a tap of a ★ confluent gap — that's your cue to do
your own analysis and manage risk.
═══════════════════════════════════════════════════════════
LIMITATIONS — PLEASE READ
═══════════════════════════════════════════════════════════
• This is an awareness / confluence tool, not a strategy or signal service — no buy/sell
calls. A confluent tap is a location of interest, not a guarantee.
• The OTE map uses the previous HTF candle range and updates as new HTF candles form;
it reflects current context, not a fixed historical grid.
• FVGs are detected on the chart timeframe; confluence is judged against the OTE active
when each gap forms.
• Not financial advice. Trade at your own risk.
═══════════════════════════════════════════════════════════
CREDITS & ORIGINALITY
═══════════════════════════════════════════════════════════
Fair Value Gaps, OTE, and premium/discount are public ICT concepts. All code here — the
non-repainting HTF OTE map, the FVG detection and mitigation, the confluence logic, and
the alert engine — is original Viprasol work written from the standard definitions. No
third-party Pine code is reused.
Indicateur

Confluence Context - Regime Filter + Market Structure🎯 CONFLUENCE CONTEXT - REGIME FILTER + MARKET STRUCTURE
Your signal tool tells you WHEN. This tells you WHETHER.
Confluence Context — Regime Filter + Market Structure is the companion layer that
sits on top of whatever you already trade and answers the one question that wrecks
most setups: does the context actually agree? It draws no zones and fires no
entries — it reads the environment, scores it, and hands you a single
glance-readable verdict. 📊
🔥 WHY IT EXISTS
Most signal tools fire identically in every environment — trending, ranging, dead,
or violent. The killer is the clean-looking signal taken in the wrong context: a
breakout in a dead session, a continuation against structure, a trend entry while
volatility is flatlined. Confluence Context — Regime Filter + Market Structure
gates your entry with the four things signal tools love to ignore.
🧩 THE FOUR LAYERS
📐 Market Structure — Swing pivots labeled BOS (Break of Structure, with the
trend) and CHoCH (Change of Character, against it), with a running bias: Bullish,
Bearish, or Neutral. Confirmed-bar only.
🌊 Volatility Regime — ATR vs its own moving average, sorting the tape into Low,
Normal, or Extreme. This is the regime filter — it tells you whether you're in the
environment your strategy was actually built for. Flip on H1 mode to inherit a
higher-timeframe regime read from the prior closed 60-min bar, no repaint.
🕐 Session Filter — London / New York / Asia with pair presets (JPY, USD majors,
AUD/NZD) or fully custom windows + timezone. Reads the live wall clock, so it flips
to "Closed" the moment the market closes instead of freezing on the last bar.
📈 Trend — Price vs a configurable EMA. Simple, and it earns its weight.
⚡ HOW THEY STACK (the scoring engine)
Every layer casts a weighted vote into TWO independent tallies — a bull score and a
bear score, scored separately so you can actually see when context is fighting
itself instead of just being quiet. Clear your threshold and the Highlighter
collapses both into one verdict:
🟢 Stacked Long · Leaning Long · ⚪ Balanced · Leaning Short · 🔴 Stacked Short
It tints your candles and/or background and drops a headline row in the table —
CONTEXT: BULLISH · Stacked Long · 9 / 2. It confirms context, it doesn't call
trades, so it speaks BULLISH / BEARISH, never BUY / SELL.
🔗 THE COMPANION HOOK
The engine holds a heavyweight slot for an "External Zone Hit" you toggle manually
(bull and bear separately) the moment YOUR zone or level tool confirms a touch.
That's the whole point: it lets your existing setup feed the one input it can't
infer, so the verdict reflects your real trigger — not a guess.
🛠️ HOW TO USE IT
Slap it on top of whatever you trade. Tune the EMA, regime multipliers, and session
windows to your instrument. Read the verdict off the table or the candle tint —
filter your primary signal so you only pull the trigger when context agrees, or let
the confluence alert ping you when the dominant side clears threshold. Alerts ship
for structure breaks, regime shifts, session opens/closes, and threshold crossings.
⏱️ BEST TIMEFRAMES
Built to shine on M15 through H4 — enough structure to mean something, fast enough
to act on.
♾️ The whole idea: it stays useful after it's been on your chart for a while. Every
read maps to a concrete trading or chart decision — no decoration, no noise.
🔓 Open-source.
Repaint policy: structure, regime, and score history evaluate on confirmed bars;
the HTF regime read uses a closed-bar offset and doesn't repaint; the session
display is live by design and doesn't touch history. Settings are starting points,
not advice — tune them to your market and validate before risking capital. Indicateur

Multi-Axis Confluence Matrix Adaptive MTF & Forward CalibratedMulti-Axis Confluence Matrix — Adaptive MTF & Forward-Calibrated
What it is
A confluence oscillator that scores agreement across five independent information axes, each measured on three adaptively-resolved timeframes, then weights every axis by its own forward-measured edge on the current symbol so the score self-corrects instead of treating all inputs as equally reliable. It separates the two kinds of multi-timeframe agreement that most stacks wrongly merge, gates direction with a higher-timeframe bias, and reports the whole state in one plain-language verdict panel.
The plotted line reads like a conventional oscillator (−100 to +100, with strong-zone bands and price-chart BUY/SELL signals), so a non-technical user can interpret it at a glance — while the engine underneath is doing edge-weighted, multi-timeframe, forward-calibrated confluence.
Why these components are combined (mashup rationale)
Stacking indicators usually produces false confluence: five momentum tools in different clothes vote the same bet five times, and it looks like five confirmations when it is really one. This script is built specifically to avoid that, and every layer removes a distinct failure of naive stacking. They ship as one engine because direction, certainty, and agreement are one decision — splitting them across separate scripts would lose the cross-checks below.
1. Five orthogonal axes, each from a different data source. Agreement only carries information if the axes are independent. Each axis reads a different thing:
Momentum — price (normalized MACD-histogram sign)
Stretch — price vs an adaptive fair value (z-score of the deviation)
Order flow — signed volume (sign of a bounded cumulative volume-delta z-score)
Fear — an implied-volatility index (direction of a negated IV trend)
Cross-market — a correlated leader instrument (signed momentum), off by default
Because no two axes share an input, four of them agreeing is four independent witnesses, not one witness repeated.
2. Vote / gate split. Directional axes vote long or short. Context does not vote — it scales conviction or vetoes. A volatility-regime measure and a trend-efficiency measure only shrink conviction; the higher-timeframe bias only decides which side is allowed. High volatility is neither bullish nor bearish, so folding it into the direction sum would inject bias. Keeping context as a multiplier rather than an addend is the single thing that stops the stack collapsing into "momentum with extra steps."
3. Two separate confluence counts, never summed.
Method confluence = how many independent axes agree on the signal timeframe (the rare, high-information agreement).
Scale confluence = how many timeframes one axis agrees on (robustness/timing only — the same signal at different resolutions, not a new vote).
Merging them lets three timeframes of one axis drown out a contradicting axis. They are reported on separate rows so you can see which kind of agreement you actually have.
4. Adaptive multi-timeframe resolution. The bias / signal / trigger timeframes are derived as multiples of the chart timeframe, clamped and snapped to real frames. The "bias-above, vote-between, trigger-at" relationship is preserved on any chart, instead of fixed frames that are only correct on the one chart they were tuned for.
5. Per-axis forward calibration (the core original component). Each axis is calibrated on each timeframe by a triple-barrier outcome (profit barrier / stop barrier / time horizon), with sample-uniqueness weighting and recency decay, reported as an edge over a barrier-matched base rate with a Wilson confidence interval. Each axis then votes weighted by its own edge lower-bound, so an axis that is not paying on the current symbol contributes little and cannot bias the score merely by being present. A small weight floor keeps the engine responsive (edge tilts the score rather than fully gating it); set the floor to zero for strict gating.
6. Higher-timeframe bias gate. The slow frame sets which side is allowed and does not vote, which blocks the counter-trend entries that punish mean-reversion approaches.
Remove any one layer and the stack loses a check it cannot recover. That is the justification for combining them.
How to use it
The line lives in −100..+100. In the green zone = strong bullish confluence; red zone = strong bearish; mid = no edge. Read it like any oscillator.
BUY / SELL triangles print on the price chart only when the gated, edge-weighted verdict fires (method confluence + conviction + bias gate all pass). Triangles with text = high conviction; without text = weaker. A latch + cooldown gives one clean mark per swing, not a cluster.
Bull / Bear divergence is drawn on the score line, spaced by a cooldown, and suppressed only when it directly contradicts a high-conviction opposite verdict (early-reversal divergences against a weak score are kept).
The verdict panel (top-right, on by default) states the action in plain language: tier, what to do, method/scale confluence, conviction, calibration warm-state, and which side the higher-TF bias allows.
The axis × timeframe matrix is an advanced view, off by default — turn it on to inspect each axis's arrows across timeframes and its measured edge. A Key-info table (Compact by default, Pro for full detail) summarizes the live state on the left.
Any market: the price source, volume source (with a borrow-symbol option for instruments that report no volume), the implied-volatility symbol, and the cross-market leader are all inputs in the settings. Defaults suit a major index future; change the symbols for any market, or clear the fear / cross-market symbols to drop those axes (the score re-weights over the axes that remain).
What makes it original
The multi-axis matrix, the vote/gate split, the dual (method vs scale) confluence accounting, the adaptive timeframe resolution, and the per-axis-per-timeframe forward edge-weighting are this script's own construction. It is not a re-skin of a single classic indicator — it is an engine for organizing several independent reads into one honest, self-correcting confluence score.
Outputs (Data Window)
Generic, identifiable names for use by other scripts: direction, conviction, method confluence, scale confluence, higher-TF bias, regime direction, edge, edge lower-bound, and sample count.
Non-repainting
Every off-chart-timeframe read uses confirmed previous bars with lookahead disabled; votes confirm on bar close; every calibrated statistic is forward-measured at fixed barriers on confirmed bars. The live bar is provisional, as with any indicator.
Concept credits (techniques operationalized here — not third-party code)
MACD: Gerald Appel. Bands / %B style stretch: John Bollinger. Cumulative volume delta and divergence: standard order-flow practice. Implied-volatility index methodology: CBOE. Trade-side from standardized returns (Bulk Volume Classification): Easley, López de Prado & O'Hara. Triple-barrier labeling and sample uniqueness: López de Prado. Wilson score interval: Edwin B. Wilson. Efficiency-ratio regime: Perry Kaufman. The matrix architecture and the calibration/weighting scheme are the author's own.
Disclaimer
Research and education only. This is not financial advice, not a recommendation, and not a guarantee. The axes are deliberately compact reads of their concepts. Calibration is in-sample, forward-measured at fixed barriers, with no costs, slippage, or guaranteed fills. Indicators describe past behavior; they do not predict the future. Trading carries risk of loss. Test out-of-sample and make your own decisions. Indicateur

Multi-Factor Divergence MatrixMulti-Factor Divergence Matrix
OVERVIEW
Most divergence tools read one oscillator against price. The Multi-Factor Divergence Matrix reads fifteen independent lenses at once, standardizes them onto a single shared standard-deviation (sigma) scale, and then organizes them into a structure: lenses roll up into 14 aspects (distinct questions), aspects roll up into 6 families (factor classes), and families roll up into one composite. Divergence is detected five different ways on that construction, and a built-in calibration harness scores whether each method has actually carried any edge on your instrument.
The core idea: a price move is more trustworthy when many independent reads confirm it, and a divergence is more meaningful when it shows up across different kinds of information — not just three flavours of momentum that all say the same thing.
WHY THE COMPONENTS BELONG IN ONE SCRIPT (mashup rationale)
This is a deliberate multi-factor engine, not indicators stacked side by side. Every part answers the same question — is this price move confirmed, and by how broad a set of independent reads? — and each fixes a blind spot of the others:
A single oscillator can only diverge one way. Fifteen lenses across six families let price be unconfirmed by momentum, by trend efficiency, by location, by volatility, by order flow, or by cross-asset carry — independently.
Raw factor-stacking double-counts. Standardizing every lens to one sigma scale makes them directly comparable, and grouping correlated lenses into aspects (then families) means consensus is counted where it carries independent information, not where it merely repeats.
One detection method misses what another catches. Pivot divergence is precise but lags; slope fires earlier; correlation is continuous; sequential catches structured exhaustion; the intra-family split is often the very first crack. Run together, they cover the ways divergence actually appears.
Assertions are cheap. The calibration harness ties the whole construction back to realized forward outcomes, per method, so the tool reports whether its own signals carry edge rather than claiming they do.
Remove any one layer and the central question is answered less completely — which is what makes them one tool.
HOW IT WORKS
The 15 lenses → 14 aspects → 6 families
Momentum — oscillatory (RSI + Know Sure Thing), velocity (low-lag two-pole strength), stationary (fractional-difference of log price)
Trend / Efficiency — path quality (Kaufman efficiency ratio), extension (SAR distance in ATR units), rollover (dual-horizon efficiency gap)
Location / Mean — volume-anchored (VWAP deviation), geometric (linear-regression deviation)
Volatility — realized expansion (directional range), implied-vs-realized (variance-risk-premium spread)
Flow / Volume — net pressure (cumulative signed-volume delta, lower-timeframe estimated), volume-weighted (Money Flow Index)
Cross-Asset — carry (futures-vs-spot basis), fear (volatility-index vs price)
Each lens is z-scored over a rolling window (up = bullish). Correlated lenses that answer the same question (e.g. RSI and KST) are averaged into one aspect — the anti-redundancy step. A family agrees only when a majority of its filled aspects align; when its aspects disagree it is flagged SPLIT.
Two consensus axes, both at family resolution, auto-scaled by timeframe
Extreme-count — how many families are stretched to their extreme.
Divergence-count — how many families are diverging from price right now.
Five detection methods
Pivot — regular, hidden, exaggerated (equal-extreme) and triple divergence on the composite.
Slope — price-vs-composite regression-slope sign disagreement (fires earlier than pivots).
Correlation — rolling price-composite correlation flipping negative (continuous, always-on).
Sequential — a structured RSI exhaustion pattern (three deeper pushes, then a turn).
Leading — the intra-family SPLIT, often the first warning before a family flips.
Calibration. Each event is a directional hypothesis, queued and resolved a fixed horizon later versus an ATR threshold, then compared with the unconditional same-horizon base rate. The dashboard reports, per method: number of events, Hit %, and Edge = Hit − Base. Events are logged and resolved on confirmed bars only.
HOW TO USE
The dashboard has two modes. Compact (default) shows the decision essentials: the composite zone, the two consensus counts (Stretched X/6 · Diverging Y/6), a one-line family summary (bull / bear / split), and the single best-calibrated method with its Edge. Pro expands this to every family row (vote arrow, aspect agreement, SPLIT flag) and every per-method calibration class. In both, a high divergence-count backed by clean family agreement is strong context; the Edge figure tells you whether that read has actually preceded a move on this symbol and timeframe. Treat consensus as context, never a standalone trigger.
UNIVERSAL ACROSS MARKETS
Price, high, low, the VWAP source, the spot reference symbol and the volatility symbol are all inputs, so the engine runs on any instrument and timeframe. Volume-based lenses (VWAP, flow, MFI) need real traded volume — use the futures contract, not a cash index. Defaults target NSE NIFTY index futures intraday with an NSE:NIFTY spot reference and NSE:INDIAVIX; lenses without data quietly drop out and the consensus scales to whatever stays active.
ORIGINALITY
The individual techniques are public and credited below. The original work is the integration: standardizing fifteen heterogeneous reads onto one sigma axis, the aspect → family → composite roll-up that counts agreement only where it is independent, the dual extreme-and-divergence consensus, the surfacing of intra-family disagreement as a leading signal, and the forward base-rate calibration over every detection method. No third-party Pine code is reused.
CONCEPT CREDIT
RSI, Parabolic SAR, ATR, DMI — J. Welles Wilder. Know Sure Thing — Martin J. Pring. Efficiency Ratio — Perry J. Kaufman. Money Flow Index — Quong & Soudack. VWAP and cumulative volume delta — standard public market-microstructure concepts. Fractional differentiation — the long-memory / stationarity literature (Hosking 1981; adapted for finance by M. López de Prado). Two-pole low-pass smoothing — John F. Ehlers. The basis is explained by the cost-of-carry framework (N. Kaldor 1939; H. Working 1948–49). Variance risk premium — the implied-minus-realized literature. Linear regression and price/oscillator divergence are long-established public techniques. Not affiliated with, nor endorsed by, any third party.
HONESTY / LIMITATIONS
Consensus is context, not a trigger. Independence is managed, not perfect — lenses inside a family still share inputs, which is exactly why consensus counts families and aspects rather than raw lenses, and why a high count is never proof. The Edge figures are in-sample, close-to-close, with overlapping forward windows and no costs — descriptive context, not a verified backtest. An Edge near zero, negative, or unstable across timeframes is the harness honestly telling you the method has no reliable edge on that instrument; do not tune parameters until it turns green — that is curve-fitting. Divergence and reversals confirm a few bars after their pivot (inherent to honest pivot detection). Nothing here predicts price.
DISCLAIMER
Research and educational tool only. NOT financial advice and NO guarantee of profitability or accuracy. Indicators describe past behaviour; they do not predict the future. Trading carries risk of loss. Test out-of-sample and make your own decisions. The author accepts no liability for any use of this script. Indicateur

APEX Trend & Signal Engine [Viprasol]APEX Trend & Signal Engine — Regime-Aware Dual-Mode Toolkit
═══════════════════════════════════════════════════════════
THE PROBLEM IT SOLVES
═══════════════════════════════════════════════════════════
The single most expensive mistake in trading is using the wrong style for the
conditions — trend-following a sideways range (death by a thousand whipsaws), or
mean-reverting a strong trend (fighting a freight train). Most indicators apply ONE
style blindly and let you find out the hard way.
APEX reads the market REGIME first, tells you which style fits right now, and only
fires signals that match. When the market is trending it trend-follows; when it's
ranging it mean-reverts. Same tool, opposite logic, applied at the right time.
═══════════════════════════════════════════════════════════
HOW THE FOUR PILLARS WORK TOGETHER
═══════════════════════════════════════════════════════════
Every trade decision rests on four questions, and APEX answers each:
1. BIAS — long or short? A multi-factor Trend Midline (your choice of 8 MA types)
colored by a consensus of price position, slope, and directional movement.
2. REGIME — trend or range? ADX + Kaufman Efficiency Ratio classify the regime and
pick the favored mode (trend-follow vs mean-revert). This is the engine's core.
3. LOCATION — where is fair value? A premium/discount model: longs are only allowed
in discount (below equilibrium), shorts only in premium (above). Better entries,
better risk-reward.
4. SIGNAL + FILTER — the trigger, gated by regime, location, and trend-cloud
confluence, so low-quality signals are filtered out.
═══════════════════════════════════════════════════════════
SIGNALS
═══════════════════════════════════════════════════════════
• In a TRENDING regime: momentum entries in the trend direction (baseline reclaim with
rising/falling slope and directional-movement agreement).
• In a RANGING regime: mean-reversion entries when price tags an extreme band and
reverts.
• A colored dot marks a confluent signal; a gray ✕ marks a signal that LACKS confluence
(a hint to exit the opposite position rather than enter).
• Take-profit markers flag when price reaches an ATR-based target after a signal.
═══════════════════════════════════════════════════════════
FOUR OPTIONAL OVERLAYS
═══════════════════════════════════════════════════════════
• TREND MIDLINE — an MA baseline colored by multi-factor consensus (blue long / red
short / gray neutral-exhaustion), filled to price.
• ADAPTIVE ZONE — a Supertrend rendered as a dynamic support/resistance ZONE (support
beneath price in uptrends, resistance above in downtrends) rather than flip signals.
• TREND CLOUD — a modified Ichimoku Kumo (Donchian, EMA, or HMA engine) for trend
context; bullish above, bearish below.
• EXTREME ZONES — multi-band standard-deviation gradient zones marking where price is
statistically stretched and prone to revert (mean-reversion).
Each is independently toggleable so you keep the chart as clean as you like.
═══════════════════════════════════════════════════════════
5-STATE CANDLE COLORING & DASHBOARD
═══════════════════════════════════════════════════════════
Candles paint in five states from a 0-10 trend-strength score: strong buy, buy,
neutral, sell, strong sell (strong states solid, weaker states faded).
The dashboard reports, at a glance: Favored Mode (trend-follow / mean-revert), Regime
(trending/ranging + bias), Trend (increasing/decreasing), Strength (0-10), Volatility
(increasing/decreasing), Location (premium/discount), Session (Tokyo/London/NY/Void),
and the current Signal.
═══════════════════════════════════════════════════════════
HOW TO USE
═══════════════════════════════════════════════════════════
1. Leave Mode on "Auto" and read the dashboard's Favored Mode — trade with the regime.
2. Take colored signals that agree with the trend; treat gray ✕ marks as exit cues.
3. Respect Location — favor longs in discount, shorts in premium.
4. Use the Adaptive Zone / Extreme Zones as entry and target reference levels.
5. Tune Trend/Fast lengths and the ADX threshold to your market and timeframe.
═══════════════════════════════════════════════════════════
HONEST LIMITATIONS — PLEASE READ
═══════════════════════════════════════════════════════════
• No indicator predicts the future. APEX organizes context and signals; it does not
guarantee outcomes. Confirm on closed bars.
• Regime classification has a transition lag — the first bars of a new trend or range
can be mislabeled. The favored-mode readout is guidance, not gospel.
• Session hours are set in UTC and adjustable; verify they match your instrument.
• Volume-dependent and synthetic-feed instruments may read differently.
• Take-profit markers use a simple ATR target on one tracked signal — they are a
reference, not a backtest. This is a decision-support tool, not financial advice.
═══════════════════════════════════════════════════════════
CREDITS & ORIGINALITY
═══════════════════════════════════════════════════════════
This is an original toolkit built from public-domain technical-analysis methods,
implemented from their published formulas: Supertrend (Olivier Seban), Ichimoku Kinko
Hyo (Goichi Hosoda), Bollinger Bands / %B (John Bollinger), ADX/DMI (J. Welles Wilder),
Efficiency Ratio (Perry Kaufman), and the premium/discount equilibrium concept. The
regime-aware dual-mode architecture, the confluence/location gating, the strength model,
the overlays' construction, and all code are original Viprasol work. No third-party Pine
code is reused and no proprietary algorithms are included.
Indicateur

MA Confluence Engine [Viprasol]MA Confluence Engine — 15-MA Consensus Ribbon
═══════════════════════════════════════════════════════════
ONE CROSSOVER IS AN OPINION. FIFTEEN MAs AGREEING IS A TREND.
═══════════════════════════════════════════════════════════
A single moving-average crossover whipsaws constantly — two lines tangle in chop and
fire signal after signal that goes nowhere. MA Confluence Engine replaces that one
fragile opinion with the agreement of a 15-MA ribbon. It only signals when most of the
ribbon agrees on direction, stands aside when the ribbon squeezes together (a
compressed ribbon IS chop), and on every signal it draws a complete trade plan:
Entry, TP1, TP2, TP3 and Stop Loss.
═══════════════════════════════════════════════════════════
HOW THE CONSENSUS WORKS
═══════════════════════════════════════════════════════════
The engine builds a ribbon of 15 moving averages, spaced from a fast base length
upward (e.g. 10, 18, 26 … 122). Every bar it measures two things across all 15:
• How many is price trading ABOVE?
• How many are SLOPING UP?
These combine into a single CONSENSUS SCORE from 0 to 100:
100% = price above all 15 MAs AND all 15 rising (a fully stacked uptrend)
0% = price below all 15 AND all 15 falling (a fully stacked downtrend)
50% = mixed — the ribbon disagrees
A long signal fires only when consensus rises through your bullish threshold
(default 75%), a short when it falls through the bearish threshold (default 25%).
Half-hearted moves where the ribbon disagrees never trigger.
═══════════════════════════════════════════════════════════
THE TRADE PLAN — DRAWN ON THE LAST SIGNAL
═══════════════════════════════════════════════════════════
The moment a signal fires, the engine projects five levels forward and labels each
with its price:
• ENTRY — at the signal close
• STOP LOSS — your risk distance away (ATR or %); this distance defines 1R
• TP1 / TP2 / TP3 — at your chosen R-multiples of that risk (default 1R / 2R / 3R)
Only the most recent signal's plan is shown, so the chart stays clean. The dashboard
mirrors the exact prices, and every alert carries the full plan (Entry/SL/TP1/TP2/TP3)
so it's ready for journaling or automation.
═══════════════════════════════════════════════════════════
THE RIBBON IS ITS OWN CHOP FILTER
═══════════════════════════════════════════════════════════
When a market chops, moving averages of every length collapse onto each other — the
ribbon goes flat and thin. The engine measures RIBBON WIDTH (the spread of the 15 MAs,
normalized by ATR) and skips signals whenever the ribbon is compressed below your
threshold. A second Kaufman Efficiency-Ratio gate confirms price is actually trending.
Filtered crosses are drawn faintly (✕) and counted, so you SEE what was avoided.
═══════════════════════════════════════════════════════════
21 VERIFIED, LICENSE-CLEAN MOVING AVERAGES
═══════════════════════════════════════════════════════════
Build the ribbon from any one of:
SMA, EMA, WMA, RMA, VWMA, DEMA, TEMA, HMA, ALMA, T3, McGinley, ZLEMA, KAMA, FRAMA,
VIDYA, SuperSmoother, Gaussian, Laguerre, Kalman, LSMA, Median.
Each is implemented from its published formula and credited to its author. Jurik's JMA
is deliberately excluded — it is a proprietary, trademarked product whose every
open-source "version" is an unlicensed reverse-engineering.
═══════════════════════════════════════════════════════════
DASHBOARD
═══════════════════════════════════════════════════════════
• Live consensus score, with price-above and sloping-up counts (x of 15)
• Ribbon width + chop state, trend-regime efficiency reading
• Last signal direction and the full Entry / TP1 / TP2 / TP3 / SL prices
• Whipsaws filtered
═══════════════════════════════════════════════════════════
FEATURES
═══════════════════════════════════════════════════════════
• 15-MA ribbon colored by consensus (red → green) or simple bull/bear, with fill
• Entry/TP1/TP2/TP3/SL level lines + labels on the latest signal
• Choppy-regime background shading + faint markers on filtered crosses
• Direction filter (Both / Longs / Shorts)
• Stop in ATR or %, take-profits as R-multiples
• Alerts for long, short, and chop — signal alerts include the full trade plan
• Full MA sub-parameter control (ALMA, T3, KAMA, Gaussian, Laguerre, Kalman, VIDYA, McGinley)
═══════════════════════════════════════════════════════════
HOW TO USE
═══════════════════════════════════════════════════════════
1. Choose an MA type, base length, and spacing for the ribbon.
2. Wait for a signal — it only fires when the ribbon fans out and aligns (consensus
through your threshold) in a trending regime.
3. Use the drawn Entry / SL / TP1 / TP2 / TP3 as your trade plan; scale out at the TPs.
4. Raise the consensus thresholds and ribbon-width minimum to make signals stricter
(fewer, cleaner) — the whipsaw-filtered count shows the filter working.
═══════════════════════════════════════════════════════════
HONEST LIMITATIONS — PLEASE READ
═══════════════════════════════════════════════════════════
• Signals are evaluated on bar close; act on confirmed bars to avoid intrabar flicker.
• A consensus system enters LATER than a single fast crossover — it trades fewer,
higher-quality moves and will sit out fast reversals. That trade-off is the point.
• The TP/SL levels are a risk framework, not a prediction — markets do not owe you 3R.
• Volume MAs (VWMA) and the regime math need reliable data; some synthetic forex/CFD
feeds are less meaningful.
• This is a decision-support tool, not financial advice. Trade at your own risk.
═══════════════════════════════════════════════════════════
CREDITS & ORIGINALITY
═══════════════════════════════════════════════════════════
MA methods credited to their authors: Wilder (RMA), Mulloy (DEMA/TEMA), Hull (HMA),
Legoux & Kouzis-Loukas (ALMA), Tillson (T3), McGinley, Kaufman (KAMA/Efficiency Ratio),
Ehlers (ZLEMA, SuperSmoother, Gaussian, Laguerre, FRAMA), Chande (VIDYA), Kálmán
(Kalman). All formulas are public-domain / published methods. Every line of Pine — the
MA dispatcher, the 15-MA consensus engine, the ribbon chop filter, the trade-plan
projection, and the visualization — is original Viprasol work written from the
published formulas. No third-party Pine code is reused; no proprietary algorithms included.
Indicateur

Turtle Soup Strategy with 1-Bar ConfirmationCatching Institutional Traps:
The Turtle Soup 1-Bar Confirmation MechanicsIn high-frequency and algorithmic trading environments, traditional breakout strategies frequently fall victim to institutional stop-hunts. When price breaks past an established 20-bar extreme, retail momentum systems are triggered to buy or sell the expansion. Concurrently, institutional market makers utilize these concentrated liquidity pockets to fill large counter-positions, resulting in sharp rejections known as "fakeouts".This publication presents the core structural mechanics of a refined Turtle Soup Reversal Model with Strict 1-Bar Confirmation. Rather than attempting to trend-follow highly volatile breakout expansions, this system introduces an automated state-machine architecture engineered to locate, track, and execute trades alongside institutional order absorption.
💎 Key Architectural & Analytical PillarsTo maintain strict execution data discipline on lower timeframes, the script is structured around three proprietary processing frameworks:
1. Zero-Lag Pure Price Action CoreUnlike classic reversal oscillators (RSI, Stochastic, or MACD) that require compounding mathematical averages—which naturally introduces execution lag—this logic operates exclusively on raw spatial thresholds. By plotting step-line boundaries from static historical peaks and troughs, the exact tick distance of structural sweeps can be monitored without lagging indicators distorting the entries. =================================== (20-Bar Historical High)
▲ (The Sweep Wick: Price pierces high)
│
▼ (The Trap Snap: Next candle closes below low)
----------------------------------- (Setup Invalidation Floor)
2. The Multi-Phase State Isolation Engine To completely eliminate signal stacking and duplicate arrow cluster errors during highly volatile flushes, the logic utilizes a sequential State Machine Processor. State 0 (Ready / Flat): The script searches the chart data for a valid historical boundary breach. State 1 / -1 (Trap Active Zone): The moment a candle's wick runs outside the channel lines, the engine halts further search processing. It locks onto that specific bar index, saves its high/low coordinates as unique reference vectors, and opens a strict conditional confirmation window.
3. Strict 1-Bar Confirmation ValidationThe definitive edge of this strategy lies in its restricted window constraint: bar_index == setupBarIndex + 1.If a market-maker stop-hunt is legitimate, the price must immediately fail and reverse back inside the range on the very next candle. If the market continues to expand aggressively against the level for 2 or more bars, the state machine automatically self-resets to 0, clearing all variables. This mathematical restriction prevents the script from attempting to "catch a falling knife" during real macro trend expansions. Indicateur

BocchiTheTrader | Quantum Trend Matrix# BocchiTheTrader | Quantum Trend Matrix
## 🚀 OVERVIEW
In modern electronic markets, retail traders suffer from cognitive overload. Managing multiple charts, fragmented timeframes, and dozens of conflicting indicators often leads to analysis paralysis and execution delays.
The **Quantum Trend Matrix** by **BocchiTheTrader** solves this structural problem. It is an enterprise-grade, localized Heads-Up Display (HUD) that synthesizes a high-fidelity technical matrix directly onto your active trading workspace. By evaluating macro trend direction, multi-oscillator momentum, volume health, and volatility boundaries simultaneously, the QTM provides traders with an instantaneous snapshot of market confluence. It functions as a single, centralized source of truth for directional bias, asset strength, and execution validation.
---
## 📐 THE MATHEMATICAL & LOGICAL CORE
The dashboard works as a multi-indicator consensus engine, evaluating individual variables every single tick to update a structural confluence matrix:
* **Tri-Horizon Trend Architecture:** Evaluates directional health by processing price action relative to an optimized Simple Moving Average (SMA) across three distinct temporal planes: Macro-Weekly, Swing-Daily, and Intraday-Current.
* **Linear & Non-Linear Momentum Ensemble:**
* **MACD Line/Signal Cross:** Decodes classic directional velocity shifts.
* **Relative Strength Index (RSI-14):** Evaluates oversold/overbought thresholds based on a centralized 50-level mid-line axis.
* **Stochastic Oscillator (14, 3):** Measures the location of the close relative to the high-low range to catch rapid cyclical swing turns.
* **Gaussian Normalized Fisher Transform:** Applies an algebraic log transform to normalized RSI values, sharpening the turning points into crisp, highly responsive leading triggers.
* **Money Flow Index (MFI-14):** Combines price action with volume to determine institutional capital absorption or distribution.
* **Volatility & Structural Boundaries:**
* **Bollinger Bands (20, 2.0):** Isolates extreme price extensions. If price pierces the lower band, an exhaustion "Buy" state triggers; if it pierces the upper band, a "Sell" state triggers; otherwise, it remains balanced ("Neutral").
* **Trend Strength & Direction Balance (DMI/ADX):**
* **Directional Movement Index (DMI):** Identifies whether the positive ($+DI$) or negative ($-DI$) trend force is dominant.
* **Average Directional Index (ADX):** Quantifies the absolute strength of the move. Values below 25 trigger a "Weak" warning, while values above 25 confirm a true trending market.
* **Dynamic Exponential Ribbon (EMA 20/50):** Monitors the fast-to-slow exponential moving average cross to confirm immediate mechanical trend acceleration.
---
## 🚦 HOW TO TRADE WITH IT
### 🔹 Long-Side Execution Matrix (Confluence Buying)
1. **Macro Validation:** Ensure that the *Daily Trend* and *Current Trend* cells display **Bullish** (Mint Green).
2. **Momentum Alignment:** Look for a cluster of **Buy** signals across leading indicators (specifically *Fisher*, *MACD*, and *RSI*).
3. **Volatility Confirmation:** Verify that the *ADX* row indicates **Trend** ($>25$). This confirms that the bullish move has institutional momentum backing it.
4. **Entry Trigger:** Execute when the *EMA 20/50* row transitions to **Buy**.
### 🔸 Short-Side Execution Matrix (Confluence Shorting)
1. **Macro Validation:** Ensure that the *Daily Trend* and *Current Trend* cells display **Bearish** (Crimson Red).
2. **Momentum Alignment:** Look for a cluster of **Sell** signals across *MACD*, *Stoch*, *MFI*, and *RSI*.
3. **Volatility Confirmation:** If price breaks down past a structural level and *Bollinger* shifts out of neutral into an extreme state or *DMI* reads **Sell**, the downward expansion is confirmed.
4. **Entry Trigger:** Execute when the *EMA 20/50* transitions to **Sell**.
### 🛡️ Risk Management & Trailing Protocol
* **Invalidation Point:** If an established Long trade is running and more than three momentum cells (e.g., MACD, Stoch, Fisher) flip rapidly from **Buy** to **Sell**, it signals an impending distribution phase. Use this as an early warning indicator to tighten stop-losses or harvest partial profits before visual price rotation occurs.
---
## ⚠️ RISK DISCLAIMER
Financial market trading involves substantial risk of capital loss. Quantum Trend Matrix is engineered exclusively as a statistical and analytical workflow assistant. Past performance configurations do not dictate, guarantee, or imply future algorithmic outcomes. Always utilize strict capital allocation and risk mitigation frameworks. Indicateur

Multi Factor Divergence Confluence OscillatorMulti-Factor Divergence Confluence Oscillator
What it is
This indicator detects price/oscillator divergence on four independent indicator families at the same price pivots and reports how many of them agree. The lower-pane histogram shows the signed agreement count — positive (bullish) above the zero line, negative (bearish) below — and a signal is flagged only when at least N independent families diverge at the same swing. It is a context tool that measures agreement, not a buy/sell system, and it places no orders.
Why these components are combined (and why it is not just stacked indicators)
Divergence on a single oscillator is a weak, noisy signal. The instinctive "fix" is to stack several oscillators and look for agreement — but stacking RSI, Stochastic, MACD and similar tools does not create real confluence, because they are all rate-of-change of price. They are highly correlated, so a divergence on one almost always coincides with the others. That is one witness counted several times, which feels like confirmation while adding almost no new information.
Meaningful confluence requires independent witnesses. This script therefore measures divergence on four families chosen specifically because each looks at a different dimension of the same bar, and each covers a blind spot of the others:
Momentum — Relative Strength Index. The classic rate-of-change read. It says nothing about who is transacting or how far price has travelled.
Volume — Normalized Cumulative Volume Delta. Detrended, standardized signed volume — an order-flow read that is independent of price geometry. (Signed volume is estimated; see Limitations.)
Volatility — Parabolic-SAR-to-price extension, in ATR units. How stretched the current trend leg is relative to its trailing stop, normalized by volatility — a read that ignores both momentum and volume.
Forecast — price minus its linear-regression forecast. A z-scored "how far has price departed from its own fitted path" term, independent of the three above.
All four are rescaled to share polarity (up = bullish), so a single divergence rule applies to every engine and the counts are directly comparable. Counting agreement across these families is information; counting it within one family is not — that independence is the entire reason these four are combined, rather than four momentum clones.
How the parts work together
Each enabled family is reduced to one bounded, bullish-up oscillator.
At every confirmed price swing (the families share the same price pivots), each family is asked whether it diverges there. Bearish = price makes a higher high while the oscillator makes a lower high; bullish = price makes a lower low while the oscillator makes a higher low.
The number of agreeing families becomes the signed confluence histogram, with glowing tip dots on flagged signals and a connecting line/label on the pane.
A signal flag is raised only at or above the chosen agreement threshold. That threshold can adapt to the chart timeframe — lower timeframes are noisier, so by default 1–5m require four families, 15–60m require three, and above 60m require two.
How to use it
Read the height and sign of the histogram: how many independent families diverge, and in which direction. The flag lines and the optional shaded zones mark where agreement is strong (three or more).
Treat it as context that qualifies your own analysis, not a standalone trigger. A divergence marks where price and a flow/momentum read disagree; it can resolve either way. More agreement is rarer, not guaranteed-better.
The dashboard summarizes the last signal, which families diverged, the active engines, the current threshold, and whether the signed-volume estimate is using lower-timeframe data or the proxy.
Enable/disable any family, switch between regular (reversal) and hidden (continuation) divergence, and tune the pivot, gap and threshold settings to your instrument and style.
What is original
The originality is the integration discipline, not the individual techniques: divergence is measured only across deliberately independent families on one shared set of price pivots and one comparable axis, with an explicit rule that within-family agreement is excluded. The result is a single confluence read that resists the double-counting that ordinary multi-oscillator "confluence" tools fall into, plus a timeframe-adaptive agreement threshold and an honest, configurable, multi-market implementation.
Universal across markets (configurable data source)
The Price / High / Low sources are user-selectable in Settings, so the engine runs on any symbol, asset class or timeframe — equities, futures, forex, crypto or indices. The Volume family needs a symbol that reports real volume; otherwise it falls back to a high/low/close proxy, and the dashboard shows which is active. Defaults are tuned for NSE NIFTY index futures on intraday charts; change the sources, lengths and lower timeframe for any other instrument.
Concept credits
Relative Strength Index and Parabolic SAR — J. Welles Wilder Jr. Cumulative Volume Delta, linear-regression forecasting and price/oscillator divergence are standard, publicly documented techniques. This is an original integration built around those public concepts and is not affiliated with, nor endorsed by, any originator.
Limitations (honest)
Divergence is context, not a trigger. Signed volume is estimated from lower-timeframe sub-bars (or an intrabar proxy), not exchange aggressor data, so the Volume family is an approximation and is unreliable on instruments without real volume. Divergence confirms a few bars after its pivot — inherent to honest, non-repainting pivot detection. Past behaviour does not predict future results.
Disclaimer
For research and educational purposes only. This is not financial advice and carries no guarantee of profitability or accuracy. Indicators describe past behaviour; they do not predict the future. Trading involves risk of loss. Test out-of-sample and make your own decisions.
Indicateur

[Viprasol] Equilibrium Confluence EngineOverview
The Viprasol Equilibrium Confluence Engine is an original indicator that requires five independent, well-known trading conditions to agree before it prints a signal: an EMA trend filter, Fibonacci premium/discount location, a market-structure shift (CHoCH), a liquidity sweep, and a Fair Value Gap. Each of these concepts answers a different question about a trade — direction, location, structure, intent, and imbalance — and the engine only confirms when all of the enabled conditions line up on the same side within a configurable window. The on-chart panels (HOW IT WORKS legend, a live confluence checklist, and a strategy summary) make the logic self-explanatory directly on the chart.
It is built for traders who want a single, transparent confluence check instead of running five separate indicators and eyeballing whether they agree.
Why These Components Belong Together (Mashup Justification)
Each layer covers a dimension the others cannot, which is the reason they are combined rather than used alone:
- The EMA trend filter answers "which direction?" but says nothing about where to enter.
- Fibonacci equilibrium answers "is price cheap or expensive within the range?" but not whether momentum agrees.
- Market structure (CHoCH) answers "has the prevailing structure actually shifted?" but a shift alone can be a trap.
- The liquidity sweep answers "did price take liquidity before moving?" — the footprint that often precedes a real move — but needs direction and location to be actionable.
- The Fair Value Gap answers "is there an institutional imbalance for price to react to?" but an FVG in the wrong location or against the trend is low quality.
Used together, a signal only appears when momentum, location, structure, intent, and imbalance all point the same way — the combination is the point, not any single piece.
How It Works
1. EMA Trend Filter:
Two EMAs (default 9 and 15). The trend is bullish when the fast EMA is above the slow EMA and bearish when below. BUY confluence requires bullish trend; SELL requires bearish.
2. Fibonacci Equilibrium (dealing range):
The most recent confirmed swing high and swing low (from pivots of the swing length) define a dealing range. The 0.5 level is equilibrium; 0.236 and 0.786 are also drawn. Below 0.5 is the Discount zone (a relatively cheap "buy area"); above 0.5 is the Premium zone ("sell area"). BUY confluence requires price in discount; SELL requires premium. The range, levels, and zones are shaded and labeled with live prices.
3. Market Structure — CHoCH / BOS:
Swing highs and lows are tracked. When price closes through the prior swing high while structure was not already bullish, a bullish Change of Character (CHoCH) is marked; closing through the prior swing low while not already bearish marks a bearish CHoCH. Continuation breaks in the same direction are labeled BOS. BUY confluence requires a bullish CHoCH within the confluence window; SELL requires a bearish one.
4. Liquidity Sweep:
Sell-side liquidity is considered swept when a bar wicks below a prior swing low but closes back above it (stops taken, price rejected) — a bullish footprint. Buy-side liquidity is swept when a bar wicks above a prior swing high and closes back below — a bearish footprint. BUY confluence requires a recent bullish sweep; SELL a bearish one.
5. Fair Value Gap (FVG):
A bullish FVG is a 3-candle imbalance where the current low is above the high two bars back (low > high ); a bearish FVG is where the current high is below the low two bars back (high < low ). The gap is boxed and tracked. BUY confluence requires price inside a bullish FVG or a recent bullish FVG within the window; SELL the bearish equivalent.
Confluence Engine:
Each condition can be individually included or excluded. CHoCH, sweep, and FVG are event-based, so they remain "active" for a configurable Confluence Window (default 15 bars) using barssince, allowing the five conditions to line up even if they did not occur on the exact same bar. A confirmed BUY fires on the first bar all enabled BUY conditions are simultaneously true (and a SELL for the bear side), gated by a cooldown to prevent repeats. The dashboard shows a live BUY/SELL score out of 5, and the checklist panel shows exactly which conditions are met.
Risk Overlay:
On a confirmed signal, the engine projects Entry (signal close), Stop-Loss (beyond the relevant swing extreme plus an ATR buffer), and Take-Profit (Entry ± risk × Risk:Reward), with colored ENTRY/SL/TP price labels. Only the latest signal's projection is kept.
Key Features
- Five-factor confluence: EMA trend, Fib equilibrium, CHoCH structure, liquidity sweep, FVG
- Each factor independently toggleable in/out of the confluence
- Configurable confluence window so event-based factors can align
- Live BUY/SELL confluence score (x/5) and a tick/cross checklist panel
- Auto dealing range with 0 / 0.236 / 0.5 / 0.786 / 1 levels and shaded premium/discount zones
- CHoCH / BOS and liquidity-sweep labels
- FVG zone boxes that track until filled
- Entry/SL/TP risk overlay with price labels
- On-chart HOW IT WORKS legend and STRATEGY SUMMARY footer
- Signal cooldown to prevent clustering
- Seven alert conditions with dynamic {{ticker}}/{{close}}/{{interval}} messages
How to Use
Getting Started:
1. Add to a standard candlestick chart (not Heikin Ashi).
2. Read the HOW IT WORKS panel (left) and the live confluence checklist (right).
3. A BUY/SELL label prints only when every enabled condition is aligned; Entry/SL/TP project from it.
Tuning Confluence:
- For more signals, turn off one or two of the stricter conditions (e.g. FVG) or widen the Confluence Window.
- For higher conviction, keep all five on and shorten the window so conditions must be tightly clustered.
Recommended Starting Points:
- Intraday (5m-15m): Swing Length 10-12, Confluence Window 12-15, Cooldown 8
- Swing (1H-4H): Swing Length 15-20, Confluence Window 20, Cooldown 12
- Looser entries: disable FVG and/or Liquidity, keep Trend + Equilibrium + CHoCH
These are starting points only — every market and timeframe behaves differently. Backtest and adjust before trading live.
Settings
1 EMA Trend Filter: fast EMA, slow EMA, include-in-confluence toggle.
2 Fibonacci Equilibrium: swing pivot length, use discount/premium toggle, show range & levels, shade zones.
3 Market Structure: use CHoCH toggle, show CHoCH/BOS labels.
4 Liquidity Sweep: use sweep toggle, show sweep labels.
5 Fair Value Gap: use FVG toggle, show FVG zones.
Confluence Engine: confluence window (bars), signal cooldown.
Risk Overlay: show Entry/SL/TP, show price labels, ATR period, SL ATR buffer, Risk:Reward.
Visuals: show EMA lines, bull/bear colors.
On-Chart Panels: toggles for HOW IT WORKS, confluence checklist, strategy summary.
Dashboard: live dashboard toggle and position.
Alerts
1. Confirmed BUY — all enabled bullish conditions aligned
2. Confirmed SELL — all enabled bearish conditions aligned
3. Any Signal — either direction confirmed
4. Bullish CHoCH — a bullish change of character occurred
5. Bearish CHoCH — a bearish change of character occurred
6. Bullish Liquidity Sweep — sell-side liquidity was swept
7. Bearish Liquidity Sweep — buy-side liquidity was swept
All alerts include {{ticker}}, {{close}}, and {{interval}} for dynamic notification messages.
Limitations & Disclaimer
- Swing-based features (range, structure, liquidity) depend on confirmed pivots, which lag by the swing length; very recent swings are not yet confirmed.
- The dealing range uses the latest confirmed swing high and low; in strong one-directional moves the range can become stale until a new swing forms.
- CHoCH detection here uses closing breaks of the last swing; it is a practical approximation of the structure concept, not a full multi-leg structure model.
- FVG detection is the standard 3-candle definition and tracks only the most recent gap per direction for confluence.
- The confluence window means conditions need not occur on the same bar; widening it loosens signal quality, narrowing it tightens it — there is no single correct value.
- Entry/SL/TP lines are visual references only and do not place or manage trades.
- Past performance does not guarantee future results. This indicator is for educational and analytical purposes only and is not financial advice. Always use proper risk management and test on historical data before trading live.
Credits & Attribution
This is an original Viprasol indicator. It is built on standard, public-domain trading concepts — exponential moving averages, Fibonacci retracement / premium-discount equilibrium, market-structure Change of Character and Break of Structure, liquidity sweeps, and Fair Value Gaps (widely used ICT / Smart Money concepts) — implemented from scratch and combined into a single multi-factor confluence engine with a scoring system, configurable confluence window, risk overlay, and self-explaining on-chart panels. No third-party source code was reused.
Published open-source per TradingView House Rules.
Indicateur

ICT Confluence Framework[BullByte]ICT Confluence Framework is a structural price-action engine that monitors the chart for five independent ICT-style behaviors and fires a directional setup only when several of them align inside a short structural window. Designed for intraday traders on 1m–15m charts in crypto, indices, and futures, with an auto-adapter that rescales every meaningful lookback to the chart timeframe.
Most ICT tools draw one element - order blocks, liquidity pools, BOS lines - and leave the trader to combine them mentally. This framework does the combining, scores the result against the current market regime and volatility phase, and prints one clean setup with an Entry, two Reference Levels, and an Invalidation level. The chart stays focused on what is currently relevant - no permanent boxes, no arrows on every candle, no flashing icons.
WHY THIS IS NOT A MASHUP
No public indicator is imported, wrapped, or re-skinned. Every detector is written from first principles against raw OHLCV. The five detectors share four custom layers that no single public indicator provides:
- A common confluence scoring layer with adaptive per-pattern weighting
- A regime classifier based on path efficiency
- A volatility-phase filter based on rolling ATR percentile rank
- A signal lifecycle manager with deterministic outcome resolution
The originality is in how five orthogonal behaviors are unified into one decision - not in the behaviors themselves.
THE FIVE BEHAVIORS MONITORED
1. Liquidity Sweep + Reclaim
Price violates a recent swing extreme - taking out resting stops - then closes back inside the prior range within a short window. The classic stop-hunt-then-reverse footprint.
2. Stopping Volume
A high-volume bar at a local extreme that closes with a strong rejection wick. Marks a level where aggressive flow was absorbed by passive flow.
3. Range Compression to Expansion
A bar that is the narrowest of its recent window is immediately followed by an expansion bar of meaningful size. A bullish expansion contributes to a bullish setup; a bearish expansion to a bearish one.
4. Break of Structure (BOS)
A close beyond the last confirmed pivot high or low. The script uses 3-bar right-confirmed pivots, so BOS prints with structural lag by design - this removes false breaks.
5. Order Block Mitigation
Price returns to the last opposing candle preceding a strong impulse, wicks into it, and closes back outside the zone.
Each behavior is detected independently against raw price and volume.
WHY THESE FIVE
At structural turning points markets do a small number of distinct things: they trap traders (sweep), they absorb flow (stopping volume), they release energy (compression-expansion), they confirm intent (BOS), and they retest origin (order block). When two or more of these align within the same structural window on the same side, the setup quality is materially higher than any one of them in isolation.
WHAT MAKES THIS DIFFERENT
Signals are stable. Detection and signal arming occur only on confirmed bar close. Once a setup prints, it does not move, redraw, or vanish on the next tick.
The script adapts to your chart. Every pattern carries a rolling reliability score calculated from its own follow-through history on the instrument and timeframe you are viewing. Follow-through is measured as maximum favorable excursion in ATR multiples over a configurable evaluation window. Patterns that have been working get more weight; patterns that have been failing get less, bounded by a user-set floor so no pattern is fully silenced.
Market regime is respected. An efficiency ratio (net displacement divided by path length) classifies the market as Trend Up, Trend Down, Range, Volatile, or Neutral. Inside this classification, BOS in a Range is soft-weighted to 0.4x and Expansion in a Volatile regime is soft-weighted to 0.5x. Counter-trend setups inside a strong trend are weighted down to 0.5x but still allowed.
Volatility phase aware. The current ATR's percentile rank classifies the bar as Quiet, Normal, or Active. Active phase tightens the required pattern count by one (capped at five). Quiet and Normal use the user's setting unchanged.
Confluence decay. A residual opposing score decays linearly by 1.0 per bar with no fresh pattern activity, so a stale opposing cluster cannot block a fresh signal indefinitely. The decayed value is also reset to zero on trade closure so the post-cooldown chart starts clean.
The chart stays clean. While no trade is active, the Hunting Layer shows what the script is monitoring. The moment a signal fires, every hunting visual that did not contribute to the signal and is not contextually inside the trade's expected path is erased. Contributors and contextual zones are recolored to the signal's direction and promoted into permanent history.
CHART EXAMPLE
1.ETH/USD 15m: Bullish Alignment: Expansion + BOS. Following a sharp bearish leg into a session low near 08:00, price entered a tight compression range between approximately 10:30 and 12:00. An expansion bar then broke above the last confirmed swing high (the LH pivot at ~11:00), firing the Compression-to-Expansion and Break of Structure detectors simultaneously. The framework printed a Bullish Alignment at 2036.60 with Invalidation at 2022.77. The market has advanced through Reference Level 1 (2050.43) and is approaching Reference Level 2 (2064.27).
2.ETH/USD 15m: Bullish High-Confluence: Sweep + BOS + OB. During a Range regime under Active volatility phase (which tightened the confluence requirement to three patterns), price swept the sellside liquidity at approximately 10:30 below a confirmed swing low. After consolidation, the entry bar at approximately 13:30 mitigated a bullish Order Block and broke above the local pivot. Three patterns aligned at signal close, firing a Bullish High-Confluence setup at 2118.34 with Invalidation at 2097.19. The market is currently advancing toward Reference Level 1 (2139.49) and Reference Level 2 (2160.64
3.ETH/USD 15m: Bearish Alignment: StopVol + BOS. Following a multi-hour consolidation between approximately 10:00 and 13:00 near the 2115–2125 area, price rejected the consolidation high with a high-volume bar at approximately 13:00, then broke below the local pivot. Stopping Volume and Break of Structure aligned on the same bar in a Volatile regime, firing a Bearish Alignment at 2110.89 with Invalidation at 2133.24. The setup is currently in progress, advancing toward Reference Level 1 (2088.54) and Reference Level 2 (2066.18), with a large sellside liquidity pool sitting in the path.
HOW TO READ THE OUTPUT
When a setup fires you will see four horizontal levels with right-side labels:
ENTRY (solid line, signal-direction color)
The closing price of the signal bar.
REFERENCE LEVEL 1 (dashed line, reference color)
Placed at 1R by default. Informational only - the setup does not close here. Useful for partial-exit planning or scaling.
REFERENCE LEVEL 2 (dashed line, reference color)
Placed at 2R by default. Reaching this level closes the setup as a success.
INVALIDATION (dotted line, invalidation color)
Placed at 3 ATR from entry by default. Reaching this level closes the setup as a failure.
Outcome and historical record
The setup closes when either Reference Level 2 or Invalidation is reached intrabar. Outcome is detected on the bar's high/low. When a single bar's range spans both levels, the setup closes on that bar; the script does not assume intrabar order, so the user should treat such ambiguous closures cautiously when reviewing historical results.
When the trade closes, right-side labels and connectors are removed and the four lines freeze at the closure bar. The signal label at the firing bar remains as a permanent record. To keep object counts within TradingView limits on long histories, the script retains the most recent 400 signal labels and the most recent 400 closed-trade lines; older items are recycled automatically.
COOLDOWN
After any trade closes, the script waits a configurable number of bars before arming the next setup. Prevents back-to-back firing on noisy moves.
THE DASHBOARD
A 9-row status panel reports:
Regime - Trend Up, Trend Down, Range, Volatile, or Neutral.
Phase - Quiet, Normal, or Active.
Pattern rows - for each of the five behaviors: rolling Activity count and a Low / Medium / High Emphasis rating based on recent follow-through reliability on this chart.
Patterns Required - the integer minimum that must align for a signal to fire on the current bar. Equal to your "Minimum Patterns Required" input in Quiet and Normal phases; tightened by one (capped at five) in Active phase.
Status - Ready, Cooldown, or Signal Active.
THE HUNTING LAYER
Drawn while no trade is active and the script is hunting for confluence:
Buyside Liquidity zones - blue boxes above swing highs.
Sellside Liquidity zones - teal boxes below swing lows.
Bullish Order Blocks - teal boxes at the last bearish candle before a strong bullish impulse.
Bearish Order Blocks - red boxes at the last bullish candle before a strong bearish impulse.
Compression bars - amber boxes on narrow-range candles.
Stopping Volume markers - amber triangles at high-volume rejection candles at local extremes.
BOS labels - text labels at confirmed structural breaks, centered on the broken level.
Sweep markers - text labels at the bar where price violated a confirmed pivot extreme, marking where liquidity was taken.
Reclaim labels - text labels at the bar where price closed back inside the prior range, confirming the sweep. Together with the Sweep marker, these tell the complete two-event Sweep+Reclaim story.
HH / HL / LH / LL pivot labels - market structure narration. Pivots are independent of the BOS module switch and are shown whenever the pivot toggle is enabled.
Duplicate BOS, Sweep, and Reclaim markers at the same price level within a recent window are automatically suppressed. Each confirmed pivot can be swept and reclaimed at most once until a new pivot forms.
At signal fire
Each active hunting item is evaluated:
- If its pattern type contributed to the signal, it is recolored to the signal's direction and promoted to history.
- If it is a liquidity zone or order block sitting inside the trade's expected path AND structurally aligned with the trade, it is promoted as context.
- Everything else is erased instantly.
At signal fire, BOS and Reclaim markers are explicitly drawn so every fired setup carries its structural anchor. The Reclaim marker is guaranteed when the Sweep pattern contributed; the BOS marker is drawn when BOS contributed and no recent BOS marker exists at the same level.
TIMEFRAME GUIDANCE
1m and 3m - high-frequency scalping on liquid pairs (BTC/USDT, ETH/USDT, NQ, ES).
5m and 15m - intraday swing entries on the same instruments and other liquid markets.
30m and above - functional but signal frequency drops noticeably; suitable for positional approaches.
The Auto-Calibrate by Timeframe input automatically scales swing lookback, ATR length, volume lookback, sweep window, stopping-volume percentile, and compression lookback. Disable only for full manual control.
HOW TO USE IT
1. Load on a clean chart. Leave Auto-Calibrate enabled.
2. Watch the Hunting Layer to see what the script is monitoring.
3. Wait for a signal label to print at bar close. The label text lists the contributing patterns.
4. The four levels appear automatically.
5. The setup auto-closes when Reference Level 2 or Invalidation is reached. After cooldown, hunting resumes.
INPUTS GUIDE
Auto-Calibrate by Timeframe - master switch that scales all lookbacks to the chart timeframe.
Pattern Modules - enable or disable any of the five detectors individually.
Core Parameters - manual swing, ATR, and volume lookbacks (used when Auto-Calibrate is OFF).
Pattern Tuning - per-pattern sensitivity controls.
Adaptive Learning - evaluation window, follow-through threshold in ATR multiples, learning memory, and minimum emphasis floor.
Regime Filter - toggle regime awareness and set its lookback.
Volatility Phase - toggle phase-based threshold tightening and set its lookback.
Confluence Decay - toggle linear decay of residual opposing scores.
Output - Quiet Mode (only High-Confluence tier fires), minimum patterns required, cooldown bars, RR for Reference Levels 1 and 2, Invalidation distance in ATR multiples, and label offset from the last bar.
Visual - color tones for bullish, bearish, reference, invalidation, and label background.
ICT Hunting Layer - individual toggles and color controls for every visual element and the legend panel.
ALERTS
Six alert conditions cover every tier and direction combination:
- Bullish High-Confluence
- Bearish High-Confluence
- Bullish Alignment
- Bearish Alignment
- Bullish Watch
- Bearish Watch
Add through the standard TradingView alert dialog.
TECHNICAL NOTES
- All pattern detection and signal arming occur on confirmed bar close. No intrabar fires, no repaint.
- No request.security() calls. No higher-timeframe lookups. No lookahead modifiers. No future leakage.
- Pivots use 3-bar right confirmation - structural lag is intentional and removes false breaks.
- The script uses one active trade slot at a time. New setups can only arm after the current one closes and cooldown expires.
- Same-bar conflict between Reference Level 2 and Invalidation resolves conservatively as invalidation. This is the honest interpretation when intrabar order is unknown.
- Object retention is bounded: 400 signal labels, 400 closed-trade lines, 400 hunting-history items. Adaptive learning memory is configurable up to 1000 bars per pattern.
WHAT THIS SCRIPT IS NOT
- Not a strategy. It does not place trades or compute P&L.
- Not a holy grail. No indicator is.
- Not a black box. Every threshold and lookback is exposed as an input.
- Not predictive. It reacts to confirmed structural events at bar close.
DISCLAIMER
This script is published as an open-source educational and analytical tool. It does not constitute financial advice, a recommendation to buy or sell any instrument, or any guarantee of future performance. Past behavior of any pattern on any chart does not guarantee future results. You are solely responsible for your trading decisions, your risk management, and your testing on a demo environment before any live use. The author and TradingView accept no liability for losses incurred from use of this script.
CREDITS
Concepts inspired by public ICT (Inner Circle Trader) educational material. All detection logic, scoring, regime classification, adaptive learning, lifecycle management, and visualization is original implementation by the author. Indicateur

Confluence Matrix Multi-Timeframe RegimeCONFLUENCE MATRIX — Multi-Timeframe Regime & Accuracy-Weighted Bias
================================================================================
WHAT THIS SCRIPT IS
A multi-timeframe decision panel. Across a fixed ladder of nine timeframes
(1m, 3m, 5m, 15m, 30m, 60m, 120m, 240m, Daily) it measures the same five
technical factors — trend, momentum, structure, volume flow and mean-reversion —
normalises each to a comparable scale, and fuses them into one directional bias
per timeframe. It then compares the timeframes to each other: how strongly they
agree (a confluence meter), how many of the nine are aligned, and whether the
fast timeframes are turning against the slow ones (a transition). It flags moves
that are exhausted, shows where volatility is compressing, and reports past-only
how often the overall bias has actually been followed through on the current
symbol, with a confidence interval.
WHY THE COMPONENTS ARE COMBINED (how the parts work together)
These are not separate indicators stacked in one pane. They are five reads of
the same question — "what is price doing and should I trust it?" — chosen
because they fail in different conditions, so combining them removes each
other's blind spots, and reading them across a full timeframe ladder removes the
blind spot of any single chart:
- TREND: an ATR SuperTrend blended with a moving-average stack. The SuperTrend
flips with less lag than a moving average alone; the stack confirms direction.
- MOMENTUM: MACD histogram + RSI + Stochastic. A three-oscillator read is harder
to whipsaw than any one of them.
- STRUCTURE: location of price within the recent range — acceptance in the
middle versus pressure at the edges.
- VOLUME FLOW: money-flow combined with position relative to the anchored VWAP,
i.e. whether price is above or below the session's volume-weighted fair value.
- MEAN-REVERSION: deviation from an adaptive equilibrium whose responsiveness
scales with the efficiency ratio. This is the counterweight that fades
extension — correct in a range, wrong in a trend.
Because a factor that helps in one regime hurts in another, the fusion is
governed by two layers that decide how much to trust each factor:
1. REGIME WEIGHTING. Each timeframe classifies its own regime from the
efficiency ratio, ADX and relative volatility, and reweights the factors
accordingly — trend and momentum lead in a trend, mean-reversion leads in a
range, and confidence is damped when volatility is elevated. A daily that is
trending and a 5-minute that is ranging are therefore scored by different
logic, which is the whole point of a multi-timeframe read.
2. PROVEN-ACCURACY WEIGHTING. The script tracks, on past bars only, how often
each individual factor's signal has been followed through on THIS symbol, and
scales that factor's weight by its measured hit-rate. So the fusion becomes
regime x proven-accuracy: on a symbol where, historically, mean-reversion has
paid and trend has not, the panel learns that and weights accordingly. This
is what turns a generic vote into a calibrated, symbol-aware read.
Two further layers handle the traps and the timing:
- EXHAUSTION. A fully-aligned stack that is also over-extended is the classic
"everything agrees right at the turn" trap. Exhausted timeframes are marked,
and the confluence meter is damped so that alignment-with-exhaustion is not
mistaken for high conviction.
- SQUEEZE. A read of where Bollinger bands sit inside Keltner channels —
volatility compression that tends to precede expansion. This adds timing
(when a move may start) to the directional read (which way).
The cross-timeframe layer then turns the nine composites into one verdict:
overall direction, a confluence meter, an alignment count, and a fast-versus-slow
transition flag. Calibration of the overall bias keeps the headline honest by
measuring its real follow-through on the current symbol.
HOW IT WORKS (mechanics, briefly)
Each timeframe's factors are computed with standard confirmation and requested
non-repainting; history does not change after the fact. The per-symbol accuracy
weights and the headline follow-through are built by recording a signal's
direction when it forms and checking, a fixed number of bars later, whether
price travelled a chosen ATR multiple in that direction, then aggregating into a
rate with a Wilson confidence interval. All thresholds are ATR-relative, so
nothing is tied to a particular price scale.
HOW TO USE
1. Read the headline bar (overall bias) and the CONFLUENCE meter, then scan the
Bias column down the ladder for a long aligned run.
2. A "!" on a Bias cell means that timeframe is exhausted; high alignment with
exhaustion is lower conviction, and the meter already reflects that.
3. Watch STATE (FULL STACK / TRANSITION) and the SQUEEZE row for timing.
4. Weight the read by FOLLOW-THROUGH — the overall bias's measured hit-rate here.
5. Everything is descriptive context, not a signal to act on.
USE ON ANY MARKET
The Price source input drives the trend, momentum, mean-reversion and structure
reads, so you can run the panel on standard candles, Heikin-Ashi, or another
price series across stocks, indices, futures, forex and crypto. High, low and
volume stay native for the range and flow factors, and a volume-borrow input
supplies volume for symbols that report none.
WHAT MAKES IT ORIGINAL
The contribution is the fusion, not the individual factors, which are standard.
Here the same regime-adaptive, volatility-normalised composite is computed
identically across a timeframe ladder, then weighted further by each factor's
past-only, per-symbol accuracy, with exhaustion damping and explicit alignment,
transition and squeeze context. A multi-timeframe panel that learns which
factors to trust on each symbol, and that damps alignment when a move is
exhausted, is the part that is not available elsewhere.
SETTINGS WORTH KNOWING
- Timeframe Ladder: the nine timeframes are editable.
- Fusion: toggle proven-accuracy weighting, exhaustion damping and the squeeze
read; the higher-timeframe emphasis slider controls how much slow timeframes
count in the overall (0 = equal weighting).
- Calibration: horizon and minimum follow-through define what counts as a
"followed-through" signal for both the accuracy weights and the headline rate.
- External signals (optional): three source inputs accept directional exports
from other indicators and blend them into the overall composite at the chart
timeframe; price sources are auto-ignored.
- Visuals: theme is auto/dark/light; size is Tiny/Small/Normal; the identity
strip shows the script name, symbol and timeframe.
NOTE ON TIMEFRAMES BELOW THE CHART
A timeframe lower than the chart returns its most recent value rather than a full
aggregated history. For a fully historical view of the fast rows, load the
indicator on a low chart timeframe; for a live current-state read, every row is
valid at any chart timeframe.
LIMITATIONS
Higher-timeframe values reflect the developing bar in real time; history is
non-repainting. Volume flow and anchored VWAP need real (or borrowed) volume. The
accuracy weighting and follow-through describe PAST behaviour only — they are not
a backtest and not a probability of future results. Every read is probabilistic
context, never a certainty.
DISCLAIMER
This is a study / indicator for chart analysis and education only. It is not a
strategy, not a recommendation, and not financial advice. It places no orders and
guarantees no outcome. Markets carry risk, and the past behaviour of a signal
does not assure its future behaviour. Do your own research and manage your own
risk.
Indicateur