Volume Profile Free Pro (25 Levels Value Area VWAP) by RRBVolume Profile Free Pro by RagingRocketBull 2019
Version 1.0
All available Volume Profile Free Pro versions are listed below (They are very similar and I don't want to publish them as separate indicators):
ver 1.0: style columns implementation
ver 2.0: style histogram implementation
ver 3.0: style line implementation
This indicator calculates Volume Profile for a given range and shows it as a histogram consisting of 25 horizontal bars.
It can also show Point of Control (POC), Developing POC, Value Area/VWAP StdDev High/Low as dynamically moving levels.
Free accounts can't access Standard TradingView Volume Profile, hence this indicator.
There are 3 basic methods to calculate the Value Area for a session.
- original method developed by Steidlmayr (calculated around POC)
- classical method using StdDev (calculated around the mean VWAP)
- another method based on the mean absolute deviation (calculated around the median)
POC is a high volume node and can be used as support/resistance. But when far from the day's average price it may not be as good a trend filter as the other methods.
The 80% Rule: When the market opens above/below the Value Area and then returns/stays back inside for 2 consecutive 30min periods it has 80% chance of filling VA (like a gap).
There are several versions: Free, Free Pro, Free MAX. This is the Free Pro version. The Differences are listed below:
- Free: 30 levels, Buy/Sell/Total Volume Profile views, POC
- Free Pro: 25 levels, +Developing POC, Value Area/VWAP High/Low Levels, Above/Below Area Dimming
- Free MAX: 50 levels, packed to the limit
Features:
- Volume Profile with up to 25 levels (3 implementations)
- POC, Developing POC Levels
- Buy/Sell/Total/Side by Side View modes
- Side Cover
- Value Area, VAH/VAL dynamic levels
- VWAP High/Low dynamic levels with Source, Length, StdDev as params
- Show/Hide all levels
- Dim Non Value Area Zones
- Custom Range with Highlighting
- 3 Anchor points for Volume Profile
- Flip Levels Horizontally
- Adjustable width, offset and spacing of levels
- Custom Color for POC/VA/VWAP levels and Transparency for buy/sell levels
Usage:
- specify max_level/min_level for a range (required in ver 1.0/2.0, auto/optional in ver 3.0 = set to highest/lowest)
- select range (start_bar, range length), confirm with range highlighting
- select mode Value Area or VWAP to show corresponding levels.
- flip/select anchor point to position the buy/sell levels, adjust width and spacing as needed
- select Buy/Sell/Total/Side by Side view mode
- use POC/Developing POC/VA/VWAP High/Low as S/R levels. Usually daily values from 1-3 days back are used as levels for the current day.
- Green - buy volume of a specific price level in a range, Red - sell volume. Green + Red = Total volume of a price level in a range
There's no native support for vertical histograms in Pinescript (with price axis as base)
Basically, there are 4 ways to plot a series of horizontal bars stacked on top of each other:
1. plotshape style labeldown (ver 0 prototype discarded)
- you can have a set of fixed width/height text labels consisting of a series of underscores and moving dynamically as levels. Level offset controls visible length.
- you can move levels and scale the base width of the volume profile histogram dynamically
- you can calculate the highest/lowest range values automatically. max_level/min_level inputs are optional
- you can't fill the gaps between levels/adjust/extend width, height - this results in a half baked volume profile and looks ugly
- fixed text level height doesn't adjust and looks bad on a log scale
- fixed font width also doesn't scale and can't be properly aligned with bars when zooming
2. plot style columns + hist_base (ver 1.0)
- you can plot long horizontal bars using a series of small adjacent vertical columns with level offsets controlling visible length.
- you can't hide/move levels of the volume profile histogram dynamically on each bar, they must be plotted at all times regardless - you can't delete the history of a plot.
- you can't scale the base width of the volume profile histogram dynamically, can't set show_last from input, must use a preset fixed width for each level
- hist_base can only be a static const expression, can't be assigned highest/lowest range values automatically - you have to specify max_level/min_level manually from input
- you can't control spacing between columns - there's an equalizer bar effect when you zoom in, and solid bars when you zoom out
- using hist_base for levels results in ugly load/redraw times - give it 3-5 sec to finalize its shape after each UI param change
- level top can be properly aligned with another level's bottom producing a clean good looking histogram
- columns are properly aligned with bars automatically
3. plot style histogram + hist_base (ver 2.0)
- you can plot long horizontal bars using a series of small vertical bars (horizontal histogram) instead of columns.
- you can control the width of each histogram bar comprising a level (spacing/horiz density). Large enough width will cause bar overlapping and give level a "solid" look regardless of zoom
- you can only set width <= 4 in UI Style - custom textbox input is provided for larger values. You can set width and plot transparency from input
- this method still uses hist_base and inherits other limitations of ver 2.0
4. plot style lines (ver 3.0)
- you can also plot long horizontal bars using lines with level offsets controlling visible length.
- lines don't need hist_base - fast and smooth redraw times
- you can calculate the highest/lowest range values automatically. max_level/min_level inputs are optional
- level top can't be properly aligned with another level's bottom and have a proper spacing because line width uses its own units and doesn't scale
- fixed line width of a level (vertical thickness) doesn't scale and looks bad on log (level overlapping)
- you can only set width <= 4 in UI Style, a custom textbox input is provided for larger values. You can set width and plot transparency from input
Notes:
- hist_base for levels results in ugly load/redraw times - give it 3-5 sec to finalize its shape after each UI param change
- indicator is slow on TFs with long history 10000+ bars
- Volume Profile/Value Area are calculated for a given range and updated on each bar. Each level has a fixed width. Offsets control visible level parts. Side Cover hides the invisible parts.
- Custom Color for POC/VA/VWAP levels - UI Style color/transparency can only change shape's color and doesn't affect textcolor, hence this additional option
- Custom Widh for levels - UI Style supports only width <= 4, hence this additional option
- POC is visible in both modes. In VWAP mode Developing POC becomes VWAP, VA High and Low => VWAP High and Low correspondingly to minimize the number of plot outputs
- You can't change buy/sell level colors (only plot transparency) - this requires 2x plot outputs exceeding max 64 limit. That's why 2 additional plots are used to dim the non Value Area zones
- Use Side by Side view to compare buy and sell volumes between each other: base width = max(total_buy_vol, total_sell_vol)
- All buy/sell volume lengths are calculated as % of a fixed base width = 100 bars (100%). You can't set show_last from input
- Sell Offset is calculated relative to Buy Offset to stack/extend sell on top of buy. Buy Offset = Zero - Buy Length. Sell Offset = Buy Offset - Sell Length = Zero - Buy Length - Sell Length
- If you see "loop too long error" - change some values in UI and it will recalculate - no need to refresh the chart
- There's no such thing as buy/sell volume, there's just volume, but for the purposes of the Volume Profile method, assume: bull candle = buy volume, bear candle = sell volume
- Volume Profile Range is limited to 5000 bars for free accounts
P.S. Cantaloupia Will be Free!
Links on Volume Profile and Value Area calculation and usage:
www.tradingview.com
stockcharts.com
onlinelibrary.wiley.com
Recherche dans les scripts pour "pro"

Reversal Detection v3.1 - Real-Time Pro (Non-Repainting)Reversal Detection Pro v3.1 - Universal Non-Repainting
ACKNOWLEDGMENTS
Special thanks to @ksiva100 for extensive testing and detailed feedback on v3.0 that led to the major improvements in v3.1. Their real-world testing on GC, ES, NQ, NG, and CL futures across 3-5 minute timeframes identified critical issues with sensitivity scaling and helped shape the universal ATR-adaptive system that makes this version work seamlessly across all instruments and timeframes.
Community feedback like this is invaluable in creating better tools for all traders.
FULL DESCRIPTION:
OVERVIEW
Reversal Detection Pro v3.1 is a non-repainting reversal identification system designed for futures trading across all timeframes. The indicator uses ATR-adaptive thresholds combined with a zigzag-based pivot detection algorithm to identify confirmed price reversals. A triple EMA trend filter provides directional context, while optional supply/demand zones highlight key reversal areas.
The indicator automatically scales to any instrument's price level and volatility through its ATR-adaptive mechanism, eliminating the need for manual threshold adjustments when switching between instruments or timeframes.
KEY FEATURES
Non-Repainting Confirmation System
All confirmed reversal signals are final and do not disappear or move to different bars. The indicator includes an optional preview mode that shows potential reversals before confirmation, clearly labeled to distinguish them from confirmed signals. Users can add extra confirmation bars for additional validation before signals appear.
ATR-Adaptive Sensitivity
The indicator uses Average True Range (ATR) as its primary sensitivity mechanism. Five preset sensitivity levels (Very High, High, Medium, Low, Very Low) multiply the ATR by factors ranging from 0.8x to 3.5x. This approach automatically adapts to:
Different price levels (works equally on $25 micro futures and $25,000 instruments)
Varying volatility conditions (calm vs. volatile markets)
Multiple timeframes (1-minute through daily charts)
Different trading sessions (regular hours vs. after-hours)
Triple EMA Trend Detection
Three exponential moving averages (9, 14, and 21 periods) create a trend identification system. The info table displays current trend status as BULLISH, BEARISH, or NEUTRAL. Strong signals occur when a reversal aligns with the prevailing trend direction.
Supply and Demand Zones
Optional rectangular zones display at confirmed pivot points. These zones are color-coded (green for demand/support, red for supply/resistance) and can be configured for thickness, extension length, and maximum number displayed. Zones can be toggled on or off independently of reversal signals.
Information Display Table
A customizable table shows real-time indicator settings including:
Current signal mode (Confirmed Only, Preview, or Both)
Active sensitivity preset
ATR multiplier value
Percentage threshold
Current ATR reading
Calculated reversal threshold
Current trend status
Comprehensive Alert System
Eight different alert conditions cover all signal types:
Bullish reversal confirmed
Bearish reversal confirmed
Any reversal (combined)
EMA buy signal (trend change to bullish)
EMA sell signal (trend change to bearish)
Trend changed to bullish
Trend changed to bearish
Strong bullish (reversal + bullish trend aligned)
Strong bearish (reversal + bearish trend aligned)
HOW IT WORKS
Reversal Detection Algorithm
The indicator tracks price using a zigzag methodology that requires a minimum reversal amount before confirming a pivot. This reversal threshold is calculated using three components:
ATR Component (Primary): ATR × Sensitivity Multiplier
Percentage Component (Safety Floor): Close Price × Percentage Threshold
Absolute Component (Minimum Floor): Fixed dollar/point amount
The reversal threshold equals whichever of these three values is largest. This ensures appropriate sensitivity across all instruments and timeframes.
Pivot Confirmation Process
Price must move in one direction to establish a high or low pivot point. When price reverses by the minimum threshold amount, that pivot is confirmed. A reversal signal triggers when price subsequently breaks through the previous confirmed pivot in the opposite direction.
Signal Generation
Green labels and lines: Bullish reversal confirmed (buy signal)
Red labels and lines: Bearish reversal confirmed (sell signal)
Preview labels (if enabled): Potential reversals not yet confirmed (semi-transparent)
Trend Filter Operation
The 9/14/21 EMA system identifies trend direction:
BULLISH: 9 EMA > 14 EMA > 21 EMA, with price above 9 EMA
BEARISH: 9 EMA < 14 EMA < 21 EMA, with price below 9 EMA
NEUTRAL: EMAs not in sequential order
Strong signals occur when reversals align with trend direction.
HOW TO USE
Initial Setup
Add Indicator to Chart
Search "Reversal Detection Pro v3.1" in TradingView indicators
Click to add to any futures chart
Default settings work immediately on any instrument/timeframe
Choose Signal Mode (Signal Controls section)
Confirmed Only: Shows only final, non-repainting signals (recommended for trading)
Confirmed + Preview: Shows both confirmed and potential signals
Preview Only: Shows only potential signals (educational/learning mode)
Set "Extra Confirmation Bars" to 0 for immediate signals, or 1-5 for additional validation
Select Sensitivity (Main Controls section)
Very High: Maximum signals, catches small swings (0.8× ATR)
High: Active trading with more opportunities (1.2× ATR)
Medium: Balanced quality and quantity - recommended starting point (2.0× ATR)
Low: Conservative, higher quality signals (2.8× ATR)
Very Low: Major reversals only, highest quality (3.5× ATR)
Recommended Settings by Timeframe
1-2 Minute Charts (Ultra-Short Scalping)
Sensitivity: High or Very High
Confirmation Bars: 0
Expected: 10-20+ signals per session
Best for: Quick scalps, high-frequency trading
3-5 Minute Charts (Active Day Trading)
Sensitivity: Medium or High
Confirmation Bars: 0-1
Expected: 5-15 signals per session
Best for: Standard scalping, intraday swings
15-30 Minute Charts (Swing Trading)
Sensitivity: Medium or Low
Confirmation Bars: 0-1
Expected: 2-8 signals per session
Best for: Larger intraday swings, part-time trading
1-4 Hour Charts (Position Trading)
Sensitivity: Low or Very Low
Confirmation Bars: 1-2
Expected: 1-5 signals per week
Best for: Multi-day position trades
Daily Charts (Long-Term Swing Trading)
Sensitivity: Very Low
Confirmation Bars: 1-3
Expected: 1-4 signals per month
Best for: Weekly to monthly swing trades
Customizing Display
Supply/Demand Zones (Zones section)
Enable "Show Supply/Demand Zones" to display rectangular areas at pivots
Adjust "Number of Zones" to control how many recent zones appear (0-20)
Set "Zone Box Extension" for forward projection length (5-100 bars)
Modify "Zone Thickness" as percentage of price (0.01%-0.2%)
Visual Elements (Labels section)
"Stop Line Extension": Length of horizontal lines at reversal points (1-50 bars)
"Maximum Lines to Display": Limits historical lines visible (3-50)
"Label Size": Small, Normal, or Large text
Information Table (Info Table section)
Toggle "Show Info Table" on/off
Choose "Table Position": Six position options
Select "Table Size": Tiny through Huge
Setting Up Alerts
Click the "Alert" button (clock icon) on TradingView
Select "Reversal Detection Pro v3.1" from Condition dropdown
Choose specific alert type or "Any REVERSAL" for all signals
Set "Options" to "Once Per Bar Close" (recommended)
Configure notifications (popup, email, SMS, webhook)
Name your alert and click "Create"
For highest-probability trades, use "STRONG Bullish Signal" and "STRONG Bearish Signal" alerts which combine reversals with trend confirmation.
Advanced Settings (Custom Mode)
For experienced users, selecting "Custom" sensitivity unlocks manual control:
Calculation Method: "average" for smoother signals, "high_low" for more responsive
Percentage Reversal: Manual percentage threshold (0.01%-1.0%)
Absolute Reversal: Fixed dollar/point minimum ($0.01-$50)
ATR Multiplier: Manual ATR multiplication factor (0.1-10.0)
ATR Length: Period for ATR calculation (1-50, standard is 14)
Average Length: Smoothing period for high/low when using "average" method (1-50)
Trading Workflow Example
Identify Market Context
Check info table for trend status (BULLISH, BEARISH, NEUTRAL)
Note current ATR and reversal threshold values
Observe recent reversal signal quality
Wait for Signal
Green label = potential long entry (bullish reversal)
Red label = potential short entry (bearish reversal)
Horizontal line shows reversal pivot level
Evaluate Signal Quality
Strongest signals align with trend (STRONG alerts)
Check if reversal occurs at supply/demand zone
Verify adequate volume on reversal bar
Execute Trade
Enter on signal confirmation
Place stop loss below/above reversal pivot line
Target next supply/demand zone or opposing reversal signal
Manage Position
Trail stop loss with price movement
Take partial profits at zones
Exit on opposing reversal signal or stop hit
Multi-Timeframe Analysis
For optimal results, use multiple timeframes:
Higher timeframe (3-5× larger): Determine overall trend direction
Trading timeframe: Execute trades on reversal signals
Lower timeframe (3-5× smaller): Fine-tune entries and exits
Example: Trade ES futures
1 Hour chart: Identify BULLISH trend
5 Minute chart: Take only green (long) reversal signals
1 Minute chart: Time precise entry after signal appears
IMPORTANT USAGE NOTES
Understanding Signal Timing
This is a reversal identification indicator, not a prediction tool. Signals appear AFTER price begins reversing from a pivot, not at the exact top or bottom. This is intentional design - the confirmation process ensures reliability at the cost of capturing the absolute extremes.
Timeframe and Signal Frequency
Higher timeframes naturally produce fewer signals. This is correct behavior:
Daily charts: 1-4 signals per month is normal
1-hour charts: 1-5 signals per week is normal
5-minute charts: 5-15 signals per day is normal
1-minute charts: 10+ signals per hour is normal
If you want more signals, either use a lower timeframe or higher sensitivity setting.
Optimal Market Conditions
Best performance occurs during:
Regular trading hours (RTH) with normal volume
Trending or ranging markets
Liquid instruments with tight spreads
Normal volatility environments
Reduced performance may occur during:
Major economic announcements (FOMC, NFP, CPI)
Opening gaps or halted trading
Extremely thin markets (after-hours, holidays)
Flash crash or extreme volatility events
Risk Management Requirements
Always use stop losses (place beyond reversal pivot)
Position size appropriately (1-2% account risk per trade)
Account for commissions and slippage in planning
Never trade with funds you cannot afford to lose
Paper trade new settings before using real capital
Not a Complete Trading System
This indicator identifies potential reversal points but should be used as part of a complete trading plan including:
Overall market analysis and context
Risk/reward assessment
Position sizing methodology
Trade management rules
Psychological discipline
TECHNICAL SPECIFICATIONS
Calculation Method
Base Algorithm: Modified zigzag with adaptive thresholds
Primary Sensitivity: ATR-based multiplier system
Trend Filter: Triple EMA (9/14/21 exponential moving averages)
Price Calculation: Configurable (high/low or EMA-smoothed high/low)
Confirmation: Configurable delayed confirmation (0-5 bars)
Resource Usage
Maximum Boxes: 50 (for supply/demand zones)
Maximum Lines: 200 (user-configurable display limit)
Maximum Labels: 100 (for reversal markers)
Calculation Speed: Fast (minimal computational overhead)
Compatibility
TradingView Pine Script: Version 6
Chart Types: All (candlestick, bar, line, etc.)
Instruments: All futures contracts (optimized for liquid markets)
Timeframes: All (1 second through 1 month)
Features: Alerts, Strategy Tester compatible
SUITABLE INSTRUMENTS
Micro E-mini Futures
MES (Micro E-mini S&P 500), MNQ (Micro E-mini Nasdaq-100), MYM (Micro E-mini Dow), M2K (Micro E-mini Russell 2000), MGC (Micro Gold), MCL (Micro Crude Oil)
E-mini Futures
ES (E-mini S&P 500), NQ (E-mini Nasdaq-100), YM (E-mini Dow), RTY (E-mini Russell 2000)
Commodities
GC (Gold), SI (Silver), CL (Crude Oil), NG (Natural Gas), HG (Copper), ZW (Wheat), ZC (Corn), ZS (Soybeans)
Indices
SPX (S&P 500 Index), NDX (Nasdaq-100 Index), DJI (Dow Jones Industrial Average)
Currencies
6E (Euro FX), 6B (British Pound), 6J (Japanese Yen), 6A (Australian Dollar)
Interest Rates
ZB (30-Year T-Bond), ZN (10-Year T-Note), ZF (5-Year T-Note)
Crypto Futures
BTC (Bitcoin Futures), ETH (Ethereum Futures)
The ATR-adaptive system works on any liquid futures contract. Results may vary on extremely thin markets or instruments with unusual price structures.
LIMITATIONS AND CONSIDERATIONS
What This Indicator Does
Identifies confirmed price reversals after they begin
Adapts threshold requirements to market volatility
Provides trend context through EMA analysis
Marks potential support/resistance zones
Generates alerts for reversal conditions
What This Indicator Does NOT Do
Predict future price movements
Guarantee profitable trades
Work equally in all market conditions
Eliminate the need for trader judgment
Replace a complete trading strategy
Known Limitations
Signals lag actual reversal by design (confirmation required)
May generate false signals during choppy, directionless markets
Not optimized for gapping markets or illiquid instruments
Requires normal volatility (extreme VIX can affect performance)
EMAs are lagging indicators (trend status reflects recent past)
User Responsibility
Users are responsible for:
Backtesting settings on their chosen instruments
Understanding how the indicator works before trading
Implementing proper risk management
Complying with their broker's margin requirements
Following applicable regulations in their jurisdiction
DISCLAIMERS
Educational Purpose
This indicator is provided for educational and informational purposes only. It is a technical analysis tool designed to assist traders in identifying potential reversal points. It does not constitute financial advice, investment recommendations, or trading signals.
No Performance Guarantees
Past performance of this indicator does not guarantee future results. Markets are inherently uncertain and no technical indicator can predict future price movements with certainty. Losses are a normal part of trading and users should expect both winning and losing trades.
Risk Warning
Trading futures involves substantial risk of loss and is not suitable for all investors. Users should carefully consider whether trading is appropriate for them in light of their experience, objectives, financial resources, and other relevant circumstances. Users should only trade with capital they can afford to lose entirely.
No Liability
The indicator creator and publisher are not responsible for any losses incurred through use of this indicator. Users assume full responsibility for their trading decisions and outcomes. The indicator is provided "as-is" without warranties of any kind.
Testing Requirement
Users should thoroughly test this indicator using paper trading or small position sizes before committing significant capital. Different instruments, timeframes, and market conditions will produce different results. What works well in one context may not work in another.
Not Investment Advice
Nothing in this description or in the indicator itself constitutes investment advice or a recommendation to buy or sell any security. Users should consult with a licensed financial advisor before making investment decisions.
SUPPORT AND UPDATES
Version Information
Current Version: 3.1
Release Date: 21 January 2025
Pine Script Version: 6
Updates and Improvements
This indicator may receive updates to improve functionality, fix bugs, or add features. Users will automatically receive updates through TradingView's indicator system. Major version changes may include breaking changes to settings or behavior.
User Feedback
Community feedback helps improve the indicator. Users are encouraged to share their experiences, report issues, and suggest enhancements through comments. Please include specific details about instruments, timeframes, and settings when reporting issues.
Following for Updates
Click "Follow" on the @NPR21 profile to receive notifications about new indicators, updates, and educational content.

Penny Stock Short Signal Pro# Penny Stock Short Signal Pro (PSSP) v1.0
## Complete User Guide & Documentation
---
# 📋 TABLE OF CONTENTS
1. (#introduction)
2. (#why-short-penny-stocks)
3. (#the-7-core-detection-systems)
4. (#installation--setup)
5. (#understanding-the-dashboard)
6. (#input-settings-deep-dive)
7. (#visual-elements-explained)
8. (#alert-configuration)
9. (#trading-strategies)
10. (#risk-management)
11. (#best-practices)
12. (#troubleshooting)
13. (#changelog)
---
# Introduction
**Penny Stock Short Signal Pro (PSSP)** is a comprehensive Pine Script v6 indicator specifically engineered for identifying high-probability short-selling opportunities on low-priced, high-volatility stocks. Unlike generic indicators that apply broad technical analysis, PSSP is purpose-built for the unique characteristics of penny stock price action—where parabolic moves, retail FOMO, and violent reversals create predictable patterns for prepared traders.
## Key Features
- **7 Independent Detection Systems** working in concert to identify exhaustion points
- **Composite Signal Engine** that requires multiple confirmations before triggering
- **Real-Time Dashboard** displaying all signal states and market metrics
- **Automatic Risk Management** with dynamic stop-loss and profit target calculations
- **Customizable Sensitivity** for different trading styles (scalping vs. swing)
- **Built-in Alert System** for all major signal types
## Who Is This For?
- **Active Day Traders** looking to capitalize on intraday reversals
- **Short Sellers** who specialize in penny stocks and small caps
- **Momentum Traders** who want to identify when momentum is exhausting
- **Risk-Conscious Traders** who need clear entry/exit levels
---
# Why Short Penny Stocks?
## The Penny Stock Lifecycle
Penny stocks follow a remarkably predictable lifecycle that creates shorting opportunities:
```
PHASE 1: ACCUMULATION
└── Low volume, tight range
└── Smart money quietly building positions
PHASE 2: MARKUP / PROMOTION
└── News catalyst or promotional campaign
└── Volume increases, price begins rising
└── Early momentum traders enter
PHASE 3: DISTRIBUTION (YOUR OPPORTUNITY)
└── Parabolic move attracts retail FOMO buyers
└── Smart money selling into strength
└── Volume climax signals exhaustion
└── ⚠️ PSSP SIGNALS FIRE HERE ⚠️
PHASE 4: DECLINE
└── Support breaks, panic selling
└── Price returns toward origin
└── Short sellers profit
```
## Why Shorts Work on Penny Stocks
1. **No Fundamental Support**: Most penny stocks have no earnings, revenue, or assets to justify elevated prices
2. **Promotional Nature**: Many rallies are driven by promoters who will eventually stop
3. **Retail Exhaustion**: Retail buying power is finite—when it's exhausted, gravity takes over
4. **Float Dynamics**: Low float stocks move fast in both directions
5. **Technical Levels Matter**: VWAP, round numbers, and prior highs become self-fulfilling resistance
---
# The 7 Core Detection Systems
PSSP employs seven independent detection algorithms. Each identifies a specific type of exhaustion or reversal signal. When multiple systems fire simultaneously, the probability of a successful short dramatically increases.
---
## 1. PARABOLIC EXHAUSTION DETECTOR
### What It Detects
Identifies when price has moved too far, too fast and is likely to reverse. This system looks for the classic "blow-off top" pattern common in penny stock runners.
### Technical Logic
```
Parabolic Signal = TRUE when:
├── Consecutive green candles ≥ threshold (default: 3)
├── AND price extension from VWAP ≥ threshold ATRs (default: 1.5)
└── OR shooting star / upper wick rejection pattern forms
```
### Visual Representation
```
╱╲ ← Shooting star / upper wick
╱ ╲ (Parabolic exhaustion)
╱
╱
╱
══════════════ VWAP
╱
╱
```
### Why It Works on Penny Stocks
Penny stocks are notorious for parabolic moves driven by retail FOMO. When everyone who wants to buy has bought, there's no one left to push prices higher. The shooting star pattern shows that sellers are already stepping in at higher prices.
### Key Settings
| Parameter | Default | Range | Description |
|-----------|---------|-------|-------------|
| Lookback Period | 10 | 3-30 | Bars to analyze for pattern |
| Extension Threshold | 1.5 ATR | 0.5-5.0 | How far above VWAP is "parabolic" |
| Consecutive Green Bars | 3 | 2-10 | Minimum green bars for exhaustion |
---
## 2. VWAP REJECTION SYSTEM
### What It Detects
Volume Weighted Average Price (VWAP) is the single most important level for institutional traders. This system identifies when price tests above VWAP and gets rejected back below—a powerful short signal.
### Technical Logic
```
VWAP Rejection = TRUE when:
├── Candle high pierces above VWAP
├── AND candle closes below VWAP
├── AND candle is bearish (close < open)
└── AND rejection distance is within sensitivity threshold
```
### Visual Representation
```
High ──→ ╱╲
╱ ╲
VWAP ════════╱════╲═══════════
Close ←── Rejection
```
### Extended VWAP Signals
The system also tracks VWAP standard deviation bands. Rejection from the upper band (2 standard deviations above VWAP) is an even stronger signal.
### Why It Works on Penny Stocks
- Algorithms and institutions use VWAP as their benchmark
- Failed attempts to reclaim VWAP often lead to waterfall selling
- VWAP acts as a "magnet" that price tends to revert toward
### Key Settings
| Parameter | Default | Range | Description |
|-----------|---------|-------|-------------|
| Rejection Sensitivity | 0.5 ATR | 0.1-2.0 | How close to VWAP for valid rejection |
| Show VWAP Line | True | - | Display VWAP on chart |
| Show VWAP Bands | True | - | Display standard deviation bands |
| Band Multiplier | 2.0 | 0.5-4.0 | Standard deviations for bands |
---
## 3. VOLUME CLIMAX DETECTOR
### What It Detects
Identifies "blow-off tops" where extreme volume accompanies a price spike. This often marks the exact top as it represents maximum retail participation—after which buying power is exhausted.
### Technical Logic
```
Volume Climax = TRUE when:
├── Current volume ≥ (Average volume × Climax Multiple)
├── AND one of:
│ ├── Selling into the high (upper wick > lower wick on green bar)
│ └── OR post-climax weakness (red bar following climax bar)
```
### Visual Representation
```
Price: ╱╲
╱ ╲
╱ ╲
╱ ╲
╱
Volume:
▂▃▅▇██▇▅▃▂▁
↑
Volume Climax (3x+ average)
```
### Why It Works on Penny Stocks
- Retail traders pile in at the top, creating volume spikes
- Market makers and smart money use this liquidity to exit
- Once the volume spike passes, there's no fuel left for higher prices
- The "smart money selling into dumb money buying" creates the top
### Key Settings
| Parameter | Default | Range | Description |
|-----------|---------|-------|-------------|
| Volume MA Length | 20 | 5-50 | Period for average volume calculation |
| Climax Volume Multiple | 3.0x | 1.5-10.0 | Multiple of average for "climax" |
| Show Volume Bars | True | - | Visual volume representation |
---
## 4. RSI DIVERGENCE ANALYZER
### What It Detects
Bearish divergence occurs when price makes higher highs but RSI (momentum) makes lower highs. This indicates that momentum is weakening even as price pushes higher—a warning of imminent reversal.
### Technical Logic
```
Bearish Divergence = TRUE when:
├── RSI is in overbought territory (> threshold)
├── AND RSI is declining (current < previous < prior)
└── Indicates momentum exhaustion before price catches up
```
### Visual Representation
```
Price: /\ /\
/ \ / \ ← Higher high
/ \/
/
/
RSI: /\
/ \ /\
/ \/ \ ← Lower high (DIVERGENCE)
/ \
════════════════════ Overbought (70)
```
### Why It Works on Penny Stocks
- Penny stocks often push to new highs on weaker and weaker momentum
- Divergence signals that fewer buyers are participating at each new high
- Eventually, the lack of buying pressure leads to collapse
### Key Settings
| Parameter | Default | Range | Description |
|-----------|---------|-------|-------------|
| RSI Length | 14 | 5-30 | Standard RSI calculation period |
| Overbought Level | 70 | 60-90 | RSI level considered overbought |
| Divergence Lookback | 14 | 5-30 | Bars to look back for swing highs |
---
## 5. KEY LEVEL REJECTION TRACKER
### What It Detects
Identifies rejections from significant price levels where shorts are likely to be concentrated: High of Day (HOD), premarket highs, and psychological levels (whole and half dollars).
### Technical Logic
```
Level Rejection = TRUE when:
├── Price touches key level (within 0.2% tolerance)
├── AND candle is bearish (close < open)
├── AND close is in lower portion of candle range
│
├── Key Levels Tracked:
│ ├── High of Day (HOD)
│ ├── Premarket High
│ └── Psychological levels ($1.00, $1.50, $2.00, etc.)
```
### Visual Representation
```
HOD ─────────────────────────────────
╱╲ ← Rejection
╱ ╲
╱ ╲
╱
─────────────────────────────────
PM High ─────────────────────────────
```
### Why It Works on Penny Stocks
- **HOD**: The high of day is where the most traders are trapped long. Failure to break HOD often triggers stop-loss cascades
- **Premarket High**: Represents overnight enthusiasm; failure to exceed often means the "news" is priced in
- **Psychological Levels**: Round numbers ($1, $2, $5) attract orders and act as natural resistance
### Key Settings
| Parameter | Default | Range | Description |
|-----------|---------|-------|-------------|
| Track HOD Rejection | True | - | Monitor high of day |
| Track Premarket High | True | - | Monitor premarket resistance |
| Track Psychological Levels | True | - | Monitor round numbers |
---
## 6. FAILED BREAKOUT DETECTOR
### What It Detects
Identifies "bull traps" where price breaks above resistance but immediately fails and closes back below. This traps breakout buyers and often leads to accelerated selling.
### Technical Logic
```
Failed Breakout = TRUE when:
├── Price breaks above recent high (lookback period)
├── AND one of:
│ ├── Same bar closes below the breakout level
│ └── OR following bars show consecutive red candles
```
### Visual Representation
```
╱╲
╱ ╲ ← False breakout
Recent High ══╱════╲════════════════
╱ ╲
╱ ╲
╱ ╲ ← Trapped longs panic sell
```
### Why It Works on Penny Stocks
- Breakout traders enter on the break, providing exit liquidity for smart money
- When the breakout fails, these traders become trapped and must exit
- Their forced selling accelerates the decline
- Penny stocks have thin order books, making failed breakouts especially violent
### Key Settings
| Parameter | Default | Range | Description |
|-----------|---------|-------|-------------|
| Breakout Lookback | 5 | 2-15 | Bars to define "recent high" |
| Confirmation Bars | 2 | 1-5 | Bars to confirm failure |
---
## 7. MOVING AVERAGE BREAKDOWN SYSTEM
### What It Detects
Monitors exponential moving averages (EMAs) for bearish crossovers and price rejections. EMA crosses often signal trend changes, while rejections from EMAs indicate resistance.
### Technical Logic
```
MA Breakdown = TRUE when:
├── Bearish EMA cross (fast crosses below slow)
└── OR EMA rejection (price tests EMA from below and fails)
```
### Visual Representation
```
╱╲ ← Rejection from EMA
╱ ╲
EMA 9 ═══════════╱════╲═══════════
╲
EMA 20 ═══════════════════╲════════
╲
Bearish cross ↓
```
### Why It Works on Penny Stocks
- EMAs smooth out the noise and show underlying trend direction
- When fast EMA crosses below slow EMA, it signals momentum shift
- Rejected attempts to reclaim EMAs show sellers are in control
### Key Settings
| Parameter | Default | Range | Description |
|-----------|---------|-------|-------------|
| Fast EMA | 9 | 3-20 | Short-term trend |
| Slow EMA | 20 | 10-50 | Medium-term trend |
| Show EMAs | True | - | Display on chart |
---
# Installation & Setup
## Step 1: Access Pine Editor
1. Open TradingView (tradingview.com)
2. Open any chart
3. Click "Pine Editor" at the bottom of the screen
## Step 2: Create New Indicator
1. Click "Open" → "New blank indicator"
2. Delete any existing code
3. Paste the entire PSSP code
## Step 3: Save and Add to Chart
1. Click "Save" (give it a name like "PSSP")
2. Click "Add to chart"
3. The indicator will appear with default settings
## Step 4: Configure Settings
1. Click the gear icon (⚙️) on the indicator
2. Adjust settings based on your trading style (see Settings section)
3. Click "OK" to apply
## Recommended Chart Setup
- **Timeframe**: 1-minute or 5-minute for scalping, 15-minute for swing shorts
- **Chart Type**: Candlestick
- **Extended Hours**: Enable if trading premarket/afterhours
- **Volume**: Can disable default volume since PSSP tracks it
---
# Understanding the Dashboard
The real-time dashboard provides at-a-glance status of all systems:
```
┌─────────────────────────────────────────┐
│ 📊 SHORT SIGNAL DASHBOARD │
├─────────────────────────────────────────┤
│ Signal Strength: 5/7 │
├─────────────────────────────────────────┤
│ ─── ACTIVE SIGNALS ─── │
│ │
│ Parabolic Exhaustion 🔴 2.1 ATR │
│ VWAP Rejection 🔴 Above │
│ Volume Climax 🔴 4.2x Avg │
│ RSI Divergence ⚪ RSI: 68 │
│ Level Rejection 🔴 @ HOD │
│ Failed Breakout 🔴 │
│ MA Breakdown ⚪ Bullish │
├─────────────────────────────────────────┤
│ ─── RISK LEVELS ─── │
│ Stop: $2.45 T1: $2.10 T2: $1.85 │
└─────────────────────────────────────────┘
```
## Dashboard Elements Explained
### Signal Strength Indicator
| Rating | Signals | Color | Interpretation |
|--------|---------|-------|----------------|
| STRONG | 5-7 | Red | High-confidence short opportunity |
| MODERATE | 3-4 | Orange | Decent setup, consider other factors |
| WEAK | 1-2 | Gray | Insufficient confirmation |
| NONE | 0 | Gray | No short signals active |
### Signal Status Icons
- 🔴 = Signal is ACTIVE (condition met)
- ⚪ = Signal is INACTIVE (condition not met)
### Contextual Metrics
Each signal row includes relevant metrics:
- **Parabolic**: Shows ATR extension from VWAP
- **VWAP**: Shows if price is Above/Below VWAP
- **Volume**: Shows current volume as multiple of average
- **RSI**: Shows current RSI value
- **Level**: Shows which level was touched (HOD, PM High, etc.)
- **MA**: Shows EMA relationship (Bullish/Bearish)
### Risk Levels
When a composite short signal fires:
- **Stop**: Suggested stop-loss level (high + ATR multiple)
- **T1**: First profit target (1:1 risk/reward)
- **T2**: Second profit target (user-defined R:R)
---
# Input Settings Deep Dive
## Group 1: Parabolic Exhaustion
| Setting | Default | Conservative | Aggressive | Description |
|---------|---------|--------------|------------|-------------|
| Enable | True | True | True | Turn system on/off |
| Lookback Period | 10 | 15 | 5 | Bars analyzed for pattern |
| Extension Threshold | 1.5 | 2.0 | 1.0 | ATRs above VWAP for "parabolic" |
| Consecutive Green Bars | 3 | 4 | 2 | Minimum green bars required |
**Tuning Tips:**
- Lower thresholds = more signals but more false positives
- Higher thresholds = fewer signals but higher quality
- For very volatile penny stocks, consider higher thresholds
## Group 2: VWAP Rejection
| Setting | Default | Conservative | Aggressive | Description |
|---------|---------|--------------|------------|-------------|
| Enable | True | True | True | Turn system on/off |
| Rejection Sensitivity | 0.5 | 0.3 | 0.8 | ATR distance for valid rejection |
| Show VWAP Line | True | True | True | Display VWAP |
| Show VWAP Bands | True | True | True | Display deviation bands |
| Band Multiplier | 2.0 | 2.5 | 1.5 | Standard deviations for bands |
**Tuning Tips:**
- Tighter sensitivity (lower number) = must reject very close to VWAP
- Wider bands = less frequent upper band rejections but more significant
## Group 3: Volume Climax
| Setting | Default | Conservative | Aggressive | Description |
|---------|---------|--------------|------------|-------------|
| Enable | True | True | True | Turn system on/off |
| Volume MA Length | 20 | 30 | 10 | Baseline volume period |
| Climax Volume Multiple | 3.0 | 4.0 | 2.0 | Multiple for "climax" status |
| Show Volume Profile | True | True | True | Visual volume bars |
**Tuning Tips:**
- Higher multiple = only extreme volume spikes trigger
- Shorter MA = more responsive to recent volume changes
- For highly liquid stocks, consider higher multiples
## Group 4: Momentum Divergence
| Setting | Default | Conservative | Aggressive | Description |
|---------|---------|--------------|------------|-------------|
| Enable | True | True | True | Turn system on/off |
| RSI Length | 14 | 21 | 7 | RSI calculation period |
| Overbought Level | 70 | 75 | 65 | Threshold for "overbought" |
| Divergence Lookback | 14 | 20 | 10 | Bars for swing high detection |
**Tuning Tips:**
- Lower overbought threshold = more frequent signals
- Shorter RSI length = more responsive but noisier
## Group 5: Key Level Rejection
| Setting | Default | Description |
|---------|---------|-------------|
| Enable | True | Master toggle for level system |
| Track Premarket High | True | Monitor premarket resistance |
| Track HOD Rejection | True | Monitor high of day |
| Track Psychological Levels | True | Monitor round numbers |
**Tuning Tips:**
- Disable premarket tracking if stock doesn't have significant premarket activity
- Psychological levels work best on stocks under $10
## Group 6: Failed Follow-Through
| Setting | Default | Conservative | Aggressive | Description |
|---------|---------|--------------|------------|-------------|
| Enable | True | True | True | Turn system on/off |
| Breakout Lookback | 5 | 8 | 3 | Bars defining "recent high" |
| Confirmation Bars | 2 | 3 | 1 | Bars to confirm failure |
**Tuning Tips:**
- Shorter lookback = more breakouts detected but smaller significance
- More confirmation bars = higher confidence but later entry
## Group 7: Moving Average Signals
| Setting | Default | Conservative | Aggressive | Description |
|---------|---------|--------------|------------|-------------|
| Enable | True | True | True | Turn system on/off |
| Fast EMA | 9 | 12 | 5 | Short-term trend |
| Slow EMA | 20 | 26 | 13 | Medium-term trend |
| Show EMAs | True | True | True | Display on chart |
**Tuning Tips:**
- Standard 9/20 works well for most penny stocks
- Faster EMAs (5/13) for scalping, slower (12/26) for swing trading
## Group 8: Composite Signal
| Setting | Default | Conservative | Aggressive | Description |
|---------|---------|--------------|------------|-------------|
| Minimum Signals | 3 | 4-5 | 2 | Signals needed for trigger |
| Show Dashboard | True | True | True | Display signal table |
| Dashboard Position | top_right | - | - | Screen location |
**Tuning Tips:**
- **Minimum Signals is the most important setting**
- Higher minimum = fewer trades but higher win rate
- Lower minimum = more trades but more false signals
## Group 9: Risk Management
| Setting | Default | Conservative | Aggressive | Description |
|---------|---------|--------------|------------|-------------|
| Show Stop Levels | True | True | True | Display stop loss |
| Stop ATR Multiple | 1.5 | 2.0 | 1.0 | Stop distance in ATRs |
| Show Targets | True | True | True | Display profit targets |
| Target R:R | 2.0 | 1.5 | 3.0 | Risk:Reward for Target 2 |
**Tuning Tips:**
- Tighter stops (lower ATR multiple) = less risk but more stop-outs
- Higher R:R targets = bigger winners but fewer targets hit
## Group 10: Visual Settings
| Setting | Default | Description |
|---------|---------|-------------|
| Bullish Color | Green | Color for bullish elements |
| Bearish Color | Red | Color for bearish/short signals |
| Warning Color | Orange | Color for caution signals |
| Neutral Color | Gray | Color for inactive elements |
---
# Visual Elements Explained
## Chart Overlays
### VWAP Line (Blue)
- **Solid blue line** = Volume Weighted Average Price
- Price above VWAP = bullish bias
- Price below VWAP = bearish bias
- **Use**: Short when price rejects from above VWAP
### VWAP Bands (Purple circles)
- Upper band = 2 standard deviations above VWAP
- Lower band = 2 standard deviations below VWAP
- **Use**: Extreme extension to upper band signals potential reversal
### EMAs (Orange and Red)
- **Orange line** = Fast EMA (9-period default)
- **Red line** = Slow EMA (20-period default)
- **Use**: Bearish cross or price rejection from EMAs confirms short
### HOD Line (Red, dashed)
- Shows the current day's high
- **Use**: Rejection from HOD is a key short signal
### Premarket High (Orange, dashed)
- Shows premarket session high
- **Use**: Failure to break PM high often signals weakness
## Signal Markers
### Individual Signal Markers (Small)
| Shape | Color | Signal |
|-------|-------|--------|
| ▼ Triangle | Purple | Parabolic Exhaustion |
| ✕ X-Cross | Blue | VWAP Rejection |
| ◆ Diamond | Yellow | Volume Climax |
| ● Circle | Orange | RSI Divergence |
| ■ Square | Red | Failed Breakout |
### Composite Short Signal (Large)
- **Large red triangle** with "SHORT" text
- Only appears when minimum signal threshold is met
- This is your primary trading signal
## Risk Level Lines
### Stop Loss (Red line)
- Calculated as: Entry + (ATR × Stop Multiple)
- Represents maximum acceptable loss
- **RESPECT THIS LEVEL**
### Target 1 (Light green line)
- First profit target at 1:1 risk/reward
- Consider taking partial profits here
### Target 2 (Dark green line)
- Second profit target at user-defined R:R
- Let winners run to this level
## Background Coloring
### Light Red Background
- Appears when composite short signal is active
- Indicates you should be looking for shorts, not longs
### Light Purple Background
- Appears during extreme parabolic extension
- Warning of potential imminent reversal
---
# Alert Configuration
## Available Alerts
### 1. Composite Short Signal
**Best for**: Primary trading signal
```
Condition: Composite short signal fires
Message: "PSSP: Short Signal Triggered - {ticker} at {close}"
```
### 2. Parabolic Exhaustion
**Best for**: Early warning of potential top
```
Condition: Parabolic exhaustion detected
Message: "PSSP: Parabolic exhaustion detected on {ticker}"
```
### 3. Volume Climax
**Best for**: Blow-off top identification
```
Condition: Volume climax occurs
Message: "PSSP: Volume climax / blow-off top on {ticker}"
```
### 4. Strong Short Setup (5+ Signals)
**Best for**: High-confidence opportunities only
```
Condition: 5 or more signals active
Message: "PSSP: STRONG short setup on {ticker}"
```
### 5. Very Strong Short Setup (6+ Signals)
**Best for**: Maximum confidence trades
```
Condition: 6 or more signals active
Message: "PSSP: VERY STRONG short setup on {ticker}"
```
### 6. Failed Breakout
**Best for**: Bull trap identification
```
Condition: Failed breakout detected
Message: "PSSP: Failed breakout detected on {ticker}"
```
### 7. Key Level Rejection
**Best for**: Resistance level plays
```
Condition: Key level rejection occurs
Message: "PSSP: Key level rejection on {ticker}"
```
## Setting Up Alerts in TradingView
1. Right-click on the chart
2. Select "Add Alert"
3. Set Condition to "Penny Stock Short Signal Pro"
4. Choose your desired alert condition
5. Configure notification method (popup, email, webhook, etc.)
6. Set expiration (or "Open-ended" for permanent)
7. Click "Create"
## Alert Strategy Recommendations
### For Active Day Traders
- Enable: Composite Short Signal, Volume Climax
- Set to: Popup + Sound
- Check frequently during market hours
### For Swing Traders
- Enable: Strong Short Setup (5+), Very Strong Short Setup (6+)
- Set to: Email + Mobile Push
- Review at key times (open, lunch, close)
### For Part-Time Traders
- Enable: Very Strong Short Setup (6+) only
- Set to: Email + SMS
- Only trade highest-conviction setups
---
# Trading Strategies
## Strategy 1: The Parabolic Fade
**Setup Requirements:**
- Parabolic Exhaustion signal ACTIVE
- Extension from VWAP ≥ 2.0 ATR
- Volume climax or declining volume on push
**Entry:**
- Short on first red candle after signal
- Or short on break below prior candle's low
**Stop Loss:**
- Above the high of the parabolic move
- Maximum: 1.5 ATR above entry
**Targets:**
- T1: VWAP (take 50% off)
- T2: Lower VWAP band or LOD
**Best Time:** 9:30-10:30 AM (morning runners)
---
## Strategy 2: VWAP Rejection Short
**Setup Requirements:**
- VWAP Rejection signal ACTIVE
- Price came from below VWAP
- Rejection candle has significant upper wick
**Entry:**
- Short on close below VWAP
- Or short on break below rejection candle low
**Stop Loss:**
- Above VWAP + 0.5 ATR
- Or above rejection candle high
**Targets:**
- T1: Lower VWAP band
- T2: Prior support or LOD
**Best Time:** Midday (11:00 AM - 2:00 PM)
---
## Strategy 3: HOD Failure Short
**Setup Requirements:**
- Level Rejection signal ACTIVE (HOD)
- Multiple tests of HOD without breakthrough
- Volume declining on each test
**Entry:**
- Short on confirmed HOD rejection
- Wait for close below the rejection candle
**Stop Loss:**
- Above HOD + 0.25 ATR (tight)
- Clear invalidation if HOD breaks
**Targets:**
- T1: VWAP
- T2: Morning support levels
**Best Time:** 10:30 AM - 12:00 PM
---
## Strategy 4: Volume Climax Fade
**Setup Requirements:**
- Volume Climax signal ACTIVE
- Volume ≥ 3x average on green candle
- Followed by bearish candle or upper wick
**Entry:**
- Short on first red candle after climax
- Or short on break below climax candle low
**Stop Loss:**
- Above climax candle high
- Give room for volatility spike
**Targets:**
- T1: 50% retracement of the run
- T2: VWAP or start of the run
**Best Time:** First hour of trading
---
## Strategy 5: The Full Composite (High Conviction)
**Setup Requirements:**
- Composite Short signal ACTIVE
- Minimum 4-5 individual signals
- Clear visual of signal markers clustering
**Entry:**
- Short immediately on composite signal
- Use market order for fast-moving stocks
**Stop Loss:**
- Use indicator's automatic stop level
- Do not deviate from system
**Targets:**
- T1: Indicator's T1 level (1:1)
- T2: Indicator's T2 level (2:1)
**Best Time:** Any time with sufficient signals
---
# Risk Management
## Position Sizing Formula
```
Position Size = (Account Risk %) / (Stop Loss %)
Example:
- Account: $25,000
- Risk per trade: 1% = $250
- Entry: $2.00
- Stop: $2.20 (10% stop)
- Position Size: $250 / 10% = $2,500 worth
- Shares: $2,500 / $2.00 = 1,250 shares
```
## Risk Rules
### The 1% Rule
Never risk more than 1% of your account on any single trade. For a $25,000 account, max risk = $250.
### The 2x Stop Rule
If your stop gets hit twice on the same stock, stop trading it for the day. The pattern isn't working.
### The Daily Loss Limit
Set a maximum daily loss (e.g., 3% of account). Stop trading if hit.
### The Size-Down Rule
After a losing trade, reduce your next position size by 50%. Rebuild after a winner.
## Short-Specific Risks
### The Short Squeeze
- Penny stocks can squeeze violently
- ALWAYS use stops
- Never "hope" a position comes back
- Size appropriately for volatility
### The Hard-to-Borrow
- Check borrow availability before trading
- High borrow fees eat into profits
- Some stocks become HTB mid-trade
### The Halt Risk
- Penny stocks can halt on volatility
- Position size for worst-case halt against you
- Halts can open significantly higher
---
# Best Practices
## DO's
✅ **Wait for multiple signals** - Single signals have lower accuracy
✅ **Trade with the trend** - Short when daily trend is down
✅ **Use the dashboard** - Check signal count before entering
✅ **Respect stops** - The indicator calculates them for a reason
✅ **Size appropriately** - Penny stocks are volatile; position small
✅ **Trade liquid stocks** - Volume ≥ 500K daily average
✅ **Know the catalyst** - Understand why the stock is moving
✅ **Take partial profits** - Secure gains at T1
✅ **Journal your trades** - Track what works and what doesn't
✅ **Time your entries** - Best shorts often come 10:30-11:30 AM
## DON'Ts
❌ **Don't short strong stocks** - If it won't go down, don't force it
❌ **Don't fight the tape** - A stock going up can keep going up
❌ **Don't average up on losers** - Adding to losing shorts is dangerous
❌ **Don't ignore the dashboard** - It exists to help you
❌ **Don't overtrade** - Quality over quantity
❌ **Don't short into news** - Wait for the reaction first
❌ **Don't trade the first 5 minutes** - Too chaotic for reliable signals
❌ **Don't hold overnight** - Penny stock gaps can destroy accounts
❌ **Don't trade without stops** - Ever.
❌ **Don't trade on tilt** - After losses, take a break
## Optimal Trading Windows
| Time (ET) | Quality | Notes |
|-----------|---------|-------|
| 9:30-9:35 | ⭐ | Too volatile, avoid |
| 9:35-10:30 | ⭐⭐⭐⭐⭐ | Best shorts, morning runners exhaust |
| 10:30-11:30 | ⭐⭐⭐⭐ | Secondary exhaustion, HOD rejections |
| 11:30-2:00 | ⭐⭐ | Midday lull, lower quality |
| 2:00-3:00 | ⭐⭐⭐ | Afternoon setups develop |
| 3:00-3:30 | ⭐⭐⭐⭐ | End of day momentum |
| 3:30-4:00 | ⭐⭐ | Closing volatility, risky |
---
# Troubleshooting
## Common Issues
### "Signals aren't appearing"
- Check that the relevant system is enabled in settings
- Ensure minimum signals threshold isn't too high
- Verify the stock has sufficient volume for calculations
### "Too many false signals"
- Increase minimum signals threshold
- Use more conservative settings (see Settings section)
- Focus on stocks with cleaner price action
### "Dashboard not showing"
- Ensure "Show Signal Dashboard" is enabled
- Check that your chart has enough space
- Try a different dashboard position
### "VWAP line is missing"
- VWAP requires intraday timeframes (1m, 5m, 15m, etc.)
- VWAP resets daily; won't show on daily+ charts
- Ensure "Show VWAP Line" is enabled
### "Stop loss seems too tight/wide"
- Adjust Stop ATR Multiple in Risk Management settings
- Lower multiple = tighter stop
- Higher multiple = wider stop
### "Alerts not triggering"
- Verify alert is set to the correct indicator
- Check that alert hasn't expired
- Ensure notification settings are configured in TradingView
## Performance Optimization
If the indicator is slow:
1. Reduce the number of visual elements shown
2. Disable unused signal systems
3. Use on fewer simultaneous charts
4. Close unused browser tabs
---
# Changelog
## Version 1.0 (Initial Release)
- 7 core detection systems implemented
- Real-time signal dashboard
- Automatic risk management calculations
- 7 alert conditions
- Full visual overlay system
- Comprehensive input settings
## Planned Features (Future Updates)
- Scanner integration for multi-stock screening
- Machine learning signal weighting
- Backtesting statistics panel
- Volume profile analysis
- Level 2 data integration (if available)
- Custom timeframe VWAP options
---
# Support & Feedback
## Reporting Issues
When reporting issues, please include:
1. TradingView username
2. Stock symbol and timeframe
3. Screenshot of the issue
4. Your indicator settings
5. Steps to reproduce
## Feature Requests
We welcome suggestions for improving PSSP. Consider:
- What specific pattern are you trying to catch?
- How would this help your trading?
- Any reference examples?
---
# Disclaimer
**IMPORTANT: This indicator is for educational and informational purposes only.**
- Past performance does not guarantee future results
- Short selling carries unlimited risk potential
- Always use proper position sizing and stop losses
- Paper trade before using real capital
- The creator assumes no liability for trading losses
- Consult a financial advisor before trading
**Trade at your own risk.**
---
*Penny Stock Short Signal Pro v1.0*
*Pine Script v6*
*© 2025*

VAM Pro (Multi-Model) [Final]Volatility Adjusted Momentum (VAM) Pro+ is a professional quantitative tool designed to measure trend strength by normalizing momentum against market volatility. Standard momentum indicators often fail during high-volatility periods because they treat every price change the same regardless of market noise. This indicator solves that problem by scaling price changes based on their statistical significance using Z-Score logic. This Pro+ version is specifically optimized for Scalping and Intraday Trading by introducing advanced volatility estimators and mathematical horizon adjustments that superior to classic standard deviation models.
The indicator allows you to choose the most suitable volatility model for your specific asset class. The Parkinson Volatility model is highly recommended for Crypto markets because it uses the High-Low range instead of just close prices, effectively capturing intraday wicks and liquidation spikes that standard deviation often misses. For Equities and Forex, the Garman-Klass model is the most efficient choice as it utilizes the full Open-High-Low-Close data set to account for opening gaps and professional trading ranges.
The mathematical core of the script features a strict Horizon Adjustment based on the Square Root of Time rule. This aligns the one-bar volatility risk with your chosen momentum lookback period to ensure a mathematically consistent calculation. By default, the script uses Logarithmic Returns to maintain scale invariance, which is critical for assets with high percentage swings like Cryptocurrencies. To trade with VAM Pro, look for the histogram color and its relation to the Zero line. A Green histogram indicates positive volatility-adjusted momentum where bulls are dominant, while a Red histogram shows bearish dominance. Values reaching the +2.0 or -2.0 Sigma levels represent statistically extreme moves that often act as exhaustion points or precede strong mean-reversion opportunities. When the histogram crosses the yellow signal line, it provides an early warning that the current momentum is fading.
Investment involves risk. The Volatility Adjusted Momentum (VAM) Pro+ is an analytical tool and does not constitute financial advice, investment recommendations, or an offer to buy or sell any security. Past performance is not indicative of future results. Market conditions can change rapidly, and technical indicators may produce false signals. Always perform your own due diligence, use proper risk management, and consult with a certified financial advisor before making any trading decisions. The author assumes no responsibility for any financial losses incurred through the use of this script.

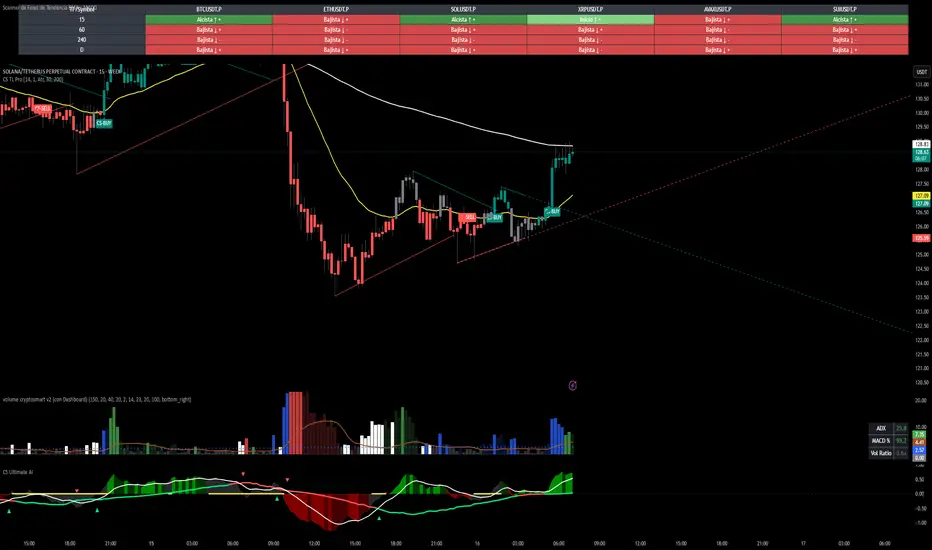
CS Trendline ProTitle: CS Trendline Pro
Description:
CS Trendline Pro is a comprehensive scalping and day-trading system designed to filter out noise and identify high-probability breakout setups. It combines the structural precision of Fractal Trendlines with a robust Dual-EMA Filter, visualized through an intuitive "Traffic Light" color system.
This tool is specifically engineered for traders who want to trade Trendline Breakouts but need a safety mechanism to avoid false signals (fakeouts) and counter-trend traps.
🚦 How the "Traffic Light" Logic Works
The core feature of this script is the dynamic coloring of the candles, which acts as a visual filter for your entries:
🟢 GREEN Zone (Safe Buy):
Condition: A Bullish Trendline Breakout has occurred AND the price is holding ABOVE the EMA 30 (Yellow Line).
Meaning: Momentum is bullish, and you are in a safe zone to look for Long entries.
🔴 RED Zone (Safe Sell):
Condition: A Bearish Trendline Breakout has occurred AND the price is holding BELOW the EMA 30 (Yellow Line).
Meaning: Momentum is bearish, and you are in a safe zone to look for Short entries.
⚪ GRAY Zone (No Trade / Wait):
Condition: A breakout occurred, but the price is on the "wrong side" of the EMA 30.
Meaning: Indecision. The market structure is conflicting with the immediate momentum. It is recommended to stay out until the color changes.
🛠️ Key Features
** automated Trendlines:** Automatically draws Support and Resistance dynamic trendlines based on pivot points (LuxAlgo engine).
Dual EMA Filter:
EMA 30 (Yellow): Acts as the immediate "Safe Zone" filter.
EMA 200 (White): Displays the macro trend. (Pro Tip: Only take Green signals if price is above the White line).
CS-BUY / CS-SELL Labels: Clear text markers appear exactly when a valid breakout occurs.
Customizable: Adjustable sensitivity (Length), EMA periods, and Slope calculation methods (ATR, Stdev, Linreg).
📉 How to Trade with CS Trendline Pro
For Scalping (5m / 15m):
Identify the Main Trend: Look at the White EMA (200).
If Price > EMA 200 → Focus on BUY signals.
If Price < EMA 200 → Focus on SELL signals.
Wait for the Signal:
Wait for the candle to turn Teal (Green) or Red.
Ensure the candle closes with the new color.
Risk Management:
Place Stop Loss below the recent swing low (for buys) or above the swing high (for sells).
Target a 1.5 Risk/Reward ratio or trail your stop using the EMA 30.
⚠️ Important Note on Backpainting
This indicator uses pivot points to draw trendlines. By nature, a pivot point can only be confirmed after a few bars have passed (Lag).
Backpaint Setting (Default ON): Keeps your historical chart clean by connecting the exact pivot points in the past.
Real-Time Behavior: In live trading, the trendline and signal will appear once the pivot is confirmed (based on your 'Length' setting). This is normal behavior for any trendline script.
Settings Recommended:
5-Minute Chart: Length 10 or 14.
15-Minute Chart: Length 14.
Enjoy trading with precision! ~ CS Trading
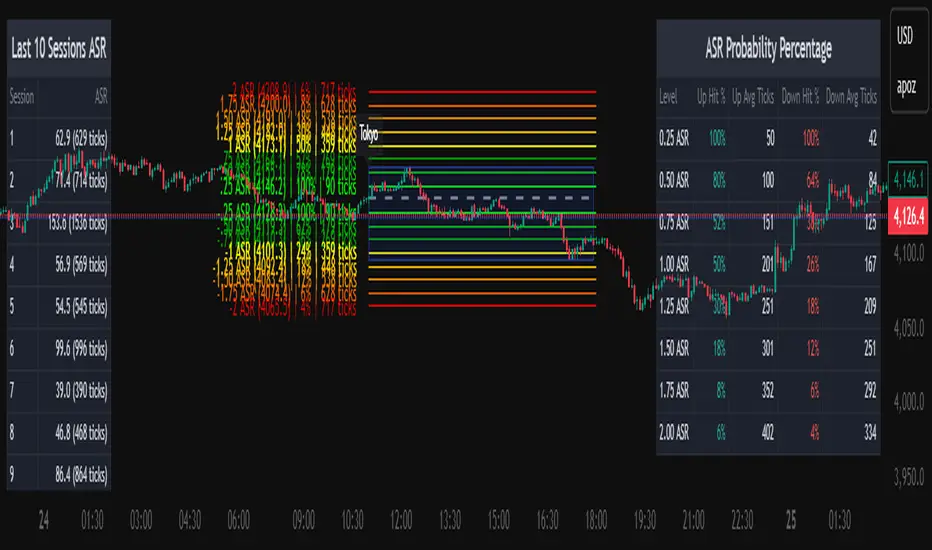
Average Daily Session Range PRO [Capitalize Labs]Average Daily Session Range PRO
The Average Daily Session Range PRO (ADSR PRO) is a professional-grade analytical tool designed to quantify and visualize the probabilistic range behavior of intraday sessions.
It calculates directional range statistics using historical session data to show how far price typically moves up or down from the session open.
This helps traders understand session volatility profiles, range asymmetry, and probabilistic extensions relative to prior performance.
Key Features
Asymmetric Range Modeling: Separately tracks average upside and downside excursions from each session open, revealing directional bias and volatility imbalance.
Probability Engine Modes: Choose between Rolling Window (fixed-length lookback) and Exponential Decay (weighted historical memory) to control how recent or historic data influences probabilities.
Session-Aware Statistics: Calculates values independently for each defined session, allowing region-specific insights (e.g., Tokyo, London, New York).
Dynamic Range Table: Displays key metrics such as average up/down ticks, expected range extensions, and percentage probabilities.
Adaptive Display: Works across timeframes and instruments, automatically aligning with user-defined session start and end times.
Visual Clarity: Includes clean range markers and labels optimized for both backtesting and live-chart analysis.
Intended Use
ADSR PRO is a statistical reference indicator.
It does not generate buy/sell signals or predictive forecasts.
Its purpose is to help users observe historical session behavior and volatility tendencies to support their own discretionary analysis.
Credits
Developed by Capitalize Labs, specialists in quantitative and discretionary market research tools.
Risk Warning
This material is educational research only and does not constitute financial advice, investment recommendation, or a solicitation to buy or sell any instrument.
Foreign exchange and CFDs are complex, leveraged products that carry a high risk of rapid losses; leverage amplifies both gains and losses, and you should not trade with funds you cannot afford to lose.
Market conditions can change without notice, and news or illiquidity may cause gaps and slippage; stop-loss orders are not guaranteed.
The analysis presented does not take into account your objectives, financial situation, or risk tolerance.
Before acting, assess suitability in light of your circumstances and consider seeking advice from a licensed professional.
Past performance and back-tested or hypothetical scenarios are not reliable indicators of future results, and no outcome or level mentioned here is assured.
You are solely responsible for all trading decisions, including position sizing and risk management.
No external links, promotions, or contact details are provided, in line with TradingView House Rules.
ZS Master Vision Pro - Advanced Multi-Timeframe Trading SystemZS MASTER VISION PRO - PROFESSIONAL TRADING SUITE
Created by Zakaria Safri
A comprehensive, all-in-one trading system combining multiple proven technical analysis methods into a single, powerful indicator. Designed for traders who demand precision, clarity, and actionable signals across all timeframes.
KEY FEATURES
CORE TREND ALGORITHM
Adaptive ATR-based trend detection with dynamic support and resistance zones. Features Type A and Type B signal modes for different trading styles, strong signal detection in key reversal zones, and optional EMA source smoothing for noise reduction.
MULTI-LAYER EMA CLOUD SYSTEM
Five customizable EMA cloud layers for multi-timeframe analysis with theme-adaptive color coding across five professional themes. Optional line display for detailed MA tracking with configurable periods from scalping to position trading.
WAVE TREND OSCILLATOR
Advanced momentum oscillator with channel-based calculations featuring smart reversal detection at extreme overbought and oversold levels. Includes directional strength confirmation and customizable sensitivity with adjustable reaction periods.
DIVERGENCE SCANNER
Detects four types of divergence automatically:
- Regular Bullish: Price making lower lows while oscillator making higher lows
- Regular Bearish: Price making higher highs while oscillator making lower highs
- Hidden Bullish: Trend continuation signals in uptrends
- Hidden Bearish: Trend continuation signals in downtrends
Automatic fractal-based detection with clear visual labels on chart.
MARKET BIAS INDICATOR
Heikin Ashi-based trend strength analysis with real-time bias calculation showing Bullish or Bearish combined with Strong or Weak conditions. Smoothed for cleaner signals and perfect for trend confirmation.
MOMENTUM SYSTEM
Proprietary momentum calculation using adaptive smoothing with growing and falling state detection. Normalized values for consistent interpretation and responsive to rapid market changes.
DYNAMIC SUPPORT AND RESISTANCE
Automatic pivot-based support and resistance level detection with adjustable left and right bar lookback. Non-repainting levels with visual clarity through color-coded lines.
LIVE INFORMATION DASHBOARD
Real-time market analysis panel displaying current trend direction, market bias based on Heikin Ashi, Wave Trend status and value, and momentum trend with state. Customizable display options with theme-adaptive colors.
VISUAL CUSTOMIZATION
FIVE PROFESSIONAL COLOR THEMES:
Pro - Modern green and red color scheme (default)
Classic - Traditional teal and red combination
Cyberpunk - Neon cyan and magenta contrast
Ocean - Blue and orange contrast
Sunset - Gold and red warmth
SIGNAL STYLES:
Labels with emoji indicators (BUY with rocket, SELL with bear, STRONG with lightning)
Arrows for clean minimal appearance
Triangles for classic approach
DISPLAY OPTIONS:
Color-coded candles following trend direction
Trend background highlighting for instant trend recognition
Optional EMA line display for detailed analysis
Adjustable transparency levels for personal preference
SMART ALERTS
Pre-configured alert conditions for all major signals:
Buy signals for standard entry opportunities
Sell signals for standard exit or short opportunities
Strong buy signals for high-confidence long entries
Strong sell signals for high-confidence short entries
Bullish divergence detection alerts
Bearish divergence detection alerts
Alert messages automatically include ticker symbol, current price, and specific signal type for quick decision making.
HOW TO USE
FOR TREND TRADERS:
Enable EMA Clouds with focus on Cloud 5 featuring 50 and 200 period moving averages. Wait for trend background color change to confirm direction. Enter on STRONG signals aligned with higher timeframe trend direction. Use support and resistance levels for strategic exits.
FOR SWING TRADERS:
Enable Wave Trend Oscillator information display. Look for oversold and overbought reversal setups. Confirm potential reversals with divergence scanner. Enter on smart reversal signals with proper risk management.
FOR SCALPERS:
Use Type B signal mode for more frequent trading signals. Enable Cloud 1 with 5 and 13 periods for quick trend confirmation. Focus on momentum growing and falling states for entry timing. Take quick entries on regular buy and sell signals.
FOR POSITION TRADERS:
Use Type A mode with higher ATR multiplier set to 3.0 or above. Enable only Cloud 5 with 50 and 200 periods for major trend confirmation. Only take STRONG signals for highest probability setups. Hold positions through minor pullbacks and noise.
RECOMMENDED SETTINGS
STOCKS ON DAILY TIMEFRAME:
Trend Period: 180
ATR Period: 155
ATR Multiplier: 2.1
Signal Mode: Type A
FOREX ON HOURLY AND 4-HOUR TIMEFRAMES:
Trend Period: 150
ATR Period: 120
ATR Multiplier: 2.5
Signal Mode: Type A
CRYPTOCURRENCY ON 15-MINUTE AND 1-HOUR TIMEFRAMES:
Trend Period: 100
ATR Period: 80
ATR Multiplier: 3.0
Signal Mode: Type B
SCALPING ON 1-MINUTE AND 5-MINUTE TIMEFRAMES:
Trend Period: 50
ATR Period: 40
ATR Multiplier: 2.0
Signal Mode: Type B
WHAT IS INCLUDED
Trend Analysis using ATR-based adaptive algorithm
Five EMA Cloud Layers for multi-timeframe confluence
Wave Trend Oscillator for momentum and reversal detection
Divergence Scanner detecting four types of divergence
Market Bias using Heikin Ashi-based trend strength
Momentum System with advanced momentum tracking
Support and Resistance Levels with automatic pivot detection
Live Dashboard showing real-time market analysis
Smart Alerts featuring six pre-configured alert types
Five Color Themes offering professional visual options
TECHNICAL DETAILS
CALCULATION METHODS:
Average True Range (ATR) for volatility adaptation
Exponential Moving Average (EMA) and Simple Moving Average (SMA) for trend smoothing
Wave Trend channel oscillator for momentum analysis
Fractal-based divergence detection algorithm
Heikin Ashi transformation for bias calculation
Logarithmic momentum calculation for precision
PERFORMANCE CHARACTERISTICS:
Optimized for maximum speed and efficiency
No repainting signals ensuring reliability
Works on all timeframes from 1 minute to monthly
Compatible with all instruments including stocks, forex, crypto, and futures
RISK DISCLAIMER
This indicator is a technical analysis tool and should not be used as the sole basis for trading decisions. Always use proper risk management and never risk more than you can afford to lose. Combine with other analysis methods and practice on demo accounts first. Past performance does not guarantee future results. Trading carries substantial risk and is not suitable for all investors.
SUPPORT AND UPDATES
Regular updates and continuous improvements
Based on proven technical analysis principles
Developed following Pine Coders best practices and standards
Clean, well-documented, and optimized code structure
WHY CHOOSE ZS MASTER VISION PRO
All-in-one solution eliminating the need for multiple indicators
Highly customizable to adapt to your specific trading style
Professional grade analysis with institutional-quality standards
Clean interface that is not cluttered or confusing
Works everywhere across all markets and all timeframes
Smart signals filtered for quality over quantity
Beautiful design featuring five professional color themes
Active development with regular improvements and updates
Transform your trading with ZS Master Vision Pro today.
Version 2.0 | Created by Zakaria Safri | Pine Script Version 5

PowerTrend Pro Strategy – Gold OptimizedTired of false signals on Gold?
PowerTrend Pro combines VWAP, Supertrend, RSI, and smart MA filters with trailing stops & break-even logic to deliver high-probability trades on XAUUSD.
PowerTrend Pro Strategy is a professional-grade trading system designed to capture high-probability swing and intraday opportunities on XAUUSD (Gold) and other volatile markets.
🔑 Core Features
VWAP Anchoring – institutional fair value reference to filter trades.
Supertrend (ATR-based) – adaptive trend filter tuned for Gold’s volatility.
Multi-Timeframe RSI – confirms momentum alignment across intraday and higher timeframe.
EMA + SMA Combo – ensures trades follow strong directional bias, reducing false signals.
Dynamic Risk Management
Adjustable Take Profit / Stop Loss (%)
Trailing Stop that locks in profits on extended moves
Break-Even Logic (stop loss moves to entry once price is in profit)
⚡ Gold-Tuned Presets
XAUUSD 1H → tighter TP/SL & faster entries for active intraday trading.
XAUUSD 4H → wider ATR filter & trailing stops to capture bigger swings.
Generic Mode → works on Forex, Indices, and Crypto (fully customizable).
🎯 Why It Works
Gold is notoriously volatile — quick spikes wipe out weak strategies. PowerTrend Pro solves this by combining:
✅ Institutional bias (VWAP)
✅ Adaptive trend filter (Supertrend)
✅ Momentum confirmation (RSI MTF)
✅ Robust trend structure (EMA + SMA)
✅ Smart exits (TP, SL, trailing & breakeven)
This multi-layer confirmation makes entries stronger and keeps risk under control.
🛠️ Usage
Add the strategy to your chart.
Choose a preset (XAUUSD 1H, 4H, or Generic).
Run Strategy Tester for performance metrics.
Optimize TP/SL and ATR values for your broker & market conditions.
🔥 Pro Tip: Combine this strategy with a session filter (London/NY overlap) or volume confirmation to boost accuracy in Gold.

CAFX Liquidity Pro V1CAFX Liquidity Pro Indicator
Precision Engineered for Smart Profit-Taking
The CAFX Liquidity Pro Indicator is a powerful trading tool designed to help traders pinpoint high-probability liquidity zones, making it ideal for setting accurate and strategic take profit levels. By identifying where institutional interest is likely to reside, this indicator highlights the areas where price is most likely to react, reverse, or pause—giving you the edge in locking in profits before the market shifts.
Whether you're scalping, day trading, or swing trading, the CAFX Liquidity Pro provides clear visual cues that simplify your decision-making process and enhance your trade management. With a focus on precision and reliability, it helps you avoid emotional exits and instead base your take profits on real market behavior and liquidity dynamics.
Use CAFX Liquidity Pro to stay one step ahead—because knowing where to exit is just as important as knowing when to enter.

Deadzone Pro @DaviddTechDeadzone Pro by @DaviddTech – Adaptive Multi-Strategy NNFX Trading System
Deadzone Pro by @DaviddTech is a meticulously engineered trading indicator that strictly adheres to the No-Nonsense Forex (NNFX) methodology. It integrates adaptive trend detection, dual confirmation indicators, advanced volatility filtering, and dynamic risk management into one powerful, visually intuitive system. Ideal for traders seeking precision and clarity, this indicator consistently delivers high-probability trade setups across all market conditions.
🔥 Key Features:
The Setup:
Adaptive Hull Moving Average Baseline: Clearly identifies trend direction using an advanced, gradient-colored Hull MA that intensifies based on trend strength, providing immediate visual clarity.
Dual Confirmation Indicators: Combines Waddah Attar Explosion (momentum detector) and Bull/Bear Power (strength gauge) for robust validation, significantly reducing false entries.
Volatility Filter (ADX): Ensures entries are only made during strong trending markets, filtering out weak, range-bound scenarios for enhanced trade accuracy.
Dynamic Trailing Stop Loss: Implements a SuperTrend-based trailing stop using adaptive ATR calculations, managing risk effectively while optimizing exits.
Dashboard:
💎 Gradient Visualization & User Interface:
Dynamic gradient colors enhance readability, clearly indicating bullish/bearish strength.
Comprehensive dashboard summarizes component statuses, real-time market sentiment, and entry conditions at a glance.
Distinct and clear buy/sell entry and exit signals, with adaptive stop-loss levels visually plotted.
Candlestick coloring based on momentum signals (Waddah Attar) for intuitive market reading.
📈 How to Interpret Signals:
Bullish Signal: Enter when Hull MA baseline trends upward, both confirmation indicators align bullish, ADX indicates strong trend (>25), and price breaks above the previous trailing stop.
Bearish Signal: Enter short or exit long when Hull MA baseline trends downward, confirmations indicate bearish momentum, ADX confirms trend strength, and price breaks below previous trailing stop.
📊 Recommended Usage:
Timeframes: Ideal on 1H, 4H, and Daily charts for swing trading; effective on shorter (5M, 15M) charts for day trading.
Markets: Compatible with Forex, Crypto, Indices, Stocks, and Commodities.
The Entry & Exit:
🎯 Trading Styles:
Choose from three distinct trading modes:
Conservative: Requires full alignment of all indicators for maximum accuracy.
Balanced (Default): Optimized balance between signal frequency and reliability.
Aggressive: Fewer confirmations needed for more frequent trading signals.
📝 Credits & Originality:
Deadzone Pro incorporates advanced concepts inspired by:
Hull Moving Average by @Julien_Eche
Waddah Attar Explosion by @LazyBear
Bull Bear Power by @Pinecoders
ADX methodology by @BeikabuOyaji
This system has been significantly refactored and enhanced by @DaviddTech to maximize synergy, clarity, and usability, standing apart distinctly from its original components.
Deadzone Pro exemplifies precision and discipline, aligning fully with NNFX principles to provide traders with a comprehensive yet intuitive trading advantage.
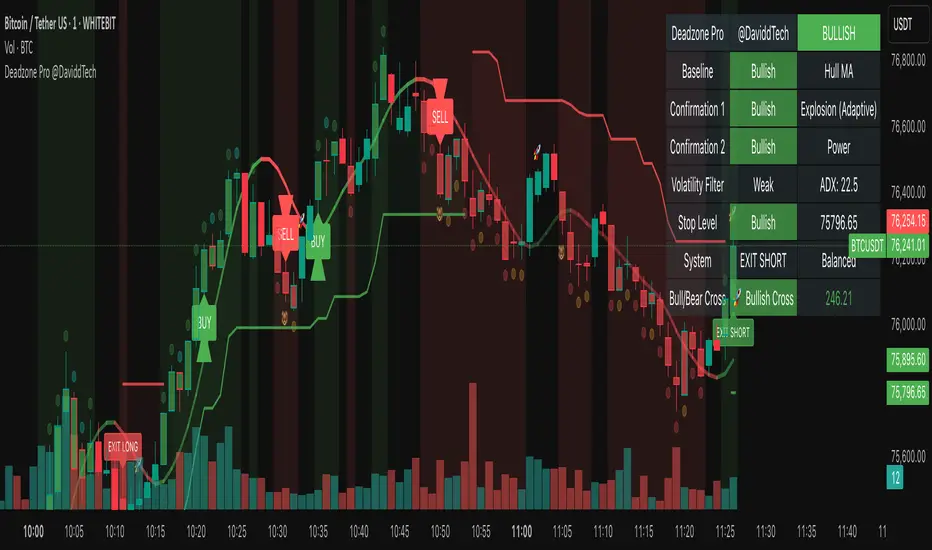
MFI Nexus Pro [trade_lexx]📈 MFI Nexus Pro is your reliable trading assistant!
📊 What is MFI Nexus Pro ?
MFI Nexus Pro is a trading indicator that analyzes cash flows in the market. It shows where money is moving — into or out of an asset, and based on this, generates buy or sell signals.
💡 The main components of the indicator
📊 The MFI Cash Flow Index (MFI)
shows the strength of cash flow into an asset. Values above 70 indicate overbought (an early sale is possible), and values below 30 indicate oversold (an early purchase is possible).
📈 Moving Averages (MA)
The indicator uses 10 different types of moving averages to smooth the MFI line.:
- SMA: Simple moving average
- EMA: Exponential moving average
- WMA: Weighted moving average
And other more complex types (HMA, KAMA, VWMA, ALMA, TEMA, ZLEMA, DEMA)
The choice of the type of moving average affects the speed of the indicator's response to market changes.
🎯 Bollinger Bands (BB)
Bands around the moving average that widen and narrow depending on volatility. They help determine when the MFI is out of the normal range.
🔄 Divergences
Divergences show discrepancies between price and MFI:
- Bullish divergence: the price is falling and the MFI is rising — an upward reversal is possible
- Bearish divergence: the price is rising and the MFI is falling — a downward reversal is possible
🔍 Indicator signals
1️⃣ Moving average signals (MA)
Buy signal
- What happens: MFI crosses its moving average from bottom to top
- What does it look like: the green triangle labeled "MA" under the chart
- What does it mean: money begins to actively flow into the asset, price growth is possible
Sell signal
- What happens: the MFI crosses the moving average from top to bottom
- What does it look like: a red triangle with the label "MA" above the chart
- What does it mean: money starts to leave the asset, the price may fall
2️⃣ Bollinger Band Signals (BB)
Buy signal
- What's happening: The MFI crosses the lower Bollinger band from bottom to top
- What it looks like: the green triangle marked "BB"
- What it means: The MFI was too low and is now starting to recover
Sell Signal
- What's going on: MFI crosses the upper Bollinger band from top to bottom
- What it looks like: a red triangle marked "BB"
- What it means: The MFI was too high and is now starting to decline
3️⃣ Divergence Signals (Div)
Buy Signal (Bullish Divergence)
- What's going on: the price is falling more than the MFI
- What it looks like: a green triangle marked "Div"
- What it means: despite the fall in price, money is already starting to return to the asset
Sell signal (bearish divergence)
- What is happening: the price is rising more strongly than the MFI
- What does it look like: the red triangle with the label "Div"
- What does it mean: despite the price increase, money is already starting to leave the asset
🛠️ Filters to filter out false signals
1️⃣ Minimum distance between the signals
- What it does: sets the minimum number of candles between signals
- Why it is needed: prevents signals from being too frequent during strong market fluctuations
- How to set it up: Set the number from 0 and above (default: 5)
2️⃣ "Waiting for the opposite signal" mode
- What it does: waits for a signal in the opposite direction before generating a new signal
- Why you need it: it helps you not to miss important trend reversals
- How to set up: just turn the function on or off
3️⃣ Filter by MFI levels
- What it does: generates signals only when the MFI is in the specified ranges
- Why it is needed: it helps to catch the moments when the market is oversold or overbought
- How to set up:
- For buy signals: set a range for oversold (e.g. 1-30)
- For sell signals: set a range for overbought (e.g. 70-100)
4️⃣ The RSI filter
- What it does: additionally checks the RSI values to confirm the signals
- Why it is needed: adds additional confirmation from another popular indicator
- How to set up: Similar to the MFI filter, set ranges for buying and selling
🔄 Signal combination modes
1️⃣ Normal mode ("None")
- How it works: all signals (MA, BB, Div) work independently of each other
- When to use it: for general market analysis or when learning how to work with the indicator
2️⃣ "And" mode ("MA and BB and Div")
- How it works: the alarm appears only when several conditions are triggered simultaneously
- Combination options:
- MA+BB: signals from the moving average and Bollinger bands
- MA+Div: signals from the moving average and divergence
- BB+Div: signals from the Bollinger bands and divergence
- MA+BB+Div: all three signals simultaneously
- When to use: for more reliable but rare signals
3️⃣ "OR" mode ("MA or BB or Div")
- How it works: the alarm appears when any of the conditions are triggered
- When to use: for frequent signals when you don't want to miss any opportunity.
🔌 Connecting to trading strategies
The indicator can be connected to your trading strategies using 5 different channels.:
1. Channel for MA signals: connects only signals from moving averages
2. BB signal channel: connects only the signals from the Bollinger bands
3. Channel for divergence signals: connects only divergence signals
4. Channel for "And" mode: connects only combined signals
5. Channel for "OR" mode: connects signals from any source
🔔 Setting up alerts
The indicator can send alerts when alarms appear.:
- Alerts for MA: when the MFI crosses the moving average
- Alerts for BB: when the MFI crosses the Bollinger bands
- Divergence alerts: when a divergence is detected
- Combined alerts: for "AND" and "OR" modes
🎭 What does the indicator look like on the chart ?
- MFI main line: purple line
- Overbought/oversold levels: horizontal lines at levels 30 and 70
- Middle line: dotted line at level 50
- MFI Moving Average: yellow line
- Bollinger bands: green lines around the moving average
- Signals: green and red triangles with corresponding labels
📚 How to start using MFI Nexus Pro
1️⃣ Initial setup
- Add an indicator to your chart
- Select the type of moving average and the period (you can leave it as the default)
- Activate the desired signal types (MA, BB, Div)
2️⃣ Filter settings
- Set the distance between the signals to get rid of unnecessary noise
- Adjust the MFI and RSI levels depending on how volatile your asset is
- If you need more reliable signals, turn on the "Waiting for the opposite signal" mode.
3️⃣ Operation mode selection
- First, use the standard mode to see all possible signals.
- When you get comfortable, try the "And" mode for more reliable signals.
- For active trading, you can use the "OR" mode
4️⃣ Setting up Alerts
- Select the types of signals you want to be notified about
- Set up alerts for "AND" or "OR" modes if you use them
5️⃣ Verification and adaptation
- Check the operation of the indicator on historical data
- Adjust the parameters for a specific asset
- Adapt the settings to your trading style
🌟 Usage examples
For trend trading
- Use MA signals in the direction of the main trend
- Turn on the "Waiting for the opposite signal" mode
- Set stricter levels for filters
For trading in a sideways range
- Use BB signals to detect bounces from the range boundaries
- Use the MFI level filter to confirm overbought/oversold conditions
- Adjust the Bollinger bands according to the width of the range
To determine the pivot points
- Pay attention to the divergence signals
- Use the "And" mode by combining divergences with other signals
- Check the RSI filter for additional confirmation

Global Market Clock Pro🌍✨ Global Market Clock Pro is a market session visualizer that combines utility and fun on your charts! 📊⏰ This indicator includes three analog clocks representing the Tokyo, London, and New York sessions, added in an entertaining way to make analysis more enjoyable and dynamic. 😊 Each clock clearly shows the session start and end times through arcs and distinctive markers, making it easier to identify active market periods. 💡
Also, a statistics table is added offering detailed information for each session:
📊 Percentage Change : Displays the price variation between sessions.
💰 Price Range : Highlights volatility within each session.
📈 Session Volume : Evaluates market activity based on traded volume.
📊 Average Volatility : Helps measure price fluctuations over time.
📌 Mean (Average Close) : Calculated by dividing the sum of closing prices of each bar by the total number of bars recorded during the session. This value gives you a reference for average price behavior, helping you detect general trends and key support/resistance levels. 📉
📌 Max Range (Maximum Range) : Represents the largest difference recorded between the highest and lowest prices during the session. This indicator is crucial for identifying volatility peaks, as it shows how far the market moved during its most active moments. 🔥
⚠️ VERY IMPORTANT : This tool works best only in timeframes under 4 hours ! ⏳
By integrating these data points directly into your chart, this indicator becomes a powerful tool to align your strategies with market activity in each session. Whether you're a day trader or a long-term investor, Global Market Clock Pro provides clear, data-driven insights to enhance decision-making. 💻📈
Español:
🌍✨ Global Market Clock Pro es un visualizador de sesiones de mercado que combina utilidad y diversión en tus gráficos. 📊⏰ Este indicador incluye tres relojes analógicos que representan las sesiones de Tokio, Londres y Nueva York, agregados de manera entretenida para hacer el análisis más ameno y dinámico. 😊 Cada reloj muestra con claridad los horarios de inicio y cierre de sesión mediante arcos y marcadores distintivos, facilitando la identificación de los periodos activos del mercado. 💡
Además, se añade una tabla de estadísticas que ofrece información detallada de cada sesión:
📊 Cambio porcentual : Muestra la variación de precio entre sesiones.
💰 Rango de precios : Destaca la volatilidad dentro de cada sesión.
📈 Volumen de sesión : Evalúa la actividad del mercado mediante el volumen negociado.
📊 Volatilidad promedio : Ayuda a medir las fluctuaciones del precio a lo largo del tiempo.
📌 Mean (Promedio de Cierre) : Se calcula dividiendo la suma de los precios de cierre de cada barra entre el número total de barras registradas durante la sesión. Este valor te brinda una referencia del comportamiento medio del precio, permitiéndote detectar tendencias generales y niveles clave de soporte o resistencia. 📉
📌 Max Range (Rango Máximo) : Representa la mayor diferencia registrada entre el precio más alto y el más bajo durante la sesión. Este indicador es fundamental para identificar los picos de volatilidad, ya que muestra hasta qué punto el mercado se movió en sus momentos de mayor actividad. 🔥
⚠️ ¡MUY IMPORTANTE! : Esta herramienta funciona mejor solo en temporalidades menores a 4 horas . ⏳
Al integrar estos datos directamente en el gráfico, este indicador se convierte en una herramienta poderosa para sincronizar tus estrategias con la actividad del mercado en cada sesión. Ya seas un trader intradía o un inversor a largo plazo, Global Market Clock Pro proporciona claridad basada en datos para mejorar la toma de decisiones. 💻📈
🚀 ¡No dejes pasar la oportunidad de optimizar tu experiencia de trading con esta innovadora herramienta! ✨
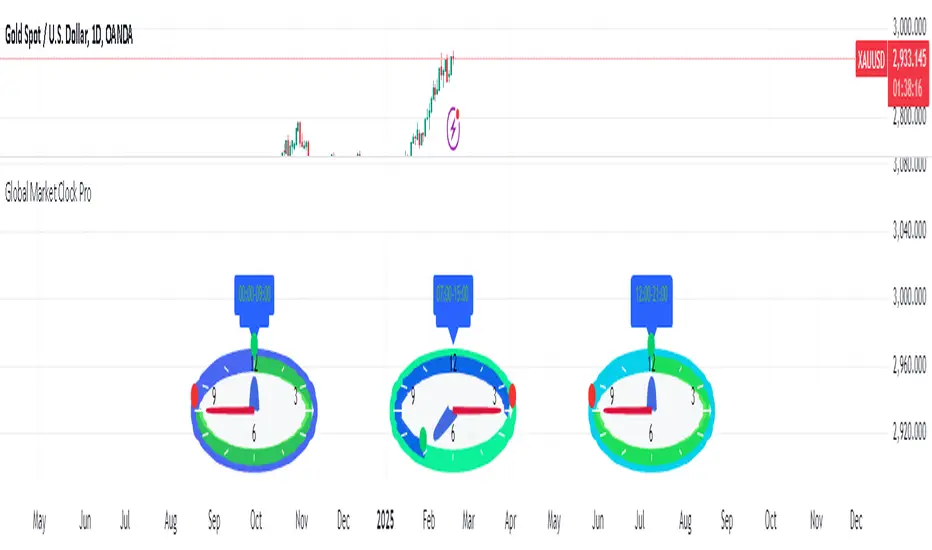
MACD PRO by LDZ1LANDZZ1 MACD Pro was developed to show the first signs of reversal, direction, and also trend strength.
Unlike normal MACD, this indicator has 3 lines as information. A white line (short EMA), a purple line (sign), and a yellow line (long EMA).
The Purple Line "Signal" is a 17-period Exponential Moving Average.
The White Line "Short EMA" is a 34-period Exponential Moving Average.
The Yellow Line "Long EMA" is a 72-Period Exponential Moving Average.
When the background color turns green it indicates that we are above 0 (positive trend) and above the Signal line (positive trend)
When the background color turns Yellow it indicates that we are above 0 (positive trend) but below the Signal line (Indicating Attention to a possible trend reversal or price correction)
When the background color turns Red it indicates that we are below 0 (negative trend) and below the Signal line (negative trend)
When the background color turns Orange it indicates that we are below 0 (negative trend) and above the signal line (Indicating attention to a possible trend reversal or price correction)
The Yellow line is like a watershed, when the White Line "Short EMA" crosses above or below it, it indicates that a stronger price movement may occur.
Tip:
Only enter Long Positions when the background color turns green and the Short EMA (White line) is above the yellow line and/or the white dotted horizontal line.
Only enter Short Positions when the background color turns red and the Long EMA (Yellow line) is below the white dotted horizontal line.
Note the difference of MACD Pro by LANDZZ1 as the traditional MACD.
----------------------------------------------------------
Description in Portuguese-BR
MACD Pro by LANDZZ1 foi desenvolvido para mostrar os primeiros sinais de reversão, direção e também força da tendência.
Diferente do MACD normal, este indicador tem como informação 3 linhas. Uma linha branca (short EMA), uma linha roxa(signal) e uma linha amarela (long EMA).
A Linha Roxa "Signal" é uma Média Móvel Exponencial de 17 períodos.
A Linha branca "Short EMA" é uma Média Móvel Exponencial de 34 períodos.
A Linha Amarela "Long EMA" é uma Média Móvel Exponencial de 72 Períodos.
Quando a cor de fundo ficar verde indica que estamos acima de 0 (tendência positiva) e acima da linha de Sinal (tendência positiva)
Quando a cor de fundo ficar Amarelo indica que estamos acima de 0 (tendência positiva) porém abaixo da linha de Sinal (Indicando Atenção a uma possível reversão de tendência ou correção de preço)
Quando a cor de fundo ficar vermelho indica que estamos abaixo de 0 (tendência negativa) e abaixo da linha de Sinal (tendência negativa)
Quando a cor de fundo ficar laranja indica que estamos abaixo de 0 (tendência negativa) e acima da linha de sinal (Indicando atenção a uma possível reversão de tendência ou correção do preço)
A linha amarela é como um divisor de águas, quando a linha branca (Short EMA) cruza para cima ou para baixo dela, indica que um movimento mais forte forte de preço poderá ocorrer.
Dica:
Apenas entre em Long Positions quando a cor de fundo ficar verde e se a Short EMA (linha Branca) estiver acima da linha amarela e/ou da linha horizontal pontilhada branca.
Apenas entre em Short Positions quando a cor de fundo ficar Vermelha e se a Long EMA (linha Amarela) estiver abaixo da linha horizontal pontilhada branca.
Repare a diferença do MACD Pro by LANDZZ1 como o MACD tradicional.
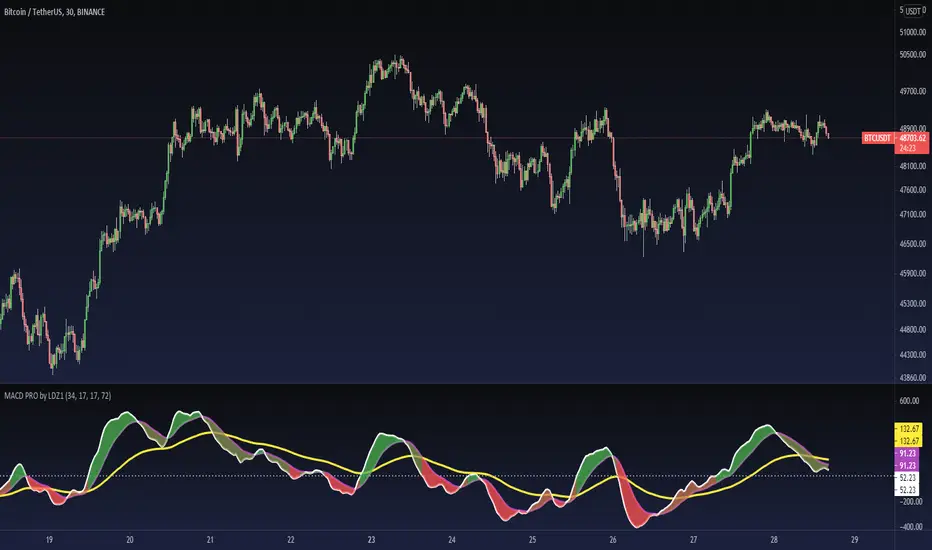
Multi SMA EMA WMA HMA BB (4x3 MAs Bollinger Bands) Pro MTF - RRBMulti SMA EMA WMA HMA 4x3 Moving Averages with Bollinger Bands Pro MTF by RagingRocketBull 2018
Version 1.0
This indicator shows multiple MAs of any type SMA EMA WMA HMA etc with BB and MTF support, can show MAs as dynamically moving levels.
There are 4 MA groups + 1 BB group. You can assign any type/timeframe combo to a group, for example:
- EMAs 50,100,200 x H1, H4, D1, W1 (4 TFs x 3 MAs x 1 type)
- EMAs 8,13,21,55,100,200 x M15, H1 (2 TFs x 6 MAs x 1 type)
- D1 EMAs and SMAs 12,26,50,100,200,400 (1 TF x 6 MAs x 2 types)
- H1 WMAs 7,77,231; H4 HMAs 50,100,200; D1 EMAs 144,169,233; W1 SMAs 50,100,200 (4 TFs x 3 MAs x 4 types)
- +1 extra MA type/timeframe for BB
compile time: 25-30 sec
full redraw time after parameter change in UI: 3 sec
There are several versions: Simple, MTF, Pro MTF, Advanced MTF and Ultimate MTF. This is the Pro MTF version. The Differences are listed below. All versions have BB
- Simple: you have 2 groups of MAs that can be assigned any type (5+5)
- MTF: +2 custom Timeframes for each group (2x5 MTF)
- Pro MTF: +4 custom Timeframes for each group (4x3 MTF), MA levels and show max bars back options
- Advanced MTF: +2 extra MAs/group (4x5 MTF), custom Ticker/Symbol, backreferences for type, TF and MA lengths in UI
- Ultimate MTF: +individual settings for each MA, custom Ticker/Symbols
Features:
- 4x3 = 12 MAs of any type including Hull Moving Average (HMA)
- 4x MTF groups with step line smoothing
- BB +1 extra TF/type for BB MAs
- 12 MA levels with adjustable group offsets, indents and shift
- show max bars back
- you can show/hide both groups of MAs/levels and individual MAs
Notes:
1. based on 3EmaBB, uses plot*, barssince and security functions
2. you can't set certain constants from input due to Pinescript limitations - change the code as needed, recompile and use as a private version
3. Levels = trackprice implementation
4. Show Max Bars Back = show_last implementation
5. uses timeframe textbox instead of input resolution to allow for 120 240 and other custom TFs. Also supports TFs in hours: 2H or H2
6. swma has a fixed length = 4, alma and linreg have additional offset and smoothing params
7. Smoothing is applied by default for visual aesthetics on MTF. To use exact ma mtf values (lines with stair stepping) - disable it
MTF Notes:
- uses simple timeframe textbox instead of input resolution dropdown to allow for 120, 240 and other custom TFs, also supports timeframes in H: 2H, H2
- Groups that are not assigned a Custom TF will use Current Timeframe (0).
- MTF will work for any MA type assigned to the group
- MTF works both ways: you can display a higher TF MA/BB on a lower TF or a lower TF MA/BB on a higher TF.
- MTF MA values are normally aligned at the boundary of their native timeframe. This produces stair stepping when a higher TF MA is viewed on a lower TF.
Therefore X Y Point Density/Smoothing is applied by default on MA MTF for visual aesthetics. Set both to 0 to disable and see exact ma mtf values (lines with stair stepping and original mtf alignment).
- Smoothing is disabled for BB MTF bands because fill doesn't work with smoothed MAs after duplicate values are replaced with na.
- MTF MA Value fluctuation is possible on the current bar due to default security lookahead
Smoothing:
- X,Y == 0 - X,Y smoothing disabled (stair stepping on high TFs)
- X == 0, Y > 0 - X,Y smoothing applied to all TFs
- Y == 0, X > 0 - X smoothing applied to all TFs < deltaX_max_tf, Y smoothing disabled
- X > 0, Y > 0 - Y smoothing applied to all TFs, then X smoothing applied to all TFs < deltaX_max_tf
X Smoothing with Y == 0 - shows only every deltaX-th point starting from the first bar.
X Smoothing with Y > 0 - shows only every deltaX-th point starting from the last shown Y point, essentially filling huge gaps remaining after Y Smoothing with points and preserving the curve's general shape
X Smoothing on high TFs with already scarce points produces weird curve shapes, it works best only on high density lower TFs
Y Smoothing reduces points on all TFs, removes adjacent points with prices within deltaY, while preserving the smaller curve details.
A combination of X,Y produces the most accurate smoothing. Higher delta value - larger range, more points removed.
Show Max Bars Back:
- can't set plot show_last from input -> implemented using a timenow based range check
- you can't delete/modify history once plotted, so essentially it just sets a start point for plotting (from num_bars bars back) that works only in realtime mode (not in replay)
Levels:
You can plot current MA value using plot trackprice=true or by checking Show Price Line in Style. Problem is:
- you can only change color (not the dashed line style, width), have both ma + price line (not just the line), and it's full screen wide
- you can't set plot trackprice from input => implemented using plotshape/plotchar with fixed text labels serving as levels
- there's no other way of creating a dynamic level: hline, plot, offset - nothing else works.
- you can't plot a text var - all text strings must be constants, so you can't change the style, width and text labels without recompiling.
- from input you can only adjust offset, indent and shift for each level group, and change color
- the dot below each level line is the exact MA value. If you want just the line swap plotshape with plotchar, recompile and save as your private version, adjust Y shift.
To speed up redraw times: reduce last_bars to ~2000, recompile and use as your own private version
Pinescript is a rudimentary language (should be called Painscript instead) that can basically only plot data. You can't do much else. Please see the code for tips and hints.
Certain things just can't be done or require shady workarounds and weeks of testing trying to resolve weird node.js compiler errors.
Feel free to learn from/reuse/change the code as needed and use as your own private version. See comments in code. Good Luck!

RSI Chebyshev Pro with Goldilocks Fractals - NR [NPR21]RSI Chebyshev Pro with Goldilocks Fractals - Non-Repaint
CHART INFORMATION
Instrument: /MNQ (Micro E-mini Nasdaq-100 Futures)
Timeframe: 2-minute
Indicator: RSI Chebyshev Pro with Goldilocks Fractals - NR
THE PROBLEM
Standard RSI is too choppy and noisy – it whipsaws all over the place in volatile markets like futures, giving false oversold/overbought signals that burn you on entries. I was sick of missing real reversals or getting stopped out on fakeouts. I wanted something smoother that still catches the big momentum shifts without lagging too much, plus actual market structure to make it more reliable for quick trades.
WHAT MAKES THIS UNIQUE
Unlike basic RSI indicators that use simple moving average smoothing, this combines several advanced techniques that aren't commonly found together:
1. Chebyshev Type I Filtering - Signal processing mathematics (not basic EMAs) that kills noise while keeping real swings sharp. Most RSI smoothing just blurs everything - this keeps responsiveness without the chop.
2. MAMA Adaptive Period - The moving average adapts to actual market cycles using the MESA algorithm, not fixed periods that lag in changing conditions.
3. RSI Pivot Fractals - These aren't price fractals slapped onto RSI. The fractals detect pivots directly on RSI values at extreme levels, with signals appearing back at the exact pivot bar (not current bar), showing you where the actual reversal happened.
4. True Non-Repainting Implementation - Signals appear delayed BUT locked at the historical pivot location forever. What you see in backtests is exactly what appeared live - no vanishing signals, no shifting.
5. All-in-One Integration - Instead of running 3-4 separate indicators (RSI + fractals + patterns + smoothing), everything works together in a single, optimized calculation with confluence built in.
This isn't just RSI with some Williams Fractals thrown on top - it's a complete rethink of how to identify high-probability RSI reversals using signal processing and adaptive algorithms.
ORIGIN & ENHANCEMENTS
Original Source: ChartPrime RSI Chebyshev indicator
Converted & Enhanced by: NPR21
What I Added:
✅ Converted to Pine Script v6 - Made this available to TradingView traders
✅ Goldilocks Fractals - RSI alone doesn't tell you about price structure. These fractals nail those "just right" pivot points where highs/lows confirm. I kept seeing RSI extremes that reversed hard when they lined up with fractals - this was the missing piece for confluence.
✅ 100% Non-Repainting - I've been burned by repainters. You'd backtest something, looks amazing, then live it vanishes or shifts. Lost real money on that. This is rock-solid: signals show delayed but once they're there, they're locked forever. Makes backtesting trustworthy.
✅ Candlestick Patterns - Engulfing, Morning Star, Evening Star detection for confluence
✅ Customizable Visuals - BUY/SELL labels, multiple display styles, full color/size control
✅ Complete Alert System - Get notified on all signal types
HOW IT WORKS
Chebyshev Filtering:
Like putting noise-canceling on your RSI – smooths out jittery ups and downs from random price spikes without flattening into useless lag. It's signal processing math that keeps important swings sharp while killing BS noise. Way better than simple EMA smoothing that blurs everything.
The Components:
Ultra-Smooth RSI - Chebyshev Type I filtering + adaptive MAMA algorithm
Goldilocks Fractals - Pivot detection confirmed after N bars (default 5)
Pattern Recognition - Detects Engulfing, Morning/Evening Star patterns
Visual Styles - Candle Trend (hollow green/solid red) or traditional candles
SIGNAL DELAY vs REPAINTING
✅ THIS HAS SIGNAL DELAY (GOOD) - NOT REPAINTING (BAD)
Signal Delay:
Signals appear after N bars (default 5 bar delay)
Once visible, NEVER disappears or moves
Perfect for backtesting - 100% reliable
What you see in history is what you'd see live
Why the Delay:
To confirm a pivot, we need to see price didn't go lower/higher in the next N bars. This confirmation makes signals reliable. The delay is the price for trustworthy signals.
Want faster? Drop Fractal Periods to 2-3 (more signals, less confirmation).
HOW I TRADE IT
My /MNQ Scalping (1-3 min charts):
LONG: BUY label appears (down fractal + maybe morning star/engulfing) → Check RSI crossing up from oversold (<30) → Confirm with volume → Long with stop below fractal low → Target 1-2R
SHORT: SELL label (up fractal + maybe evening star) → RSI from overbought → Short with stop above
Filter: Only longs in uptrends (watch the MA). Exit partials if momentum fades.
Best Timeframes: 1-5 min for futures scalping. Works on 15 min for swings but for pure scalping, stay under 5 min in high-vol sessions.
SETTINGS I USE
Standard Setup:
Length: 24, Smoothing: 3
Auto MA: ON, Multiplier: 1-2
Fractal Periods: 5 (good confirmation)
Choppy Days:
Smoothing to 5
Aggressive:
Fractal Periods to 3
Pro Tip: Pair with volume or price EMA. Love when fractal BUY + engulfing bull align. Use Candle Trend style. Test on demo first.
KEY SETTINGS
RSI: Length (24), Smoothing (3), Auto MA, Style (Candle/Candle Trend)
Fractals: Periods (5 = more reliable, 3 = faster/riskier), Label colors/sizes, Offsets
Alerts: All signals fire only on confirmed, non-repainting events
DISCLAIMERS
⚠️ Tool, not a complete system - use proper risk management
⚠️ Signals have delay for reliability - not for instant entries
⚠️ Best with price action, volume, other analysis
⚠️ Test on demo before live trading
Questions? Comment below!
NPR21

RSI Chebyshev Pro with Goldilocks Fractals - NR [NPR21]RSI Chebyshev Pro with Goldilocks Fractals - Non-Repaint
----------------------------------------------------------------------------------------------------------------------
CHART INFORMATION
Instrument: /MNQ (Micro E-mini Nasdaq-100 Futures)
Timeframe: 2-minute
Indicator: RSI Chebyshev Pro with Goldilocks Fractals - NR
----------------------------------------------------------------------------------------------------------------------
THE PROBLEM
Standard RSI is too choppy and noisy – it whipsaws all over the place in volatile markets like futures, giving false oversold/overbought signals that burn you on entries. I was sick of missing real reversals or getting stopped out on fakeouts. I wanted something smoother that still catches the big momentum shifts without lagging too much, plus actual market structure to make it more reliable for quick trades.
WHAT MAKES THIS UNIQUE
Unlike basic RSI indicators that use simple moving average smoothing, this combines several advanced techniques that aren't commonly found together:
1. Chebyshev Type I Filtering - Signal processing mathematics (not basic EMAs) that kills noise while keeping real swings sharp. Most RSI smoothing just blurs everything - this keeps responsiveness without the chop.
2. MAMA Adaptive Period - The moving average adapts to actual market cycles using the MESA algorithm, not fixed periods that lag in changing conditions.
3. RSI Pivot Fractals - These aren't price fractals slapped onto RSI. The fractals detect pivots directly on RSI values at extreme levels, with signals appearing back at the exact pivot bar (not current bar), showing you where the actual reversal happened.
4. True Non-Repainting Implementation - Signals appear delayed BUT locked at the historical pivot location forever. What you see in backtests is exactly what appeared live - no vanishing signals, no shifting.
5. All-in-One Integration - Instead of running 3-4 separate indicators (RSI + fractals + patterns + smoothing), everything works together in a single, optimized calculation with confluence built in.
This isn't just RSI with some Williams Fractals thrown on top - it's a complete rethink of how to identify high-probability RSI reversals using signal processing and adaptive algorithms.
ORIGIN & ENHANCEMENTS
Original Source: ChartPrime RSI Chebyshev indicator
Converted & Enhanced by: NPR21
What I Added:
✅ Converted to Pine Script v6 - Made this available to TradingView traders
✅ Goldilocks Fractals - RSI alone doesn't tell you about price structure. These fractals nail those "just right" pivot points where highs/lows confirm. I kept seeing RSI extremes that reversed hard when they lined up with fractals - this was the missing piece for confluence.
✅ 100% Non-Repainting - I've been burned by repainters. You'd backtest something, looks amazing, then live it vanishes or shifts. Lost real money on that. This is rock-solid: signals show delayed but once they're there, they're locked forever. Makes backtesting trustworthy.
✅ Candlestick Patterns - Engulfing, Morning Star, Evening Star detection for confluence
✅ Customizable Visuals - BUY/SELL labels, multiple display styles, full color/size control
✅ Complete Alert System - Get notified on all signal types
HOW IT WORKS
Chebyshev Filtering:
Like putting noise-canceling on your RSI – smooths out jittery ups and downs from random price spikes without flattening into useless lag. It's signal processing math that keeps important swings sharp while killing BS noise. Way better than simple EMA smoothing that blurs everything.
The Components:
Ultra-Smooth RSI - Chebyshev Type I filtering + adaptive MAMA algorithm
Goldilocks Fractals - Pivot detection confirmed after N bars (default 5)
Pattern Recognition - Detects Engulfing, Morning/Evening Star patterns
Visual Styles - Candle Trend (hollow green/solid red) or traditional candles
SIGNAL DELAY vs REPAINTING
✅ THIS HAS SIGNAL DELAY (GOOD) - NOT REPAINTING (BAD)
Signal Delay:
Signals appear after N bars (default 5 bar delay)
Once visible, NEVER disappears or moves
Perfect for backtesting - 100% reliable
What you see in history is what you'd see live
Why the Delay:
To confirm a pivot, we need to see price didn't go lower/higher in the next N bars. This confirmation makes signals reliable. The delay is the price for trustworthy signals.
Want faster? Drop Fractal Periods to 2-3 (more signals, less confirmation).
HOW I TRADE IT
My /MNQ Scalping (1-3 min charts):
LONG: BUY label appears (down fractal + maybe morning star/engulfing) → Check RSI crossing up from oversold (<30) → Confirm with volume → Long with stop below fractal low → Target 1-2R
SHORT: SELL label (up fractal + maybe evening star) → RSI from overbought → Short with stop above
Filter: Only longs in uptrends (watch the MA). Exit partials if momentum fades.
Best Timeframes: 1-5 min for futures scalping. Works on 15 min for swings but for pure scalping, stay under 5 min in high-vol sessions.
SETTINGS I USE
Standard Setup:
Length: 24, Smoothing: 3
Auto MA: ON, Multiplier: 1-2
Fractal Periods: 5 (good confirmation)
Choppy Days:
Smoothing to 5
Aggressive:
Fractal Periods to 3
Pro Tip: Pair with volume or price EMA. Love when fractal BUY + engulfing bull align. Use Candle Trend style. Test on demo first.
KEY SETTINGS
RSI: Length (24), Smoothing (3), Auto MA, Style (Candle/Candle Trend)
Fractals: Periods (5 = more reliable, 3 = faster/riskier), Label colors/sizes, Offsets
Alerts: All signals fire only on confirmed, non-repainting events
DISCLAIMERS
⚠️ Tool, not a complete system - use proper risk management
⚠️ Signals have delay for reliability - not for instant entries
⚠️ Best with price action, volume, other analysis
⚠️ Test on demo before live trading
Questions? Comment below!
NPR21

RSI Chebyshev Pro with Goldilocks Fractals - NR [NPR21]RSI Chebyshev Pro with Goldilocks Fractals - Non-Repaint
==================================================================================
**CHART INFORMATION**
The example chart shown displays:
- Instrument: /MNQ (Micro E-mini Nasdaq-100 Futures)
- Timeframe: 2-minute
- Indicator: RSI Chebyshev Pro with Goldilocks Fractals - NR
==================================================================================
═════════════════════════════════════════════════════════════
THE PROBLEM
Standard RSI is too choppy and noisy – it whipsaws all over the place in volatile markets like futures, giving false oversold/overbought signals that burn you on entries. I was sick of missing real reversals or getting stopped out on fakeouts. I wanted something smoother that still catches the big momentum shifts without lagging too much, plus actual market structure to make it more reliable for quick trades.
═════════════════════════════════════════════════════════════
WHAT MAKES THIS UNIQUE
Unlike basic RSI indicators that use simple moving average smoothing, this combines several advanced techniques that aren't commonly found together:
1. Chebyshev Type I Filtering - Signal processing mathematics (not basic EMAs) that kills noise while keeping real swings sharp. Most RSI smoothing just blurs everything - this keeps responsiveness without the chop.
2. MAMA Adaptive Period - The moving average adapts to actual market cycles using the MESA algorithm, not fixed periods that lag in changing conditions.
3. RSI Pivot Fractals - These aren't price fractals slapped onto RSI. The fractals detect pivots directly on RSI values at extreme levels, with signals appearing back at the exact pivot bar (not current bar), showing you where the actual reversal happened.
4. True Non-Repainting Implementation - Signals appear delayed BUT locked at the historical pivot location forever. What you see in backtests is exactly what appeared live - no vanishing signals, no shifting.
5. All-in-One Integration - Instead of running 3-4 separate indicators (RSI + fractals + patterns + smoothing), everything works together in a single, optimized calculation with confluence built in.
This isn't just RSI with some Williams Fractals thrown on top - it's a complete rethink of how to identify high-probability RSI reversals using signal processing and adaptive algorithms.
═════════════════════════════════════════════════════════════
ORIGIN & ENHANCEMENTS
Original Source: ChartPrime RSI Chebyshev indicator
Converted & Enhanced by: NPR21
What I Added:
✅ Converted to Pine Script v6 - Made this available to TradingView traders
✅ Goldilocks Fractals - RSI alone doesn't tell you about price structure. These fractals nail those "just right" pivot points where highs/lows confirm. I kept seeing RSI extremes that reversed hard when they lined up with fractals - this was the missing piece for confluence.
✅ 100% Non-Repainting - I've been burned by repainters. You'd backtest something, looks amazing, then live it vanishes or shifts. Lost real money on that. This is rock-solid: signals show delayed but once they're there, they're locked forever. Makes backtesting trustworthy.
✅ Candlestick Patterns - Engulfing, Morning Star, Evening Star detection for confluence
✅ Customizable Visuals - BUY/SELL labels, multiple display styles, full color/size control
✅ Complete Alert System - Get notified on all signal types
═════════════════════════════════════════════════════════════
HOW IT WORKS
Chebyshev Filtering:
Like putting noise-canceling on your RSI – smooths out jittery ups and downs from random price spikes without flattening into useless lag. It's signal processing math that keeps important swings sharp while killing BS noise. Way better than simple EMA smoothing that blurs everything.
The Components:
Ultra-Smooth RSI - Chebyshev Type I filtering + adaptive MAMA algorithm
Goldilocks Fractals - Pivot detection confirmed after N bars (default 5)
Pattern Recognition - Detects Engulfing, Morning/Evening Star patterns
Visual Styles - Candle Trend (hollow green/solid red) or traditional candles
═════════════════════════════════════════════════════════════
SIGNAL DELAY vs REPAINTING
✅ THIS HAS SIGNAL DELAY (GOOD) - NOT REPAINTING (BAD)
Signal Delay:
Signals appear after N bars (default 5 bar delay)
Once visible, NEVER disappears or moves
Perfect for backtesting - 100% reliable
What you see in history is what you'd see live
Why the Delay:
To confirm a pivot, we need to see price didn't go lower/higher in the next N bars. This confirmation makes signals reliable. The delay is the price for trustworthy signals.
Want faster? Drop Fractal Periods to 2-3 (more signals, less confirmation).
════════════════════════════════════════════════════════════
HOW I TRADE IT
My /MNQ Scalping (1-3 min charts):
LONG: BUY label appears (down fractal + maybe morning star/engulfing) → Check RSI crossing up from oversold (<30) → Confirm with volume → Long with stop below fractal low → Target 1-2R
SHORT: SELL label (up fractal + maybe evening star) → RSI from overbought → Short with stop above
Filter: Only longs in uptrends (watch the MA). Exit partials if momentum fades.
Best Timeframes: 1-5 min for futures scalping. Works on 15 min for swings but for pure scalping, stay under 5 min in high-vol sessions.
═════════════════════════════════════════════════════════════
SETTINGS I USE
Standard Setup:
Length: 24, Smoothing: 3
Auto MA: ON, Multiplier: 1-2
Fractal Periods: 5 (good confirmation)
Choppy Days: Smoothing to 5
Aggressive: Fractal Periods to 3
Pro Tip: Pair with volume or price EMA. Love when fractal BUY + engulfing bull align. Use Candle Trend style. Test on demo first.
═════════════════════════════════════════════════════════════
KEY SETTINGS
RSI: Length (24), Smoothing (3), Auto MA, Style (Candle/Candle Trend)
Fractals: Periods (5 = more reliable, 3 = faster/riskier), Label colors/sizes, Offsets
Alerts: All signals fire only on confirmed, non-repainting events
═════════════════════════════════════════════════════════════
DISCLAIMERS
⚠️ Tool, not a complete system - use proper risk management
⚠️ Signals have delay for reliability - not for instant entries
⚠️ Best with price action, volume, other analysis
⚠️ Test on demo before live trading
═════════════════════════════════════════════════════════════
Questions? Comment below!
NPR21

Multi-VWAP Pro (HP) + Alerts - par alphaomega18Multi-VWAP Pro High-Precision (D/W/M) – by alphaomega18
🚀 Overview
Elevate your institutional analysis with the Multi-VWAP Pro High-Precision, a comprehensive tool designed for traders who demand surgical accuracy.
Most standard VWAP indicators lag or shift when changing timeframes. This script solves that by using a 1-minute data polling engine (request.security), ensuring your Daily, Weekly, and Monthly levels remain rock-solid and accurate, whether you are on a 1m, 15m, or 1h chart.
💎 Key Features
High-Precision Engine: Calculation based on 1-minute intraday data for maximum mathematical accuracy.
Multi-Timeframe Anchors: View Daily, Weekly, and Monthly VWAPs simultaneously.
Dynamic Color Logic: The Daily VWAP turns Green when the price is above and Red when below for instant trend bias.
Triple SD Bands: 3 fully customizable Standard Deviation bands for each timeframe to identify exhaustion zones.
Smart Alerts: Fully programmable notifications for price crosses on all levels.
Clean Labels: Real-time labels on the price scale for a professional, organized look.
📈 Trading Strategy: The Power of Confluence
Using three different VWAP anchors allows you to see the market through multiple lenses. Here is how to use this tool:
1. The Institutional Confluence
The strongest setups occur when two or more VWAP lines overlap.
The Setup: If the Daily VWAP clusters with the Weekly VWAP, it creates a "Hard Floor/Ceiling."
The Trade: Look for high-probability bounces in these zones where institutions defend their average price.
2. Mean Reversion with SD3 Bands
The 3rd Standard Deviation (SD3) represents price extremes.
The Trade: When price pierces a Daily SD3, look for a reversal back toward the VWAP (Mean Reversion), especially if it aligns with a Weekly or Monthly SD2 band.
3. Trend Confirmation
Bullish Bias: If the Daily VWAP is Green, prioritize "Buy the Dip" on lower SD bands.
Bearish Bias: If the Daily VWAP is Red, prioritize "Sell the Rip" on upper SD bands.
💡 Pro Tip for my Followers
"Alignment is king. When the Daily, Weekly, and Monthly VWAPs all slope in the same direction, you have a high-conviction trend. Follow me for more high-precision tools and market insights!"
🛠 Settings & Customization
Visibility: Toggle any VWAP or SD band on/off.
Full Color Control: Pick your own colors for Weekly and Monthly lines.
Adjustable Multipliers: Fine-tune the volatility bands (SD1, SD2, SD3) for any asset.

Crypto Swing Pro [All-in-One] v2 [R2D2]1. Introduction
Crypto Swing Pro (CSP) is a professional-grade technical analysis suite designed for high-volatility cryptocurrency markets. It consolidates the top five institutional-grade indicators—RSI, EMAs, OBV, MACD, and Bollinger Bands—into a single overlay.
New in v2.0: The script now includes a fully integrated Alert System. You no longer need to stare at the chart all day. You can set the script to email you or ping your phone exactly when a MACD Cross occurs or when Volatility Squeezes, ensuring you never miss a move.
2. Installation
1. Open TradingView: Go to your chart.
2. Open Pine Editor: Click the tab at the bottom of the screen.
3. Paste Code: Delete existing code and paste the v2.0 script above.
4. Save: Name it CSP v2.
5. Add to Chart: Click "Add to Chart".
3. How to Set Up Alerts
This is the most powerful feature of v2.0. You can set alerts for specific conditions without needing to write code.
1. Click the "Alert" Button: Located on the top menu bar of TradingView (looks like an alarm clock).
2. Condition: In the "Condition" dropdown menu, select CSP v2.
3. Select Trigger: A second dropdown will appear. Choose the specific signal you want to track:
MACD Buy Signal: Triggers when MACD crosses bullish.
RSI Oversold (<30): Triggers when price is mathematically cheap.
Volatility Squeeze: Triggers when a big move is imminent.
Price Cross Over 200 EMA: Triggers on major trend reversals.
4. Options: Select "Once Per Bar Close" (Recommended to avoid false signals during the candle fluctuation).
5. Notify: Check "Notify in App" or "Send Email".
6. Create: Click Create. You will now be notified even if you are asleep.
4. The Dashboard (HUD)
The on-screen table gives you an instant "Health Check" of the asset.
Indicator Status Meaning
RSI (14) Green (<30) Oversold. Look for long entries.
Red (>70) Overbought. Look to take profit.
MACD BULLISH Momentum is up.
TREND UPTREND Price is above the 200 EMA (White Line).
VOLATILITY SQUEEZE CRITICAL: Market is coiling. A breakout is coming soon.
VOLUME ACCUMULATION Whales are buying (OBV is rising).
5. Configuration & Visuals
Hover over the indicator name on the chart and click the Settings (Gear) icon.
Toggle Indicators: Uncheck any indicator (like Bollinger Bands or EMA 20) to hide them if you want a cleaner view. The Dashboard will still calculate them in the background.
Dashboard Position: Move the table to any corner or turn it off entirely if it blocks your price view.
Color Themes: Adjust the RSI background colors or EMA colors to fit your chart theme (Light/Dark mode).
6. Best Practices
The "Squeeze" Play: If you get a Volatility Squeeze alert, do not enter immediately. Wait for the price to break out of the Bollinger Bands. The squeeze is the "Get Ready" signal; the breakout is the "Go" signal.
The "Trend" Filter: If the 200 EMA (White Line) is above the price (Downtrend), ignore all "MACD Buy" alerts. Trade with the macro trend, not against it.

Quant-Action Pro: Triple Confluence EngineQuant-Action Pro: Triple Confluence Engine
Systematic Framework for Structural Price Action Analysis
Quant-Action Pro is a high-performance analytical engine designed to synchronize institutional liquidity flow with market geometry. Instead of traditional "signals," this framework identifies Structural States where three independent algorithmic layers align, providing a objective roadmap for the current price action context.
1. Core Algorithmic Matrix
The engine operates by monitoring the interaction between price and three proprietary logic layers:
A. Institutional Flow Node (SP2L) —
Logic: Monitors "Passive Liquidity Absorption" at the 20-period EMA.
Function: Identifies zones where institutional buyers/sellers are defending the trend's equilibrium. This is not a simple touch; it requires a validated "Touch-and-Hold" sequence.
B. Structural Flip Scanner (BTB) —
Logic: Detects the transition from old supply to new demand (S/R Flip).
Function: Uses a 3-phase Break-Test-Break verification to confirm that a structural breakout is backed by volume, reducing the risk of "Fake-outs."
C. Liquidity Compression Monitor (Micro Map) —
Logic: Statistical range-contraction analysis (Volatility Squeeze).
Function: Signals a High-Density State where price is coiling for an expansion move.
2. The Golden State: Triple Confluence Logic
The GOLD label represents the "Apex" of this engine. It is triggered only when the SP2L, BTB, and Micro Map layers synchronize on a single candle. In structural terms, this means:
Trend Defense (SP2L) is active.
Structural Breakout (BTB) is confirmed.
Volatility Expansion (MM) is imminent.
This Triple-Layer filtering ensures that Golden Signals only appear during periods of maximum market conviction.
3. Professional Implementation (Structural View)
MTF Trend Matrix: A built-in dashboard provides a 1H, 4H, and 1D diagnosis to ensure local setups align with the Macro Trend.
Smart Invalidation (Adaptive Trendlines): The engine draws dynamic geometry to define the current "Structural Floor/Ceiling." A decisive close beyond these lines acts as a clear Invalidation Point for the current thesis.
Mean Reversion: The system uses the 200-EMA as the primary directional filter, defining whether the market is in a "Bullish Expansion" or "Bearish Correction" state.
⚠️ Risk Disclaimer
Trading financial instruments involves significant risk. Quant-Action Pro is an educational tool designed for research and structural analysis. It does not provide financial advice. Past performance is not indicative of future results. Always use strict risk management.

IDLP - Intraday Daily Levels Pro [FXSMARTLAB]🔥 IDLP – Intraday Daily Levels Pro
IDLP – Intraday Daily Levels Pro is a precision toolkit for intraday traders who rely on objective daily structure instead of repainting indicators and noisy signals.
Every level plotted by IDLP is derived from one simple rule:
Today’s trading decisions must be based on completed market data only.
That means:
✅ No use of the current day’s unfinished data for levels
✅ No lookahead
✅ No hidden repaint behavior
IDLP reconstructs the previous trading day from the intraday chart and then projects that structure forward onto the current session, giving you a stable, institutional-style intraday map.
🧱 1. Previous Daily Levels (Core Structure)
IDLP extracts and displays the full previous daily structure, which you can toggle on/off individually via the inputs:
Previous Daily High (PDH)
Previous Daily Low (PDL)
Previous Daily Open
Previous Daily Close,
Previous Daily Mid (50% of the range)
Previous Daily Q1 (25% of the range)
Previous Daily Q3 (75% of the range)
All of these come from the day that just closed and are then locked for the entire current session.
What these levels tell you:
PDH / PDL – true extremes of yesterday’s price action (liquidity zones, breakout/reversal points).
Previous Daily Open / Close – how the market positioned itself between session start and end
Mid (50%) – equilibrium level of the previous day’s auction.
Q1 / Q3 (25% / 75%) internal structure of the previous day’s range, dividing it into four equal zones and helping you see if price is trading in the lower, middle, or upper quarter of yesterday’s range.
All these levels are non-repaint: once the day is completed, they are fixed and never change when you scroll, replay, or backtest.
🎯 2. Previous Day Pivot System (P, S1, S2, R1, R2)
IDLP includes a classic floor-trader pivot grid, but critically:
It is calculated only from the previous day’s high, low, and close.
So for the current session, the following are fixed:
Pivot P – central reference level of the previous day.
Support 1 (S1) and Support 2 (S2)
Resistance 1 (R1) and Resistance 2 (R2)
These levels are widely used by institutional desks and algos to structure:
mean-reversion plays, breakout zones, intraday targets, and risk placement.
Everything in this section is non-repaint because it only uses the previous day’s fully closed OHLC.
📏 3. 1-Day ADR Bands Around Previous Daily Open
Instead of a multi-day ADR, IDLP uses a pure 1-Day ADR logic:
ADR = Range of the previous day
ADR = PDH − PDL
From that, IDLP builds two clean bands centered around the previous daily Open:
ADR Upper Band = Previous Day Open + (ADR × Multiplier)
ADR Lower Band = Previous Day Open − (ADR × Multiplier)
The multiplier is user-controlled in the inputs:
ADR Multiplier (default: 0.8)
This lets you choose how “tight” or “wide” you want the ADR envelope to be around the previous day’s open.
Typical use cases:
Identify realistic intraday extension targets, Spot exhaustion moves beyond ADR bands, Frame reversals after reaching volatility extremes, Align trades with or against volatility expansion
Again, since ADR is calculated only from the completed previous day, these bands are totally non-repaint during the current session.
🔒 4. True Non-Repaint Architecture
The internal logic of IDLP is built to guarantee non-repaint behavior:
It reconstructs each day using time("D") and tracks:
dayOpen, dayHigh, dayLow, dayClose for the current day
prevDayOpen, prevDayHigh, prevDayLow, prevDayClose for the previous day
At the moment a new day starts:
The “current day” gets “frozen” into prevDay*
These prevDay* values then drive: Previous Daily Levels, Pivots, ADR.
During the current day:
All these “previous day” values stay fixed, no matter what happens.
They do not move in real time, they do not shift in replay.
This means:
What you see in the past is exactly what you would have seen live.
No fake backtests.
No illusion of perfection from repainting behavior.
🎯 5. Designed For Intraday Traders
IDLP – Intraday Daily Levels Pro is made for:
- Day traders and scalpers
- Index and FX traders
- Prop firm challenge trading
- Traders using ICT/SMC-style levels, liquidity, and range logic
- Anyone who wants a clean, institutional-style daily framework without noise
You get:
Previous Day OHLC
Mid / Q1 / Q3 of the previous range
Previous-Day Pivots (P, S1, S2, R1, R2)
1-Day ADR Bands around Previous Day Open
All calculated only from closed data, updated once per day, and then locked.

Trend Vector Pro v2.0Trend Vector Pro v2.0
👨💻 Developed by: Mohammed Bedaiwi
💡 Strategy Overview & Coherence
Trend Vector Pro (TVPro) is a momentum-based trend & reversal strategy that uses a custom smoothed oscillator, an optional ADX filter, and classic Pivot Points to create a single, coherent trading framework.
Instead of stacking random indicators, TVPro is built around these integrated components:
A custom momentum engine (signal generation)
An optional ADX filter (trend quality control)
Daily Pivot Points (context, targets & S/R)
Swing-based “Golden Bar” trailing stops (trade management)
Optional extended bar detection (overextension alerts)
All parts are designed to work together and are documented below to address originality & usefulness requirements.
🔍 Core Components & Justification
1. Custom Momentum Engine (Main Signal Source)
TVPro’s engine is a custom oscillator derived from the bar midpoint ( hl2 ), similar in spirit to the Awesome Oscillator but adapted and fully integrated into the strategy. It measures velocity and acceleration of price, letting the script distinguish between strong impulses, weakening trends, and pure noise.
2. ADX Filter (Trend Strength Validation – Optional)
Uses Average Directional Index (ADX) as a gatekeeper.
Why this matters: This prevents the strategy from firing signals in choppy, non-trending environments (when ADX is below the threshold) and keeps trades focused on periods of clear directional strength.
3. Classic Pivot Points (Context & Targets)
Calculates Daily Pivot Points ( PP, R1-R3, S1-S3 ) via request.security() using prior session data.
Why this matters: Momentum gives the signal, ADX validates the environment, and Pivots add external structure for risk and target planning. This is a designed interaction, not a random mashup.
🧭 Trend State Logic (5-State Bar Coloring)
The strategy uses the momentum's value + slope to define five states, turning the chart into a visual momentum map:
🟢 STRONG BULL (Bright Green): Momentum accelerating UP. → Strong upside impulse.
🌲 WEAK BULL (Dark Green): Momentum decelerating DOWN (while positive). → Pullback/pause zone.
🔴 STRONG BEAR (Bright Red): Momentum accelerating DOWN. → Strong downside impulse.
🍷 WEAK BEAR (Dark Red): Momentum decelerating UP (while negative). → Rally/short-covering zone.
🔵 NEUTRAL / CHOP (Cyan): Momentum is near zero (based on noise threshold). → Consolidation / low volatility.
🎯 Signal Logic Modes
TVPro provides two selectable entry styles, controlled by input:
Reversals Only (Cleaner Mode – Default): Targets trend flips. Entry triggers when the current state is Bullish (or Bearish) and the previous state was not. This reduces noise and over-trading.
All Strong Pulses (Aggressive Mode): Targets acceleration phases. Entry triggers when the bar turns to STRONG BULL or STRONG BEAR after any other state. This mode produces more trades.
📌 Risk Management Tools
🟡 Golden Bars – Trailing Stops: Yellow “Trail” Arrows mark confirmed Swing Highs/Lows. These are used as logical trailing stop levels based on market structure.
Extended Bars: Detects when price closes outside a 2-standard-deviation channel, flagging overextension where a pullback is more likely.
Pivot Points: Used as external targets for Take Profit and structural stop placement.
⚙️ Strategy Defaults (Crucial for Publication Compliance)
To keep backtest results realistic and in line with House Rules, TVPro is published with the following fixed default settings:
Order Size: 5% of equity per trade ( default_qty_value = 5 )
Commission: 0.04% per order ( commission_value = 0.04 )
Slippage: 2 ticks ( slippage = 2 )
Initial Capital: 10,000
📘 How to Trade with Trend Vector Pro
Entry: Take Long when a Long signal appears and confirm the bar is Green (Bull state). Short for Red (Bear state).
Stop Loss: Place the initial SL near the latest swing High/Low, or near a relevant Pivot level.
Trade Management: Follow Golden (Trail) Arrows to trail your stop behind structure.
Exits: Exit when: the trailing stop is hit, Price reaches a major Pivot level, or an opposite signal prints.
🛑 Disclaimer
This script is for educational purposes only and does not constitute financial advice. Past performance does not guarantee future results. Always forward-test and use proper risk management before applying any strategy to live trading.

Adaptive Support & Resistance ProAdaptive Support & Resistance Pro – Description
Adaptive Support & Resistance Pro is an advanced S/R tool designed to automatically identify key support and resistance zones based on a combination of RSI, CMO dynamics, and pivot logic. This indicator provides precise and reactive levels that form only when specific technical conditions are met, filtering out noise and delivering more reliable S/R signals.
It is ideal for technical traders who want to understand where price naturally pauses, reverses, or consolidates—without the need to manually draw lines on every chart.
🔍 Key Features
1. Automatic Support & Resistance Detection
The indicator uses:
RSI (9)
CMO logic based on HMA
Pivot structure (len = 2)
to generate valid Support and Resistance zones.
A level is drawn only when all required conditions align, preventing false or weak signals.
2. Multi-Timeframe Analysis (MTF)
You can view the chart on one timeframe (e.g., 5m)
and display Support/Resistance levels from another timeframe (e.g., 1H, 4H, D) at the same time.
This allows for:
viewing higher-timeframe structures on lower charts,
better planning of entries and exits,
avoiding trades inside strong zones that may not be visible on the current timeframe.
All of this is controlled through the input:
S/R Timeframe
3. Adjustable Line Thickness (visual enhancement)
Using the input:
Line Width
you can increase the thickness of support/resistance lines to:
make important zones more visible,
improve chart readability,
emphasize S/R levels according to your visual preference.
This is especially useful on fast markets (Forex, Crypto) and on higher timeframes where clarity of levels is essential.
4. Clear distinction between Support and Resistance
Support lines have their own customizable color (default: green)
Resistance lines have their own customizable color (default: red)
You can freely adjust the colors to match your personal TradingView layout or theme.
5. Alerts (Notification System)
The built-in alert:
"New S/R line"
triggers whenever a new support or resistance level is detected.
This helps you:
monitor important levels without constantly watching the chart,
react quickly to new structure signals,
stay aware of market changes in real time.
🎯 How to Use the Indicator
Support levels often indicate potential reversals or long-entry opportunities.
Resistance levels highlight areas where price may reverse downward or form short setups.
The best performance is achieved when combining this indicator with:
price action,
EMA structure,
confirmation zones,
breakout logic,
trend filters.
MTF usage is highly recommended:
Analyze higher-timeframe S/R while trading lower-timeframe setups.
⚠️ Disclaimer
This indicator does not generate direct buy or sell signals.
Its purpose is to assist in market analysis and highlight areas where price is likely to react.
📌 Conclusion
Adaptive Support & Resistance Pro combines the strongest elements of automated S/R mapping: precision, reduced noise, multi-timeframe flexibility, and advanced logic based on RSI, CMO, and pivot structure.
It is perfect for traders who want:
clean and accurate S/R levels,
higher-timeframe insight while trading lower charts,
customizable and visually enhanced structure mapping.
