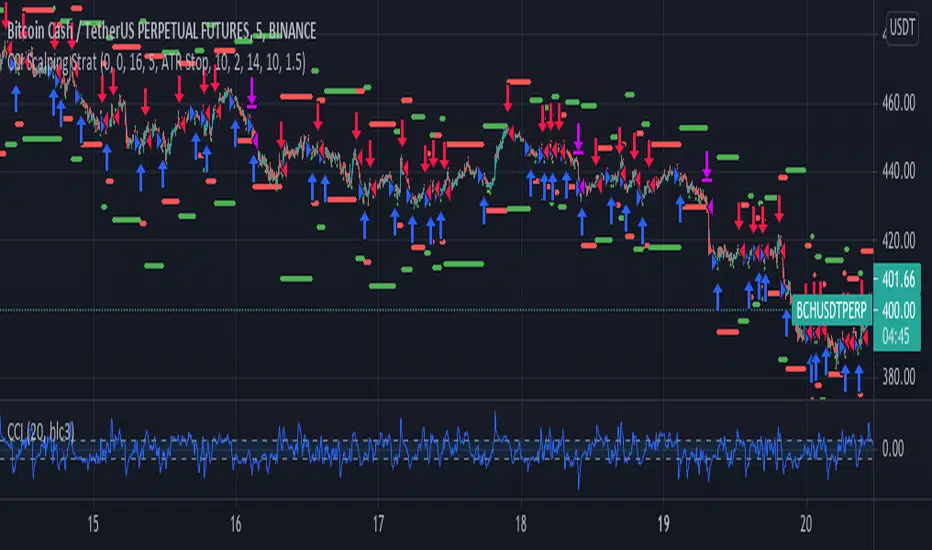
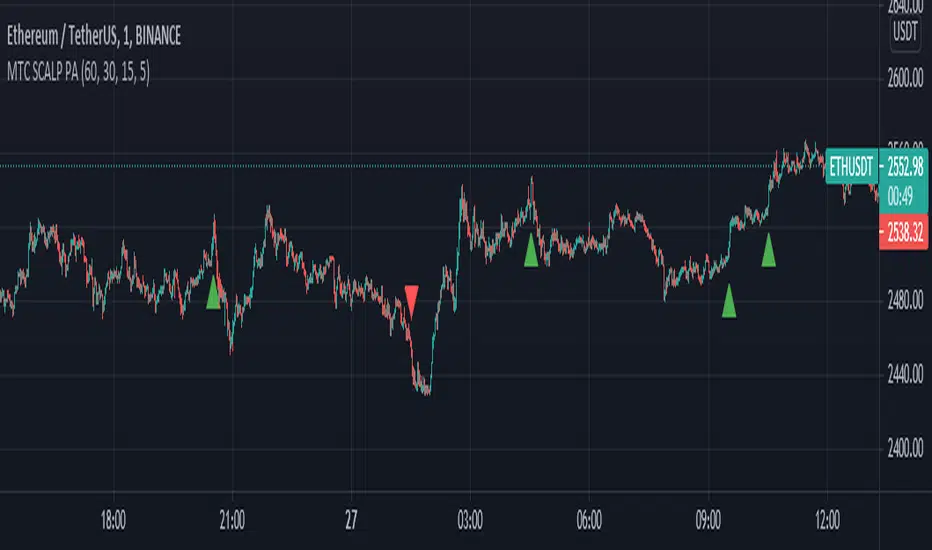
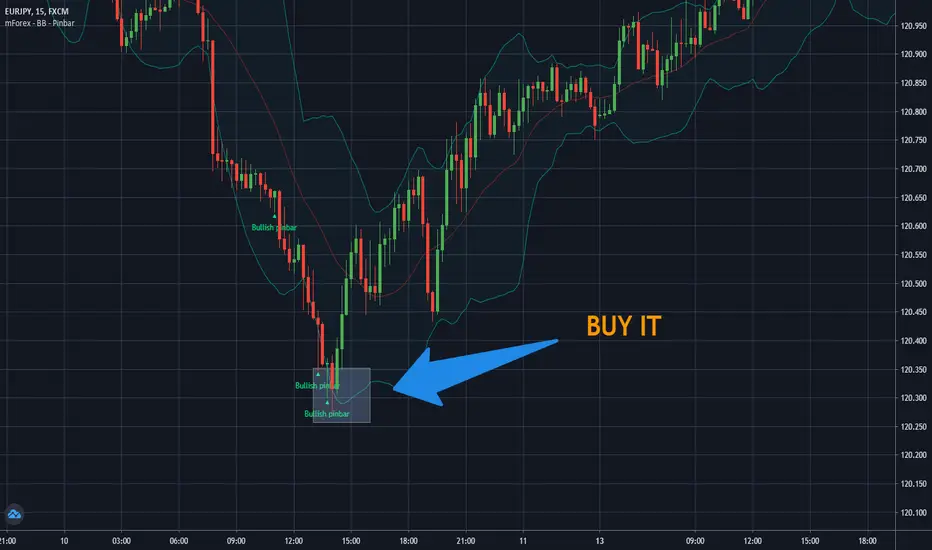
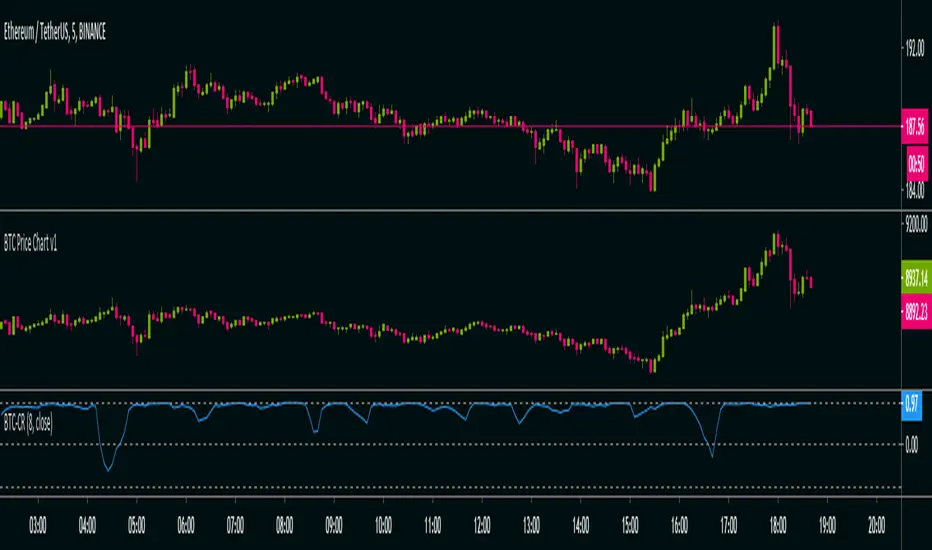
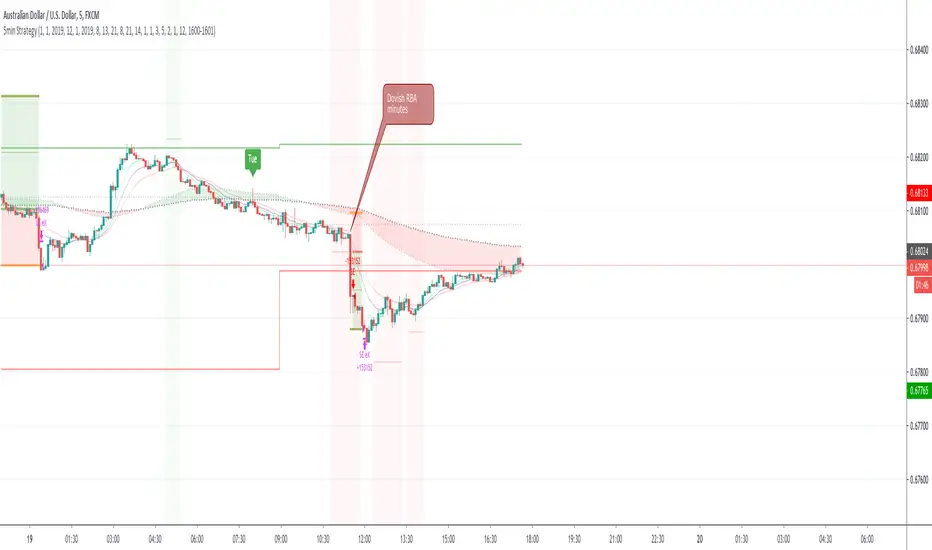
Altcoin Reversal or Correction DetectionINDICATOR OVERVIEW: Altcoin Reversal or Correction Detection 
Altcoin Reversal or Correction Detection is a powerful crypto-specific indicator designed exclusively for altcoins by analyzing their RSI values across multiple timeframes alongside Bitcoin’s RSI. Since BTC's price movements have a strong influence on altcoins, this tool helps traders better understand whether a reversal or correction signal is truly reliable or just noise. Even if an altcoin appears oversold or overbought, it may continue trending with BTC—so this indicator gives you the full picture.
The indicator is optimized for  CRYPTO MARKETS  only. Not suitable for  BTC  itself—this is a precision tool built only for ALTCOINS only.
This indicator is not only for signals but also serves as a tool for observing all the information from different timeframes of BTC and altcoins collectively.
 How the Calculation Works: Algorithm Overview 
The Altcoin Reversal or Correction Detection indicator relies on an algorithm that compares the RSI values of the altcoin across multiple timeframes with Bitcoin's RSI values. This allows the indicator to identify key market moments where a reversal or correction might occur.
BTC-Altcoin RSI Correlation: The algorithm looks for the correlation between Bitcoin's price movements and the altcoin's price actions, as BTC often influences the direction of altcoins. When both Bitcoin and the altcoin show either overbought or oversold conditions in a significant number of timeframes, the indicator signals the potential for a reversal or correction.
Multi-Timeframe Confirmation: Unlike traditional indicators that may focus on a single timeframe, this tool checks multiple timeframes for both BTC and the altcoin. When the same overbought/oversold conditions are met across multiple timeframes, it confirms the likelihood of a trend reversal or correction, providing a more reliable signal. The more timeframes that align with this pattern, the stronger the signal becomes.
Overbought/Oversold Conditions & Extreme RSI Values: The algorithm also takes into account the size of the RSI values, especially focusing on extreme overbought and oversold levels. The greater the RSI values are in these extreme regions, the stronger the potential reversal or correction signal. This means that not only do multiple timeframes need to confirm the condition, but the magnitude of the overbought or oversold RSI level plays a crucial role in determining the strength of the signal.
Signal Strength Levels: The signals are classified into three levels:
 Early Signal 
 Strong Signal 
 Very Strong Signal 
By taking into account the multi-timeframe analysis of both BTC and the altcoin RSI values, along with the magnitude of these RSI values, the indicator offers a highly reliable method for detecting potential reversals and corrections.
 Who Is This Indicator Suitable For? 
This indicator can also be used to detect reversal points, but it is especially effective for scalping. It highlights potential correction points, making it perfect for quick entries during smaller market pullbacks or short-term trend shifts, which is more suitable for scalpers looking to capitalize on short-term movements
 Integration with other tools 
Use this tool alongside key  Support and Resistance zones  to further enhance your trade by filtering for even better quality entries and focusing only on high-quality reversal or correction setups. It can be also used with other indicators and suitable with other personalised strategies.
Recherche dans les scripts pour "scalp"
Multi-timeframe Moving Average Overlay w/ Sentiment Table🔍 Overview 
This indicator overlays selected moving averages (MA) from multiple timeframes directly onto the chart and provides a dynamic sentiment table that summarizes the relative bullish or bearish alignment of short-, mid-, and long-term moving averages.
It supports seven moving average types — including traditional and advanced options like DEMA, TEMA, and HMA — and provides visual feedback via table highlights and alerts when strong momentum alignment is detected.
This tool is designed to support traders who rely on multi-timeframe analysis for trend confirmation, momentum filtering, and high-probability entry timing.
 ⚙️ Core Features 
Multi-Timeframe MA Overlay:
Plot moving averages from 1-minute, 5-minute, 1-hour, 1-day, 1-week, and 1-month timeframes on the same chart for visual trend alignment.
Customizable MA Type:
Choose from:
 
 EMA (Exponential Moving Average)
 SMA (Simple Moving Average)
 DEMA (Double EMA)
 TEMA (Triple EMA)
 WMA (Weighted MA)
 VWMA (Volume-Weighted MA)
 HMA (Hull MA)
 
Adjustable MA Length:
Change the length of all moving averages globally to suit your strategy (e.g. 9, 21, 50, etc.).
Sentiment Table:
Visually track trend sentiment across four key zones (Hourly, Daily, Weekly, Monthly). Each is based on the relative positioning of short-term and long-term MAs.
Sentiment Symbols Explained:
 
 ↑↑↑: Strong bullish momentum (short-term MAs stacked above longer-term MAs)
 ↑↑ / ↑: Moderate bullish bias
 ↓↓↓: Strong bearish momentum
 ↓↓ / ↓: Moderate bearish bias
 
Table Customization:
Choose the table’s position on the chart (bottom right, top right, bottom left, top left).
Style Customization:
Display MA lines as standard Line or Stepline format.
Color Customization:
Individual colors for each timeframe MA line for visual clarity.
Built-in Alerts:
Receive alerts when strong bullish (↑↑↑) or bearish (↓↓↓) sentiment is detected on any timeframe block.
 📈 Use Cases 
1. Trend Confirmation:
Use sentiment alignment across multiple timeframes to confirm the overall trend direction before entering a trade.
2. Entry Timing:
Wait for a shift from neutral to strong bullish or bearish sentiment to time entries during pullbacks or breakouts.
3. Momentum Filtering:
Only trade in the direction of the dominant multi-timeframe trend. For example, ignore long setups when all sentiment blocks show bearish alignment.
4. Swing & Intraday Scalping:
Use hourly and daily sentiment zones for swing trades, or rely on 1m/5m MAs for precise scalping decisions in fast-moving markets.
5. Strategy Layering:
Combine this overlay with support/resistance, RSI, or volume-based signals to enhance decision-making with multi-timeframe context.
 ⚠️ Important Notes 
Lower-timeframe values (1m, 5m) may appear static on higher-timeframe charts due to resolution limits in TradingView. This is expected behavior.
The indicator uses MA stacking, not crossover events, to determine sentiment.
Pullback SARPullback SAR - Parabolic SAR with Pullback Detection
Description: The "Pullback SAR" is an advanced indicator built on the classic Parabolic SAR but with additional functionality for detecting pullbacks. It helps identify moments when the price pulls back from the main trend, offering potential entry signals. Perfect for traders looking to enter the market after a correction.
Key Features:
    SAR (Parabolic SAR): The Parabolic SAR indicator is used to determine potential trend reversal points. It marks levels where the price could reverse its direction.
    Pullback Detection: The indicator catches periods when the price moves away from the main trend and then returns, which may suggest a re-entry opportunity.
    Long and Short Signals: Once a pullback in the direction of the main trend is identified, the indicator generates signals that could be used to open positions.
    Simple and Clear Construction: The indicator is based on the classic SAR, with added pullback detection logic to enhance the accuracy of the signals.
Parameters:
    Start (SAR Step): Determines the initial step for the SAR calculation, which controls the rate of change in the indicator at the beginning.
    Increment (SAR Increment): Defines the maximum step size for SAR, allowing traders to adjust the indicator’s sensitivity to market volatility.
    Max Value (SAR Max): Sets the upper limit for the SAR value, controlling its volatility.
Usage:
    Swing Trading: Ideal for swing strategies, aiming to capture larger price moves while maintaining a safe margin.
    Scalping: Due to its precise pullback detection, it can also be used in scalping, especially when the price quickly returns to the main trend.
    Risk Management: The combination of SAR and pullback detection allows traders to adjust their positions according to changing market conditions.
Special Notes:
    Adjusting Parameters: Depending on the market and trading style, users can adjust the SAR parameters (Start, Increment, Max Value) to fit their needs.
    Combination with Other Indicators: It's recommended to use the indicator alongside other technical analysis tools (e.g., EMA, RSI) to enhance the accuracy of the signals.
Link to the script: This open-source version of the indicator is available on TradingView, enabling full customization and adjustments to meet your personal trading strategy. Share your experiences and suggestions!
Range Filter Buy and Sell 5min## **Enhanced Range Filter Strategy: A Comprehensive Overview**  
### **1. Introduction**  
The **Enhanced Range Filter Strategy** is a powerful technical trading system designed to identify high-probability trading opportunities while filtering out market noise. It utilizes **range-based trend filtering**, **momentum confirmation**, and **volatility-based risk management** to generate precise entry and exit signals. This strategy is particularly useful for traders who aim to capitalize on trend-following setups while avoiding choppy, ranging market conditions.
---
### **2. Key Components of the Strategy**  
#### **A. Range Filter (Trend Determination)**
- The **Range Filter** smooths price fluctuations and helps identify clear trends.  
- It calculates an **adjusted price range** based on a **sampling period** and a **multiplier**, ensuring a dynamic trend-following approach.  
- **Uptrends:** When the current price is above the range filter and the trend is strengthening.  
- **Downtrends:** When the price falls below the range filter and momentum confirms the move.  
#### **B. RSI (Relative Strength Index) as Momentum Confirmation**  
- RSI is used to **filter out weak trades** and prevent entries during overbought/oversold conditions.  
- **Buy Signals:** RSI is above a certain threshold (e.g., 50) in an uptrend.  
- **Sell Signals:** RSI is below a certain threshold (e.g., 50) in a downtrend.  
#### **C. ADX (Average Directional Index) for Trend Strength Confirmation**  
- ADX ensures that trades are only taken when the trend has **sufficient strength**.  
- Avoids trading in low-volatility, ranging markets.  
- **Threshold (e.g., 25):** Only trade when ADX is above this value, indicating a strong trend.  
#### **D. ATR (Average True Range) for Risk Management**  
- **Stop Loss (SL):** Placed **one ATR below** (for long trades) or **one ATR above** (for short trades).  
- **Take Profit (TP):** Set at a **3:1 reward-to-risk ratio**, using ATR to determine realistic price targets.  
- Ensures volatility-adjusted risk management.  
---
### **3. Entry and Exit Conditions**  
#### **📈 Buy (Long) Entry Conditions:**  
1. **Price is above the Range Filter** → Indicates an uptrend.  
2. **Upward trend strength is positive** (confirmed via trend counter).  
3. **RSI is above the buy threshold** (e.g., 50, to confirm momentum).  
4. **ADX confirms trend strength** (e.g., above 25).  
5. **Volatility is supportive** (using ATR analysis).  
#### **📉 Sell (Short) Entry Conditions:**  
1. **Price is below the Range Filter** → Indicates a downtrend.  
2. **Downward trend strength is positive** (confirmed via trend counter).  
3. **RSI is below the sell threshold** (e.g., 50, to confirm momentum).  
4. **ADX confirms trend strength** (e.g., above 25).  
5. **Volatility is supportive** (using ATR analysis).  
#### **🚪 Exit Conditions:**  
- **Stop Loss (SL):**  
  - **Long Trades:** 1 ATR below entry price.  
  - **Short Trades:** 1 ATR above entry price.  
- **Take Profit (TP):**  
  - Set at **3x the risk distance** to achieve a favorable risk-reward ratio.  
- **Ranging Market Exit:**  
  - If ADX falls below the threshold, indicating a weakening trend.  
---
### **4. Visualization & Alerts**  
- **Colored range filter line** changes based on trend direction.  
- **Buy and Sell signals** appear as labels on the chart.  
- **Stop Loss and Take Profit levels** are plotted as dashed lines.  
- **Gray background highlights ranging markets** where trading is avoided.  
- **Alerts trigger on Buy, Sell, and Ranging Market conditions** for automation.  
---
### **5. Advantages of the Enhanced Range Filter Strategy**  
✅ **Trend-Following with Noise Reduction** → Helps avoid false signals by filtering out weak trends.  
✅ **Momentum Confirmation with RSI & ADX** → Ensures that only strong, valid trades are executed.  
✅ **Volatility-Based Risk Management** → ATR ensures adaptive stop loss and take profit placements.  
✅ **Works on Multiple Timeframes** → Effective for day trading, swing trading, and scalping.  
✅ **Visually Intuitive** → Clearly displays trade signals, SL/TP levels, and trend conditions.  
---
### **6. Who Should Use This Strategy?**  
✔ **Trend Traders** who want to enter trades with momentum confirmation.  
✔ **Swing Traders** looking for medium-term opportunities with a solid risk-reward ratio.  
✔ **Scalpers** who need precise entries and exits to minimize false signals.  
✔ **Algorithmic Traders** using alerts for automated execution.  
---
### **7. Conclusion**  
The **Enhanced Range Filter Strategy** is a powerful trading tool that combines **trend-following techniques, momentum indicators, and risk management** into a structured, rule-based system. By leveraging **Range Filters, RSI, ADX, and ATR**, traders can improve trade accuracy, manage risk effectively, and filter out unfavorable market conditions.  
This strategy is **ideal for traders looking for a systematic, disciplined approach** to capturing trends while **avoiding market noise and false breakouts**. 🚀
Enhanced Range Filter Strategy with ATR TP/SLBuilt by Omotola
## **Enhanced Range Filter Strategy: A Comprehensive Overview**  
### **1. Introduction**  
The **Enhanced Range Filter Strategy** is a powerful technical trading system designed to identify high-probability trading opportunities while filtering out market noise. It utilizes **range-based trend filtering**, **momentum confirmation**, and **volatility-based risk management** to generate precise entry and exit signals. This strategy is particularly useful for traders who aim to capitalize on trend-following setups while avoiding choppy, ranging market conditions.
---
### **2. Key Components of the Strategy**  
#### **A. Range Filter (Trend Determination)**
- The **Range Filter** smooths price fluctuations and helps identify clear trends.  
- It calculates an **adjusted price range** based on a **sampling period** and a **multiplier**, ensuring a dynamic trend-following approach.  
- **Uptrends:** When the current price is above the range filter and the trend is strengthening.  
- **Downtrends:** When the price falls below the range filter and momentum confirms the move.  
#### **B. RSI (Relative Strength Index) as Momentum Confirmation**  
- RSI is used to **filter out weak trades** and prevent entries during overbought/oversold conditions.  
- **Buy Signals:** RSI is above a certain threshold (e.g., 50) in an uptrend.  
- **Sell Signals:** RSI is below a certain threshold (e.g., 50) in a downtrend.  
#### **C. ADX (Average Directional Index) for Trend Strength Confirmation**  
- ADX ensures that trades are only taken when the trend has **sufficient strength**.  
- Avoids trading in low-volatility, ranging markets.  
- **Threshold (e.g., 25):** Only trade when ADX is above this value, indicating a strong trend.  
#### **D. ATR (Average True Range) for Risk Management**  
- **Stop Loss (SL):** Placed **one ATR below** (for long trades) or **one ATR above** (for short trades).  
- **Take Profit (TP):** Set at a **3:1 reward-to-risk ratio**, using ATR to determine realistic price targets.  
- Ensures volatility-adjusted risk management.  
---
### **3. Entry and Exit Conditions**  
#### **📈 Buy (Long) Entry Conditions:**  
1. **Price is above the Range Filter** → Indicates an uptrend.  
2. **Upward trend strength is positive** (confirmed via trend counter).  
3. **RSI is above the buy threshold** (e.g., 50, to confirm momentum).  
4. **ADX confirms trend strength** (e.g., above 25).  
5. **Volatility is supportive** (using ATR analysis).  
#### **📉 Sell (Short) Entry Conditions:**  
1. **Price is below the Range Filter** → Indicates a downtrend.  
2. **Downward trend strength is positive** (confirmed via trend counter).  
3. **RSI is below the sell threshold** (e.g., 50, to confirm momentum).  
4. **ADX confirms trend strength** (e.g., above 25).  
5. **Volatility is supportive** (using ATR analysis).  
#### **🚪 Exit Conditions:**  
- **Stop Loss (SL):**  
  - **Long Trades:** 1 ATR below entry price.  
  - **Short Trades:** 1 ATR above entry price.  
- **Take Profit (TP):**  
  - Set at **3x the risk distance** to achieve a favorable risk-reward ratio.  
- **Ranging Market Exit:**  
  - If ADX falls below the threshold, indicating a weakening trend.  
---
### **4. Visualization & Alerts**  
- **Colored range filter line** changes based on trend direction.  
- **Buy and Sell signals** appear as labels on the chart.  
- **Stop Loss and Take Profit levels** are plotted as dashed lines.  
- **Gray background highlights ranging markets** where trading is avoided.  
- **Alerts trigger on Buy, Sell, and Ranging Market conditions** for automation.  
---
### **5. Advantages of the Enhanced Range Filter Strategy**  
✅ **Trend-Following with Noise Reduction** → Helps avoid false signals by filtering out weak trends.  
✅ **Momentum Confirmation with RSI & ADX** → Ensures that only strong, valid trades are executed.  
✅ **Volatility-Based Risk Management** → ATR ensures adaptive stop loss and take profit placements.  
✅ **Works on Multiple Timeframes** → Effective for day trading, swing trading, and scalping.  
✅ **Visually Intuitive** → Clearly displays trade signals, SL/TP levels, and trend conditions.  
---
### **6. Who Should Use This Strategy?**  
✔ **Trend Traders** who want to enter trades with momentum confirmation.  
✔ **Swing Traders** looking for medium-term opportunities with a solid risk-reward ratio.  
✔ **Scalpers** who need precise entries and exits to minimize false signals.  
✔ **Algorithmic Traders** using alerts for automated execution.  
---
### **7. Conclusion**  
The **Enhanced Range Filter Strategy** is a powerful trading tool that combines **trend-following techniques, momentum indicators, and risk management** into a structured, rule-based system. By leveraging **Range Filters, RSI, ADX, and ATR**, traders can improve trade accuracy, manage risk effectively, and filter out unfavorable market conditions.  
This strategy is **ideal for traders looking for a systematic, disciplined approach** to capturing trends while **avoiding market noise and false breakouts**. 🚀
[TehThomas] - ICT Inversion Fair value Gap (IFVG) The Inversion Fair Value Gap (IFVG) indicator is a powerful tool designed for traders who utilize ICT (Inner Circle Trader) strategies. It focuses on identifying and displaying Inversion Fair Value Gaps, which are critical zones that emerge when traditional Fair Value Gaps (FVGs) are invalidated by price action. These gaps represent key areas where price often reacts, making them essential for identifying potential reversals, trend continuations, and liquidity zones.
 What Are Inversion Fair Value Gaps? 
Inversion Fair Value Gaps occur when price revisits a traditional FVG and breaks through it, effectively flipping its role in the market. For example:
 
 A bullish FVG that is invalidated becomes a bearish zone, often acting as resistance.
 A bearish FVG that is invalidated transforms into a bullish zone, serving as support.
 
These gaps are significant because they often align with institutional trading activity. They highlight areas where large orders have been executed or where liquidity has been targeted. Understanding these gaps provides traders with a deeper insight into market structure and helps them anticipate future price movements with greater accuracy.
 Why This Strategy Works 
The IFVG concept is rooted in ICT principles, which emphasize liquidity dynamics, market inefficiencies, and institutional order flow. Traditional FVGs represent imbalances in price action caused by gaps between candles. When these gaps are invalidated, they become inversion zones that can act as magnets for price. These zones frequently serve as high-probability areas for price reversals or trend continuations.
This strategy works because it aligns with how institutional traders operate. Inversion gaps often mark areas of interest for "smart money," making them reliable indicators of potential market turning points. By focusing on these zones, traders can align their strategies with institutional behavior and improve their overall trading edge.
 How the Indicator Works 
This indicator simplifies the process of identifying and tracking IFVGs by automating their detection and visualization on the chart. It scans the chart in real-time to identify bullish and bearish FVGs that meet user-defined thresholds for inversion. Once identified, these gaps are dynamically displayed on the chart with distinct colors for bullish and bearish zones.
The indicator also tracks whether these gaps are mitigated or broken by price action. When an IFVG is broken, it extends the zone for a user-defined number of bars to visualize its potential role as a new support or resistance level. Additionally, alerts can be enabled to notify traders when new IFVGs form or when existing ones are broken, ensuring timely decision-making in fast-moving markets.
 Key Features 
 
 Automatic Detection: The indicator automatically identifies bullish and bearish IFVGs based on user-defined thresholds.
 Dynamic Visualization: It displays IFVGs directly on the chart with customizable colors for easy differentiation.
 Real-Time Updates: The status of each IFVG is updated dynamically based on price action.
 Zone Extensions: Broken IFVGs are extended to visualize their potential as support or resistance levels.
 Alerts: Notifications can be set up to alert traders when key events occur, such as the formation or breaking of an IFVG.
 
These features make the tool highly efficient and reduce the need for manual analysis, allowing traders to focus on execution rather than tedious chart work.
 Benefits of Using This Indicator 
The IFVG indicator offers several advantages that make it an indispensable tool for ICT traders. By automating the detection of inversion gaps, it saves time and reduces errors in analysis. The clearly defined zones improve risk management by providing precise entry points, stop-loss levels, and profit targets based on market structure.
This tool is also highly versatile and adapts seamlessly across different timeframes. Whether you’re scalping lower timeframes or swing trading higher ones, it provides actionable insights tailored to your trading style. Furthermore, by aligning your strategy with institutional logic, you gain a significant edge in anticipating market movements.
 Practical Applications 
 
 This indicator can be used across various trading styles:
 Scalping: Identify quick reversal points on lower timeframes using real-time alerts.
 Day Trading: Use inversion gaps as key levels for intraday support/resistance or trend continuation setups.
 Swing Trading: Analyse higher timeframes to identify major inversion zones that could act as critical turning points in larger trends.
 
By integrating this tool into your trading routine, you can streamline your analysis process and focus on executing high-probability setups.
 Conclusion 
The Inversion Fair Value Gap (IFVG) indicator is more than just a technical analysis tool—it’s a strategic ally for traders looking to refine their edge in the markets. By automating the detection and tracking of inversion gaps based on ICT principles, it simplifies complex market analysis while maintaining accuracy and depth. Whether you’re new to ICT strategies or an experienced trader seeking greater precision, this indicator will elevate your trading game by aligning your approach with institutional behavior.
If you’re serious about improving your trading results while saving time and effort, this tool is an essential addition to your toolkit. It provides clarity in chaotic markets, enhances precision in trade execution, and ensures you never miss critical opportunities in your trading journey.
 __________________________________________ 
 Thanks for your support! 
If you found this idea helpful or learned something new, drop a like 👍 and leave a comment, I’d love to hear your thoughts! 🚀
Make sure to follow me for more price action insights, free indicators, and trading strategies. Let’s grow and trade smarter together! 📈
Multi-Timeframe Confluence IndicatorThe  Multi-Timeframe Confluence Indicator  strategically combines multiple timeframes with technical tools like EMA and RSI to provide robust, high-probability trading signals. This combination is grounded in the principles of technical analysis and market behavior, tailored for traders across all styles—whether intraday, swing, or positional.
 1. The Power of Multi-Timeframe Confluence 
Markets are influenced by participants operating on different time horizons:
	•	Intraday traders act on short-term price fluctuations.
	•	Swing traders focus on intermediate trends lasting days or weeks.
	•	Position traders aim to capture multi-month or long-term trends.
By aligning signals from a higher timeframe (macro trend) with a lower timeframe (micro trend), the indicator ensures that short-term entries are in harmony with the broader market direction. This multi-timeframe approach significantly reduces false signals caused by temporary market noise or counter-trend moves.
Example: A bullish trend on the daily chart (higher timeframe) combined with a bullish RSI and EMA alignment on the 15-minute chart (lower timeframe) provides a stronger confirmation than relying on the 15-minute chart alone.
 2. Why EMA and RSI Are Essential 
Each element of the indicator serves a unique role in ensuring accuracy and reliability:
	•	EMA (Exponential Moving Average):
	•	A dynamic trend filter that adjusts quickly to price changes.
	•	On the higher timeframe, it establishes the overall trend direction (e.g., bullish or bearish).
	•	On the lower timeframe, it identifies precise entry/exit zones within the trend.
	•	RSI (Relative Strength Index):
	•	Adds a momentum-based perspective, confirming whether a trend is backed by strong buying or selling pressure.
	•	Ensures that signals occur in areas of strength (RSI > 55 for bullish signals, RSI < 45 for bearish signals), filtering out weak or uncertain price movements.
By combining EMA (trend) and RSI (momentum), the indicator delivers confluence-based validation, where both trend and momentum align, making signals more reliable.
 3. Cooldown Period for Signal Optimization 
Trading in choppy or sideways markets often leads to overtrading and false signals. The cooldown period ensures that once a signal is generated, subsequent signals are suppressed for a defined number of bars. This prevents traders from entering low-probability trades during indecisive market phases, improving overall signal quality.
Example: After a bullish confluence signal, the cooldown period prevents a bearish signal from being triggered prematurely if the market enters a temporary retracement.
 4. Use Cases Across Trading Styles 
This indicator caters to various trading styles, each benefiting from the confluence of timeframes and technical elements:
	•	Intraday Trading:
	•	Use a 1-hour chart as the higher timeframe and a 5-minute chart as the lower timeframe.
	•	Benefit: Align intraday entries with the hourly trend for higher win rates.
	•	Swing Trading:
	•	Use a daily chart as the higher timeframe and a 1-hour chart as the lower timeframe.
	•	Benefit: Capture multi-day moves while avoiding counter-trend entries.
	•	Scalping:
	•	Use a 30-minute chart as the higher timeframe and a 1-minute chart as the lower timeframe.
	•	Benefit: Enhance scalping efficiency by ensuring short-term trades align with broader intraday trends.
	•	Position Trading:
	•	Use a weekly chart as the higher timeframe and a daily chart as the lower timeframe.
	•	Benefit: Time long-term entries more precisely, maximizing profit potential.
 5. Robustness Through Customization 
The indicator allows traders to customize:
	•	Timeframes for higher and lower analysis.
	•	EMA lengths for trend filtering.
	•	RSI settings for momentum confirmation.
	•	Cooldown periods to adapt to market volatility.
This flexibility ensures that the indicator can be tailored to suit individual trading preferences, market conditions, and asset classes, making it a comprehensive tool for any trading strategy.
 Why This Mashup Stands Out 
The Multi-Timeframe Confluence Indicator is more than a sum of its parts. It leverages:
	•	EMA’s ability to identify trends, combined with RSI’s insight into momentum, ensuring each signal is well-supported.
	•	A multi-timeframe perspective that incorporates both macro and micro trends, filtering out noise and improving reliability.
	•	A cooldown mechanism that prevents overtrading, a common pitfall for traders in volatile markets.
This integration results in a powerful, adaptable indicator that provides actionable, high-confidence signals, reducing uncertainty and enhancing trading performance across all styles.
Multi-Timeframe Stochastic Alert [tradeviZion]#  Multi-Timeframe Stochastic Alert  : Complete User Guide 
##  1. Introduction 
###  What is the Multi-Timeframe Stochastic Alert? 
The Multi-Timeframe Stochastic Alert is an advanced technical analysis tool that helps traders identify potential trading opportunities by analyzing momentum across multiple timeframes. It combines the power of the stochastic oscillator with multi-timeframe analysis to provide more reliable trading signals.
###  Key Features and Benefits 
- Simultaneous analysis of 6 different timeframes
- Advanced alert system with customizable conditions
- Real-time visual feedback with color-coded signals
- Comprehensive data table with instant market insights
- Motivational trading messages for psychological support
- Flexible theme support for comfortable viewing
###  How it Can Help Your Trading 
- Identify stronger trends by confirming momentum across multiple timeframes
- Reduce false signals through multi-timeframe confirmation
- Stay informed of market changes with customizable alerts
- Make more informed decisions with comprehensive market data
- Maintain trading discipline with clear visual signals
##  2. Understanding the Display 
###  The Stochastic Chart 
The main chart displays three key components:
1. ** K-Line (Fast) **: The primary stochastic line (default color: green)
2. ** D-Line (Slow) **: The signal line (default color: red)
3. ** Reference Lines **:
   - Overbought Level (80): Upper dashed line
   - Middle Line (50): Center dashed line
   - Oversold Level (20): Lower dashed line
###  The Information Table 
The table provides a comprehensive view of stochastic readings across all timeframes. Here's what each column means:
####  Column Explanations: 
1. ** Timeframe **
   - Shows the time period for each row
   - Example: "5" = 5 minutes, "15" = 15 minutes, etc.
2. ** K Value **
   - The fast stochastic line value (0-100)
   - Higher values indicate stronger upward momentum
   - Lower values indicate stronger downward momentum
3. ** D Value **
   - The slow stochastic line value (0-100)
   - Helps confirm momentum direction
   - Crossovers with K-line can signal potential trades
4. ** Status **
   - Shows current momentum with symbols:
   - ▲ = Increasing (bullish)
   - ▼ = Decreasing (bearish)
   - Color matches the trend direction
5. ** Trend **
   - Shows the current market condition:
   - "Overbought" (above 80)
   - "Bullish" (above 50)
   - "Bearish" (below 50)
   - "Oversold" (below 20)
####  Row Explanations: 
1. ** Title Row **
   - Shows "🎯 Multi-Timeframe Stochastic"
   - Indicates the indicator is active
2. ** Header Row **
   - Contains column titles
   - Dark blue background for easy reading
3. ** Timeframe Rows **
   - Six rows showing different timeframe analyses
   - Each row updates independently
   - Color-coded for easy trend identification
4.  **Message Row** 
   - Shows rotating motivational messages
   - Updates every 5 bars
   - Helps maintain trading discipline
###  Visual Indicators and Colors 
- ** Green Background **: Indicates bullish conditions
- ** Red Background **: Indicates bearish conditions
- ** Color Intensity **: Shows strength of the signal
- ** Background Highlights **: Appear when alert conditions are met 
##  3. Core Settings Groups 
###  Stochastic Settings 
These settings control the core calculation of the stochastic oscillator.
1. ** Length (Default: 14) **
   - What it does: Determines the lookback period for calculations
   - Higher values (e.g., 21): More stable, fewer signals
   - Lower values (e.g., 8): More sensitive, more signals
   - Recommended:
     * Day Trading: 8-14
     * Swing Trading: 14-21
     * Position Trading: 21-30
2. ** Smooth K (Default: 3) **
   - What it does: Smooths the main stochastic line
   - Higher values: Smoother line, fewer false signals
   - Lower values: More responsive, but more noise
   - Recommended:
     * Day Trading: 2-3
     * Swing Trading: 3-5
     * Position Trading: 5-7
3. ** Smooth D (Default: 3) **
   - What it does: Smooths the signal line
   - Works in conjunction with Smooth K
   - Usually kept equal to or slightly higher than Smooth K
   - Recommended: Keep same as Smooth K for consistency
4. ** Source (Default: Close) **
   - What it does: Determines price data for calculations
   - Options: Close, Open, High, Low, HL2, HLC3, OHLC4
   - Recommended: Stick with Close for most reliable signals
###  Timeframe Settings 
Controls the multiple timeframes analyzed by the indicator.
1. ** Main Timeframes (TF1-TF6) **
   - TF1 (Default: 10): Shortest timeframe for quick signals
   - TF2 (Default: 15): Short-term trend confirmation
   - TF3 (Default: 30): Medium-term trend analysis
   - TF4 (Default: 30): Additional medium-term confirmation
   - TF5 (Default: 60): Longer-term trend analysis
   - TF6 (Default: 240): Major trend confirmation
   
    Recommended Combinations: 
   * Scalping: 1, 3, 5, 15, 30, 60
   * Day Trading: 5, 15, 30, 60, 240, D
   * Swing Trading: 15, 60, 240, D, W, M
2. ** Wait for Bar Close (Default: true) **
   - What it does: Controls when calculations update
   - True: More reliable but slightly delayed signals
   - False: Faster signals but may change before bar closes
   - Recommended: Keep True for more reliable signals
###  Alert Settings 
####  Main Alert Settings 
1. ** Enable Alerts (Default: true) **
   - Master switch for all alert notifications
   - Toggle this off when you don't want any alerts
   - Useful during testing or when you want to focus on visual signals only
2. ** Alert Condition (Options) **
   - "Above Middle": Bullish momentum alerts only
   - "Below Middle": Bearish momentum alerts only
   - "Both": Alerts for both directions
   - Recommended:
     * Trending Markets: Choose direction matching the trend
     * Ranging Markets: Use "Both" to catch reversals
     * New Traders: Start with "Both" until you develop a specific strategy
3. ** Alert Frequency **
   - "Once Per Bar": Immediate alerts during the bar
   - "Once Per Bar Close": Alerts only after bar closes
   - Recommended:
     * Day Trading: "Once Per Bar" for quick reactions
     * Swing Trading: "Once Per Bar Close" for confirmed signals
     * Beginners: "Once Per Bar Close" to reduce false signals
####  Timeframe Check Settings 
1. ** First Check (TF1) **
   - Purpose: Confirms basic trend direction
   - Alert Triggers When:
     * For Bullish: Stochastic is above middle line (50)
     * For Bearish: Stochastic is below middle line (50)
     * For Both: Triggers in either direction based on position relative to middle line
   - Settings:
     * Enable/Disable: Turn first check on/off
     * Timeframe: Default 5 minutes
   - Best Used For:
     * Quick trend confirmation
     * Entry timing
     * Scalping setups
2. ** Second Check (TF2) **
   - Purpose: Confirms both position and momentum
   - Alert Triggers When:
     * For Bullish: Stochastic is above middle line AND both K&D lines are increasing
     * For Bearish: Stochastic is below middle line AND both K&D lines are decreasing
     * For Both: Triggers based on position and direction matching current condition
   - Settings:
     * Enable/Disable: Turn second check on/off
     * Timeframe: Default 15 minutes
   - Best Used For:
     * Trend strength confirmation
     * Avoiding false breakouts
     * Day trading setups
3. ** Third Check (TF3) **
   - Purpose: Confirms overall momentum direction
   - Alert Triggers When:
     * For Bullish: Both K&D lines are increasing (momentum confirmation)
     * For Bearish: Both K&D lines are decreasing (momentum confirmation)
     * For Both: Triggers based on matching momentum direction
   - Settings:
     * Enable/Disable: Turn third check on/off
     * Timeframe: Default 30 minutes
   - Best Used For:
     * Major trend confirmation
     * Swing trading setups
     * Avoiding trades against the main trend
Note: All three conditions must be met simultaneously for the alert to trigger. This multi-timeframe confirmation helps reduce false signals and provides stronger trade setups.
####  Alert Combinations Examples 
1. ** Conservative Setup **
   - Enable all three checks
   - Use "Once Per Bar Close"
   - Timeframe Selection Example:
     * First Check: 15 minutes
     * Second Check: 1 hour (60 minutes)
     * Third Check: 4 hours (240 minutes)
   - Wider gaps between timeframes reduce noise and false signals
   - Best for: Swing trading, beginners
2. ** Aggressive Setup **
   - Enable first two checks only
   - Use "Once Per Bar"
   - Timeframe Selection Example:
     * First Check: 5 minutes
     * Second Check: 15 minutes
   - Closer timeframes for quicker signals
   - Best for: Day trading, experienced traders
3. ** Balanced Setup **
   - Enable all checks
   - Use "Once Per Bar"
   - Timeframe Selection Example:
     * First Check: 5 minutes
     * Second Check: 15 minutes
     * Third Check: 1 hour (60 minutes)
   - Balanced spacing between timeframes
   - Best for: All-around trading
###  Visual Settings 
####  Alert Visual Settings 
1. ** Show Background Color (Default: true) **
   - What it does: Highlights chart background when alerts trigger
   - Benefits:
     * Makes signals more visible
     * Helps spot opportunities quickly
     * Provides visual confirmation of alerts
   - When to disable:
     * If using multiple indicators
     * When preferring a cleaner chart
     * During manual backtesting
2. ** Background Transparency (Default: 90) **
   - Range: 0 (solid) to 100 (invisible)
   - Recommended Settings:
     * Clean Charts: 90-95
     * Multiple Indicators: 85-90
     * Single Indicator: 80-85
   - Tip: Adjust based on your chart's overall visibility
3. ** Background Colors **
   - Bullish Background:
     * Default: Green
     * Indicates upward momentum
     * Customizable to match your theme
   - Bearish Background:
     * Default: Red
     * Indicates downward momentum
     * Customizable to match your theme
####  Level Settings 
1. ** Oversold Level (Default: 20) **
   - Traditional Setting: 20
   - Adjustable Range: 0-100
   - Usage:
     * Lower values (e.g., 10): More conservative
     * Higher values (e.g., 30): More aggressive
   - Trading Applications:
     * Potential bullish reversal zone
     * Support level in uptrends
     * Entry point for long positions
2. ** Overbought Level (Default: 80) **
   - Traditional Setting: 80
   - Adjustable Range: 0-100
   - Usage:
     * Lower values (e.g., 70): More aggressive
     * Higher values (e.g., 90): More conservative
   - Trading Applications:
     * Potential bearish reversal zone
     * Resistance level in downtrends
     * Exit point for long positions
3. ** Middle Line (Default: 50) **
   - Purpose: Trend direction separator
   - Applications:
     * Above 50: Bullish territory
     * Below 50: Bearish territory
     * Crossing 50: Potential trend change
   - Trading Uses:
     * Trend confirmation
     * Entry/exit trigger
     * Risk management level
####  Color Settings 
1. ** Bullish Color (Default: Green) **
   - Used for:
     * K-Line (Main stochastic line)
     * Status symbols when trending up
     * Trend labels for bullish conditions
   - Customization:
     * Choose colors that stand out
     * Match your trading platform theme
     * Consider color blindness accessibility
2. ** Bearish Color (Default: Red) **
   - Used for:
     * D-Line (Signal line)
     * Status symbols when trending down
     * Trend labels for bearish conditions
   - Customization:
     * Choose contrasting colors
     * Ensure visibility on your chart
     * Consider monitor settings
3. ** Neutral Color (Default: Gray) **
   - Used for:
     * Middle line (50 level)
   - Customization:
     * Should be less prominent
     * Easy on the eyes
     * Good background contrast
###  Theme Settings 
1. **Color Theme Options**
   - Dark Theme (Default):
     * Dark background with white text
     * Optimized for dark chart backgrounds
     * Reduces eye strain in low light
   - Light Theme:
     * Light background with black text
     * Better visibility in bright conditions
   - Custom Theme:
     * Use your own color preferences
2. ** Available Theme Colors **
   - Table Background
   - Table Text
   - Table Headers
Note: The theme affects only the table display colors. The stochastic lines and alert backgrounds use their own color settings.
###  Table Settings 
####  Position and Size 
1. ** Table Position **
   - Options:
     * Top Right (Default)
     * Middle Right
     * Bottom Right
     * Top Left
     * Middle Left
     * Bottom Left
   - Considerations:
     * Chart space utilization
     * Personal preference
     * Multiple monitor setups
2. ** Text Sizes **
   - Title Size Options:
     * Tiny: Minimal space usage
     * Small: Compact but readable
     * Normal (Default): Standard visibility
     * Large: Enhanced readability
     * Huge: Maximum visibility
   - Data Size Options:
     * Recommended: One size smaller than title
     * Adjust based on screen resolution
     * Consider viewing distance
3. ** Empowering Messages **
   - Purpose:
     * Maintain trading discipline
     * Provide psychological support
     * Remind of best practices
   - Rotation:
     * Changes every 5 bars
     * Categories include:
       - Market Wisdom
       - Strategy & Discipline
       - Mindset & Growth
       - Technical Mastery
       - Market Philosophy
##  4. Setting Up for Different Trading Styles 
###  Day Trading Setup 
1. **Timeframes**
   - Primary: 5, 15, 30 minutes
   - Secondary: 1H, 4H
   - Alert Settings: "Once Per Bar"
   
2. ** Stochastic Settings **
   - Length: 8-14
   - Smooth K/D: 2-3
   - Alert Condition: Match market trend
3. ** Visual Settings **
   - Background: Enabled
   - Transparency: 85-90
   - Theme: Based on trading hours
###  Swing Trading Setup 
1. ** Timeframes **
   - Primary: 1H, 4H, Daily
   - Secondary: Weekly
   - Alert Settings: "Once Per Bar Close"
2. ** Stochastic Settings **
   - Length: 14-21
   - Smooth K/D: 3-5
   - Alert Condition: "Both"
3. ** Visual Settings **
   - Background: Optional
   - Transparency: 90-95
   - Theme: Personal preference
###  Position Trading Setup 
1. ** Timeframes **
   - Primary: Daily, Weekly
   - Secondary: Monthly
   - Alert Settings: "Once Per Bar Close"
2. ** Stochastic Settings **
   - Length: 21-30
   - Smooth K/D: 5-7
   - Alert Condition: "Both"
3. ** Visual Settings **
   - Background: Disabled
   - Focus on table data
   - Theme: High contrast
##  5. Troubleshooting Guide 
###  Common Issues and Solutions 
1. ** Too Many Alerts **
   - Cause: Settings too sensitive
   - Solutions:
     * Increase timeframe intervals
     * Use "Once Per Bar Close"
     * Enable fewer timeframe checks
     * Adjust stochastic length higher
2. ** Missed Signals **
   - Cause: Settings too conservative
   - Solutions:
     * Decrease timeframe intervals
     * Use "Once Per Bar"
     * Enable more timeframe checks
     * Adjust stochastic length lower
3. ** False Signals **
   - Cause: Insufficient confirmation
   - Solutions:
     * Enable all three timeframe checks
     * Use larger timeframe gaps
     * Wait for bar close
     * Confirm with price action
4. ** Visual Clarity Issues **
   - Cause: Poor contrast or overlap
   - Solutions:
     * Adjust transparency
     * Change theme settings
     * Reposition table
     * Modify color scheme
###  Best Practices 
1. ** Getting Started **
   - Start with default settings
   - Use "Both" alert condition
   - Enable all timeframe checks
   - Wait for bar close
   - Monitor for a few days
2. ** Fine-Tuning **
   - Adjust one setting at a time
   - Document changes and results
   - Test in different market conditions
   - Find your optimal timeframe combination
   - Balance sensitivity with reliability
3. ** Risk Management **
   - Don't trade against major trends
   - Confirm signals with price action
   - Use appropriate position sizing
   - Set clear stop losses
   - Follow your trading plan
4. ** Regular Maintenance **
   - Review settings weekly
   - Adjust for market conditions
   - Update color scheme for visibility
   - Clean up chart regularly
   - Maintain trading journal
##  6. Tips for Success 
1. ** Entry Strategies **
   - Wait for all timeframes to align
   - Confirm with price action
   - Use proper position sizing
   - Consider market conditions
2. ** Exit Strategies **
   - Trail stops using indicator levels
   - Take partial profits at targets
   - Honor your stop losses
   - Don't fight the trend
3. ** Psychology **
   - Stay disciplined with settings
   - Don't override system signals
   - Keep emotions in check
   - Learn from each trade
4. ** Continuous Improvement **
   - Record your trades
   - Review performance regularly
   - Adjust settings gradually
   - Stay educated on markets
[ETH] Optimized Trend Strategy - Lorenzo SuperScalpStrategy Title:   Optimized Trend Strategy - Lorenzo SuperScalp
Description:
The   Optimized Trend Strategy is a comprehensive trading system tailored for Ethereum (ETH) and optimized for the 15-minute timeframe but adaptable to various timeframes. This strategy utilizes a combination of technical indicators—RSI, Bollinger Bands, and MACD—to identify and act on price trends efficiently, providing traders with actionable buy and sell signals based on market conditions.
Key Features:
Multi-Indicator Approach:
RSI (Relative Strength Index): Identifies overbought and oversold conditions to time market entries and exits.
Bollinger Bands: Acts as a dynamic support and resistance level, helping to pinpoint precise entry and exit zones.
MACD (Moving Average Convergence Divergence): Detects momentum changes through bullish and bearish crossovers.
Signal Conditions:
Buy Signal:
RSI is below 45 (indicating an oversold condition).
Price is near or below the lower Bollinger Band.
MACD bullish crossover occurs.
Sell Signal:
RSI is above 55 (indicating an overbought condition).
Price is near or above the upper Bollinger Band.
MACD bearish crossunder occurs.
Trade Execution Logic:
Long Trades: Opened when a buy signal flashes. If there’s an open short position, it is closed before opening a long.
Short Trades: Opened when a sell signal flashes. If there’s an open long position, it is closed before opening a short.
The strategy also ensures a minimum number of bars between consecutive trades to avoid rapid trading in choppy conditions.
Pyramiding Support:
Up to 3 consecutive trades in the same direction are allowed, enabling traders to scale into positions based on strong signals.
Visual Indicators:
RSI Levels: Dotted lines at 45 and 55 for quick reference to oversold and overbought levels.
Buy and Sell Signals: Visual markers on the chart indicate where trades are executed, ensuring clarity on entry and exit points.
Best Used For:
Swing Trading & Scalping: While optimized for the 15-minute timeframe, this strategy works across various timeframes, making it suitable for both short-term scalping and swing trading.
Crypto Trading: Tailored for Ethereum but effective for other cryptocurrencies due to its dynamic indicator setup.
HMA Fibonacci Rainbow Waves[FibonacciFlux]HMA Fibonacci Rainbow Waves  
 Overview   
The  HMA Fibonacci Rainbow Waves  script is designed for traders who strive for simplicity in their trading strategies while navigating the complexities of chart analysis. By utilizing the Hull Moving Average (HMA) for smoothing, this indicator provides a refined view of price action. However, over-smoothing can sometimes filter out essential market noise. To address this, the indicator incorporates a unique approach by applying Fibonacci weighting to seven HMA200 calculations. This enables traders to capture noise while effectively following market trends.
 BTCUSDT 4hour   
 Key Features 
 1. Hull Moving Average (HMA)   
- The HMA is known for its responsiveness and ability to filter out noise, providing a clear view of the underlying trend.  
- The indicator balances smoothness with responsiveness, making it suitable for various trading styles, from day trading to swing trading and scalping.
 2. Fibonacci Weighting   
- By applying Fibonacci numbers to the HMA calculations, the indicator enhances its ability to adapt to market dynamics.  
- This unique approach allows traders to maintain clarity while accommodating fluctuations in price action, ensuring they do not miss critical entry points.
 3. Multi-Timeframe Functionality   
- The HMA Fibonacci Rainbow Waves indicator operates effectively across multiple timeframes, including daily, 4-hour, 5-minute, and 1-minute charts.  
- This adaptability makes it a valuable tool for traders, regardless of their preferred trading style, facilitating seamless transitions between different market conditions.
 4. Noise Capture and Trend Following   
- The indicator is designed to capture essential market movements while filtering out excessive noise.  
- It helps traders follow trends without being overwhelmed by market fluctuations, allowing them to act on advantageous entry conditions that might otherwise be obscured.
 Signal Generation and Alerts   
- The indicator generates buy and sell signals based on the relationship between the HMAs, providing clear entry and exit points.  
- Customizable alerts keep traders informed of significant changes in market conditions, enabling timely decisions that reflect the nuances of market behavior.
 BTCUSDT 15min   
 Benefits 
 1. Simplified Trading Approach   
- Traders can focus on core market movements without being distracted by excessive noise, enhancing decision-making efficiency and minimizing emotional trading.
 2. Flexibility Across Timeframes   
- The ability to function across different timeframes allows traders to apply the same principles in various trading scenarios, from quick scalps to strategic swing trades.
 3. Enhanced Market Insights   
- The combination of HMA smoothing and Fibonacci weighting offers a comprehensive view of market trends, aiding traders in identifying potential opportunities, including those that institutional investors might exploit.
 4. Resolving Complexity with Simplicity   
- This indicator elegantly bridges the gap between simplicity and complexity, providing a single tool that addresses the inherent contradictions in trading psychology. It allows traders to simplify their strategies while still capturing the dynamic nature of the market.
 BTCUSDT 1min   
 Conclusion   
The  HMA Fibonacci Rainbow Waves  script is a powerful tool for traders seeking to streamline their analysis while effectively capturing market dynamics. By integrating advanced smoothing techniques with Fibonacci weighting, this indicator empowers traders to follow market trends confidently across various timeframes. Its design makes it an essential asset for both novice and experienced traders alike, offering insights that can reveal entry points often missed by traditional indicators.
 Open Source Collaboration   
This script is released as an open-source project on TradingView, inviting the global trading community to contribute and enhance its functionality. By collaborating on this project, traders can help improve its capabilities, ensuring it remains a valuable resource for market participants around the world.
 Important Note   
As with any trading tool, it is crucial to conduct thorough analysis and risk management when using this indicator. Past performance does not guarantee future results, and traders should always be prepared for potential market fluctuations.
Dynamic Resistance and Support LinesThis script is designed to dynamically plot support and resistance lines based on full-dollar and half-dollar price levels relative to the close price on a chart. The script is particularly useful for day traders and scalpers, as it helps visualize key psychological price levels that often act as support and resistance zones in volatile and fast-moving markets in real time.
 Key Features: 
 Dynamic Resistance and Support Levels: 
 
 Full-dollar levels: These are calculated by rounding the close price to the nearest full dollar and then extending the levels by adding and subtracting increments of 1 (e.g., $1, $2, $3).
 Half-dollar levels: These are calculated by adding and subtracting 0.5 increments to the nearest full-dollar price, providing additional reference points. The historical full-dollar levels remain where support and resistance may have occurred in the past.  
 
 Extend Lines: 
 
 You can toggle whether the support and resistance lines are extended to the right, left, or both directions. This allows flexibility in projecting potential future areas of support or resistance.
 
 Custom Line Extension: 
 
 The user can set the number of bars (or time periods) that the support and resistance lines will extend, giving control over how long the levels remain on the chart.
 
 Color-Coded Lines: 
 
 Red lines represent full-dollar resistance and support levels.
 Blue lines represent half-dollar levels, making it easy to differentiate between key psychological price zones.
 
 Line Flexibility: 
 
 The script allows the lines to extend both left and right on the chart, making it useful for analyzing historical price action or projecting future price movements. The number of bars for extension is customizable, allowing for tailored setups.
 
 Nearest Full Dollar Plot: 
 
 The nearest full-dollar price level is plotted as a yellow circle on the chart. This serves as a quick visual cue for traders to monitor price proximity to critical levels.
 
 Benefits in Day Trading, Scalping, and Volatile Markets: 
 Visualizing Key Psychological Levels: 
 
 Full-dollar and half-dollar price levels often act as psychological barriers for traders. This script helps traders easily identify these levels, which are important in both fast-moving markets and during sideways consolidation.
 
 Improved Decision-Making: 
 
 By automatically drawing these support and resistance levels, the script helps day traders and scalpers make quicker and more informed decisions, especially in volatile markets where every second counts.
 
 Adaptability to Market Conditions: 
 
 The flexibility of extending lines based on trader preferences allows the user to adapt the script to various market conditions, such as high volatility or trend-based trading, providing a clear view of potential breakout or reversal areas.
 
 Better Risk Management: 
 
 Having predefined support and resistance levels helps traders better manage risk, as these levels can act as logical areas for setting stop losses or taking profits.
 
This script is especially valuable for traders looking to capitalize on quick market movements or identify key entry and exit points during market volatility.
ADX with Donchian Channels
The "ADX with Donchian Channels" indicator combines the Average Directional Index (ADX) with Donchian Channels to provide traders with a powerful tool for identifying trends and potential breakouts.
Features:
Average Directional Index (ADX):
The ADX is used to quantify the strength of a trend. It helps traders determine whether a market is trending or ranging.
Adjustable parameters for ADX smoothing and DI length allow traders to fine-tune the sensitivity of the trend strength measurement.
Donchian Channels on ADX:
Donchian Channels are applied directly to the ADX values to highlight the highest high and lowest low of the ADX over a specified period.
The upper and lower Donchian Channels can signal potential trend breakouts when the ADX value moves outside these bounds.
The middle Donchian Channel provides a reference for the average trend strength.
Visualization:
The indicator plots the ADX line in red to clearly display the trend strength.
The upper and lower Donchian Channels are plotted in blue, with a green middle line to represent the average.
The area between the upper and lower Donchian Channels is filled with a blue shade to visually emphasize the range of ADX values.
Default Settings for Scalping:
Donchian Channel Length: 10
Standard Deviation Multiplier: 1.58
ADX Length: 2
ADX Smoothing Length: 2
These default settings are optimized for scalping, offering a quick response to changes in trend strength and potential breakout signals. However, traders can adjust these settings to suit different trading styles and market conditions.
How to Use:
Trend Strength Identification: Use the ADX line to identify the strength of the current trend. Higher ADX values indicate stronger trends.
Breakout Signals: Monitor the ADX value in relation to the Donchian Channels. A breakout above the upper channel or below the lower channel can signal a potential trend continuation or reversal.
Range Identification: The filled area between the Donchian Channels provides a visual representation of the ADX range, helping traders identify when the market is ranging or trending.
This indicator is designed to enhance your trading strategy by combining trend strength measurement with breakout signals, making it a versatile tool for various market conditions.
Enhanced High Volume AbsorptionDescription of the "Enhanced High Volume Absorption" Indicator  
The "Enhanced High Volume Absorption" indicator is a specialized trading tool designed for the TradingView platform, optimized for the 15-minute chart timeframe. It offers traders a unique approach to analyzing market momentum and strength by focusing on significant volume movements, which are often precursors to major price shifts.
 What the Indicator Does: 
 High Volume Detection:  This indicator identifies periods of high volume trading, which is a key indicator of strong market interest. High volume periods often precede significant price movements, making this an essential tool for anticipating market trends.
 
 Volume Absorption Analysis:  It analyzes the absorption of volume in the market. Absorption here refers to situations where the market is able to absorb trading volumes significantly higher than the average without a corresponding substantial change in price. This can be an indication of strong underlying market strength or weakness.
 
 Price Movement Correlation:  The script correlates volume spikes with price movements (upward or downward) to provide context to the volume absorption. This correlation helps determine whether the absorption is due to buying pressure (bullish indication) or selling pressure (bearish indication).
 How It Does It: 
 Moving Average Comparisons:  The script calculates short-term and long-term Simple Moving Averages (SMAs) of trading volumes. By comparing current volumes to these averages, it determines if the current volume is significantly higher than usual.
 Volume Thresholds:  It uses user-defined multipliers and minimum volume thresholds to filter significant volume events, ensuring that only notable volume spikes are considered.
 Impact Analysis:  Alongside volume analysis, the script computes the price change and its impact as a percentage of the current price, providing insights into the magnitude of price movements during these high-volume periods.
 How to Use It: 
 Market Entry and Exit Points:  The indicator can be used to spot potential entry and exit points. For example, a high volume absorption event with a minimal price change might indicate a strong support or resistance level.
 Confirming Market Sentiment:  It can be used in conjunction with other technical indicators to confirm market trends or reversals. High volume absorption aligned with other bullish or bearish indicators can provide a stronger case for a market move.
 Scalping and Short-Term Trading:  Optimized for the 15-minute timeframe, this indicator is particularly useful for scalpers and short-term traders. It helps in identifying quick market movements and can be a crucial part of a scalping strategy.
 Originality and Underlying Concepts: 
The originality of this indicator lies in its specific focus on volume absorption and its impact on price, especially tailored for short-term trading scenarios. Unlike many indicators that only analyze price movements or standard volume analysis, this script delves deeper into how the market is reacting to volume spikes, offering a nuanced view of market dynamics
that is often overlooked. The concept of volume absorption, coupled with the analysis of price movement direction, provides a unique perspective on market strength or weakness.
This tool is distinct in its approach as it doesn't just follow trends or provide generic scalping signals. Instead, it offers a methodical analysis of volume dynamics in relation to price action. By focusing on how the market absorbs volume, the indicator gives traders insights into whether current market movements are backed by substantial trading activity or if they are more likely to be short-lived.
Understanding volume absorption is crucial, especially in a 15-minute trading environment where market movements are swift and require quick decision-making. This indicator aids in identifying those moments when the market shows a significant reaction (or lack thereof) to large volumes, indicating potential setup for a strong move or reversal.
In summary, the "Enhanced High Volume Absorption" indicator is a valuable tool for traders who want to incorporate volume analysis into their trading strategy, especially in a fast-paced, short-term trading environment. It provides a deeper understanding of market dynamics, enabling traders to make more informed decisions based on the interplay between volume and price action.
[Sniper] SSL Hybrid + QQE MOD + Waddah Attar StrategyHi. I’m DuDu95.
**********************************************************************************
This is the script for the series called "Sniper".
*** What is "Sniper" Series? ***
"Sniper" series is the project that I’m going to start.
In "Sniper" Series, I’m going to "snipe and shoot" the youtuber’s strategy: to find out whether the youtuber’s video about strategy is "true or false". 
Specifically, I’m going to do the things below.
1. Implement "Youtuber’s strategy" into pinescript code. 
2. Then I will  "backtest" and prove whether "the strategy really works" in the specific ticker (e.g. BTCUSDT) for the specific timeframe (e.g. 5m).
3. Based on the backtest result, I will rate and judge whether the youtube video is "true" or "false", and then rate the validity, reliability, robustness, of the strategy. (like a lie detector)
*** What is the purpose of this series? ***
1. To notify whether the strategy really works for the people who watched the youtube video.
2. To find and build my own scalping / day trading strategy that really works.
**********************************************************************************
*** Strategy Description ***
This strategy is from "SSL QQE MOD 5MIN SCALPING STRATEGY" by youtuber "Daily Investments". 
"Daily Investments" claimed that this strategy will make you some money from 100 trades in any ticker in 5 minute timeframe.  
### Entry Logic
1. Long Entry Logic
- close > SSL Hybrid Baseline.
- QQE MOD should turn into blue color.
- Waddah Attar Explosion indicator must be green.
2. Short Entry Logic
- close < SSL Hybrid Baseline
- QQE MOD should turn into red color.
- Waddah Attar Explosion indicator must be red.
### Exit Logic
1. Long Exit Logic
- When QQE MOD turn into red color.
2. Short Entry Logic
- When QQE MOD turn into blue color.
### StopLoss
1. Can Choose Stop Loss Type: Percent, ATR, Previous Low / High.
2. Can Chosse inputs of each Stop Loss Type.
### Take Profit
1. Can set Risk Reward Ratio for Take Profit.
- To simplify backtest, I erased all other options except RR Ratio.
- You can add Take Profit Logic by adding options in the code.
2. Can set Take Profit Quantity.
### Risk Manangement
1. Can choose whether to use Risk Manangement Logic.
- This controls the Quantity of the Entry.
- e.g. If you want to take 3% risk per trade and stop loss price is 6% below the long entry price, 
       then 50% of your equity will be used for trade.
2. Can choose How much risk you would take per trade. 
### Plot
1. Added Labels to check the data of entry / exit positions.
2. Changed and Added color different from the original one. (green: #02732A, red: #D92332, yellow: #F2E313)
3. SSL Hybrid Baseline is by default drawn on the chart.
4. If you check EMA filter, EMA would be drawn on the chart.
5. Should add QQE MOD and Waddah Attar Explosion indicator manually if you want to see QQE MOD.
**********************************************************************************
*** Rating: True or False?
### Rating: 
→  1.5 / 5 (0 = Trash, 1 = Bad, 2 = Not Good, 3 = Good, 4 = Great, 5 = Excellent)
### True or False? 
→ False
→ Doesn't Work on 5 minute timeframe. Also, it doesn't work on crypto.
### Better Option? 
→ Use this for Day trading or Swing Trading, not for Scalping. (Bigger Timeframe)
→ Although the result was bad at 5 minute timeframe, it was profitable in 1h, 2h, 4h, 8h, 1d timeframe.
→ BTC, ETH was ok. 
→ The result was better when I use EMA filter (only on longer timeframe).
### Robust? 
→ So So. Although result was bad in short timeframe (e.g. 30m 15m 5m), backtest result was "consistently" profitable on longer timeframe.
→ Also, MDD was not that bad under risk management option on.
**********************************************************************************
*** Conclusion?
→ Don't use this on short timeframe.
→ Better use on longer timeframe with filter, stoploss and risk management.
VIX Volatility Trend Analysis With Signals - Stocks OnlyVIX VOLATILITY TREND ANALYSIS CLOUD WITH BULLISH & BEARISH SIGNALS - STOCKS ONLY
This indicator is a visual aid that shows you the bullish or bearish trend of VIX market volatility so you can see the VIX trend without switching charts. When volatility goes up, most stocks go down and vice versa. When the cloud turns green, it is a bullish sign. When the cloud turns red, it is a bearish sign.
This indicator is meant for stocks with a lot of price action and volatility, so for best results, use it on charts that move similar to the S&P 500 or other similar charts.
This indicator uses real time data from the stock market overall, so it should only be used on stocks and will only give a few signals during after hours. It does work ok for crypto, but will not give signals when the US stock market is closed.
**HOW TO USE**
When the VIX Volatility Index trend changes direction, it will give a green or red line on the chart depending on which way the VIX is now trending. The cloud will also change color depending on which way the VIX is trending. Use this to determine overall market volatility and place trades in the direction that the indicator is showing. Do not use this by itself as sometimes markets won’t react perfectly to the overall market volatility. It should only be used as a secondary confirmation in your trading/trend analysis.
For more signals with earlier entries, go into settings and reduce the number. 10-100 is best for scalping. For less signals with later entries, change the number to a higher value. Use 100-500 for swing trades. Can go higher for long swing trades. Our favorite settings are 20, 60, 100, 500 and 1000.
***MARKETS***
This indicator should only be used on the US stock markets as signals are given based on the VIX volatility index which measures volatility of the US Stock Markets.
***TIMEFRAMES***
This indicator works on all time frames, but after hours will not change much at all due to the markets being closed.
**INVERSE CHARTS**
If you are using this on an inverse ETF and the signals are showing backwards, please comment with what chart it is and I will configure the indicator to give the correct signals. I have included over 50 inverse ETFs into the code to show the correct signals on inverse charts, but I'm sure there are some that I have missed so feel free to let me know and I will update the script with the requested tickers.
***TIPS***
Try using numerous indicators of ours on your chart so you can instantly see the bullish or bearish trend of multiple indicators in real time without having to analyze the data. Some of our favorites are our Auto Fibonacci, Directional Movement Index, Volume Profile with buy & sell pressure, Auto Support And Resistance, Vix Scalper and Money Flow Index in combination with this Vix Trend Analysis. They all have real time Bullish and Bearish labels as well so you can immediately understand each indicator's trend.
Multi-Timeframe EMA (5 Configurable)Here's a comprehensive description you can use for your indicator:
Multi-Timeframe EMA Indicator (5 Configurable Slots)
Description
This indicator displays up to 5 Exponential Moving Averages (EMAs) from different timeframes simultaneously on a single chart. Perfect for multi-timeframe analysis, it allows traders to visualize key EMAs from intraday to higher timeframes without switching charts.
Key Features
5 Independent EMA Slots: Each slot can be configured with its own timeframe, EMA length, and color
Flexible Configuration: Mix any timeframes and EMA lengths (e.g., 1m EMA 50, 15m EMA 200, 4h EMA 100)
Smart Label Formatting: Automatically displays timeframes in readable format (minutes, hours, or days)
Optional Data Table: Toggle a compact table showing EMA values and price distance percentages
Individual Toggle Controls: Enable/disable each EMA independently without losing settings
Customizable Styling: Adjust colors and line width to match your chart theme
Default Configuration
EMA 1: 1-minute timeframe, EMA 200 (Red)
EMA 2: 5-minute timeframe, EMA 200 (Purple)
EMA 3: 15-minute timeframe, EMA 200 (Yellow)
EMA 4: 1-hour timeframe, EMA 200 (Blue)
EMA 5: 4-hour timeframe, EMA 200 (Orange)
How to Use
Add the indicator to any chart
Configure each EMA slot in the settings:
Timeframe: Choose from 1m, 5m, 15m, 1h, 4h, D, W, M, or custom
Length: Set the EMA period (default 200)
Color: Select a color for easy identification
Enable "Show Line Labels" to see EMA identifiers on the right side
Enable "Show Values Table" for a detailed view of current values and distances
Use Cases
Trend Analysis: Identify alignment across multiple timeframes
Support/Resistance: Use higher timeframe EMAs as dynamic S/R levels
Entry/Exit Timing: Enter on lower timeframe signals near higher timeframe EMAs
Multi-Timeframe Confirmation: Validate setups when price is above/below key EMAs
Scalping: Monitor 1m/5m EMAs while respecting 1h/4h trend direction
Tips
All EMAs update in real-time and move with the chart
Use contrasting colors for easier visual distinction
Disable unused slots to declutter your chart
The table shows percentage distance from current price to each EMA
Works on any symbol and any chart timeframe
ZS Master Vision Pro - Advanced Multi-Timeframe Trading SystemZS MASTER VISION PRO - PROFESSIONAL TRADING SUITE
Created by Zakaria Safri
A comprehensive, all-in-one trading system combining multiple proven technical analysis methods into a single, powerful indicator. Designed for traders who demand precision, clarity, and actionable signals across all timeframes.
KEY FEATURES
CORE TREND ALGORITHM
Adaptive ATR-based trend detection with dynamic support and resistance zones. Features Type A and Type B signal modes for different trading styles, strong signal detection in key reversal zones, and optional EMA source smoothing for noise reduction.
MULTI-LAYER EMA CLOUD SYSTEM
Five customizable EMA cloud layers for multi-timeframe analysis with theme-adaptive color coding across five professional themes. Optional line display for detailed MA tracking with configurable periods from scalping to position trading.
WAVE TREND OSCILLATOR
Advanced momentum oscillator with channel-based calculations featuring smart reversal detection at extreme overbought and oversold levels. Includes directional strength confirmation and customizable sensitivity with adjustable reaction periods.
DIVERGENCE SCANNER
Detects four types of divergence automatically:
- Regular Bullish: Price making lower lows while oscillator making higher lows
- Regular Bearish: Price making higher highs while oscillator making lower highs  
- Hidden Bullish: Trend continuation signals in uptrends
- Hidden Bearish: Trend continuation signals in downtrends
Automatic fractal-based detection with clear visual labels on chart.
MARKET BIAS INDICATOR
Heikin Ashi-based trend strength analysis with real-time bias calculation showing Bullish or Bearish combined with Strong or Weak conditions. Smoothed for cleaner signals and perfect for trend confirmation.
MOMENTUM SYSTEM
Proprietary momentum calculation using adaptive smoothing with growing and falling state detection. Normalized values for consistent interpretation and responsive to rapid market changes.
DYNAMIC SUPPORT AND RESISTANCE
Automatic pivot-based support and resistance level detection with adjustable left and right bar lookback. Non-repainting levels with visual clarity through color-coded lines.
LIVE INFORMATION DASHBOARD
Real-time market analysis panel displaying current trend direction, market bias based on Heikin Ashi, Wave Trend status and value, and momentum trend with state. Customizable display options with theme-adaptive colors.
VISUAL CUSTOMIZATION
FIVE PROFESSIONAL COLOR THEMES:
Pro - Modern green and red color scheme (default)
Classic - Traditional teal and red combination
Cyberpunk - Neon cyan and magenta contrast
Ocean - Blue and orange contrast
Sunset - Gold and red warmth
SIGNAL STYLES:
Labels with emoji indicators (BUY with rocket, SELL with bear, STRONG with lightning)
Arrows for clean minimal appearance
Triangles for classic approach
DISPLAY OPTIONS:
Color-coded candles following trend direction
Trend background highlighting for instant trend recognition
Optional EMA line display for detailed analysis
Adjustable transparency levels for personal preference
SMART ALERTS
Pre-configured alert conditions for all major signals:
Buy signals for standard entry opportunities
Sell signals for standard exit or short opportunities
Strong buy signals for high-confidence long entries
Strong sell signals for high-confidence short entries
Bullish divergence detection alerts
Bearish divergence detection alerts
Alert messages automatically include ticker symbol, current price, and specific signal type for quick decision making.
HOW TO USE
FOR TREND TRADERS:
Enable EMA Clouds with focus on Cloud 5 featuring 50 and 200 period moving averages. Wait for trend background color change to confirm direction. Enter on STRONG signals aligned with higher timeframe trend direction. Use support and resistance levels for strategic exits.
FOR SWING TRADERS:
Enable Wave Trend Oscillator information display. Look for oversold and overbought reversal setups. Confirm potential reversals with divergence scanner. Enter on smart reversal signals with proper risk management.
FOR SCALPERS:
Use Type B signal mode for more frequent trading signals. Enable Cloud 1 with 5 and 13 periods for quick trend confirmation. Focus on momentum growing and falling states for entry timing. Take quick entries on regular buy and sell signals.
FOR POSITION TRADERS:
Use Type A mode with higher ATR multiplier set to 3.0 or above. Enable only Cloud 5 with 50 and 200 periods for major trend confirmation. Only take STRONG signals for highest probability setups. Hold positions through minor pullbacks and noise.
RECOMMENDED SETTINGS
STOCKS ON DAILY TIMEFRAME:
Trend Period: 180
ATR Period: 155
ATR Multiplier: 2.1
Signal Mode: Type A
FOREX ON HOURLY AND 4-HOUR TIMEFRAMES:
Trend Period: 150
ATR Period: 120
ATR Multiplier: 2.5
Signal Mode: Type A
CRYPTOCURRENCY ON 15-MINUTE AND 1-HOUR TIMEFRAMES:
Trend Period: 100
ATR Period: 80
ATR Multiplier: 3.0
Signal Mode: Type B
SCALPING ON 1-MINUTE AND 5-MINUTE TIMEFRAMES:
Trend Period: 50
ATR Period: 40
ATR Multiplier: 2.0
Signal Mode: Type B
WHAT IS INCLUDED
Trend Analysis using ATR-based adaptive algorithm
Five EMA Cloud Layers for multi-timeframe confluence
Wave Trend Oscillator for momentum and reversal detection
Divergence Scanner detecting four types of divergence
Market Bias using Heikin Ashi-based trend strength
Momentum System with advanced momentum tracking
Support and Resistance Levels with automatic pivot detection
Live Dashboard showing real-time market analysis
Smart Alerts featuring six pre-configured alert types
Five Color Themes offering professional visual options
TECHNICAL DETAILS
CALCULATION METHODS:
Average True Range (ATR) for volatility adaptation
Exponential Moving Average (EMA) and Simple Moving Average (SMA) for trend smoothing
Wave Trend channel oscillator for momentum analysis
Fractal-based divergence detection algorithm
Heikin Ashi transformation for bias calculation
Logarithmic momentum calculation for precision
PERFORMANCE CHARACTERISTICS:
Optimized for maximum speed and efficiency
No repainting signals ensuring reliability
Works on all timeframes from 1 minute to monthly
Compatible with all instruments including stocks, forex, crypto, and futures
RISK DISCLAIMER
This indicator is a technical analysis tool and should not be used as the sole basis for trading decisions. Always use proper risk management and never risk more than you can afford to lose. Combine with other analysis methods and practice on demo accounts first. Past performance does not guarantee future results. Trading carries substantial risk and is not suitable for all investors.
SUPPORT AND UPDATES
Regular updates and continuous improvements
Based on proven technical analysis principles
Developed following Pine Coders best practices and standards
Clean, well-documented, and optimized code structure
WHY CHOOSE ZS MASTER VISION PRO
All-in-one solution eliminating the need for multiple indicators
Highly customizable to adapt to your specific trading style
Professional grade analysis with institutional-quality standards
Clean interface that is not cluttered or confusing
Works everywhere across all markets and all timeframes
Smart signals filtered for quality over quantity
Beautiful design featuring five professional color themes
Active development with regular improvements and updates
Transform your trading with ZS Master Vision Pro today.
Version 2.0 | Created by Zakaria Safri | Pine Script Version 5
Luxy Momentum, Trend, Bias and Breakout Indicators  V7
TABLE OF CONTENTS
This is Version 7 (V7) - the latest and most optimized release. If you are using any older versions (V6, V5, V4, V3, etc.), it is highly recommended to replace them with V7. 
 
 Why This Indicator is Different
 Who Should Use This
 Core Components Overview
 The UT Bot Trading System
 Understanding the Market Bias Table
 Candlestick Pattern Recognition
 Visual Tools and Features
 How to Use the Indicator
 Performance and Optimization
 FAQ
 
---
 ### CREDITS & ATTRIBUTION 
This indicator implements proven trading concepts using entirely original code developed specifically for this project.
 ### CONCEPTUAL FOUNDATIONS 
 • UT Bot ATR Trailing System 
  - Original concept by @QuantNomad: (search "UT-Bot-Strategy"
  - Our version is a complete reimplementation with significant enhancements:
  - Volume-weighted momentum adjustment
  - Composite stop loss from multiple S/R layers
  - Multi-filter confirmation system (swing, %, 2-bar, ZLSMA)
  - Full integration with multi-timeframe bias table
  - Visual audit trail with freeze-on-touch
  - NOTE: No code was copied - this is a complete reimplementation with enhancements.
 • Standard Technical Indicators (Public Domain Formulas): 
   - Supertrend: ATR-based trend calculation with custom gradient fills
   - MACD: Gerald Appel's formula with separation filters
   - RSI: J. Welles Wilder's formula with pullback zone logic
   - ADX/DMI: Custom trend strength formula inspired by Wilder's directional movement concept, reimplemented with volume weighting and efficiency metrics
   - ZLSMA: Zero-lag formula enhanced with Hull MA and momentum prediction
  ### Custom Implementations 
- Trend Strength: Inspired by Wilder's ADX concept but using volume-weighted pressure calculation and efficiency metrics (not traditional +DI/-DI smoothing)
- All code implementations are original
 ### ORIGINAL FEATURES (70%+ of codebase) 
- Multi-Timeframe Bias Table with live updates
- Risk Management System (R-multiple TPs, freeze-on-touch)
- Opening Range Breakout tracker with session management
- Composite Stop Loss calculator using 6+ S/R layers
- Performance optimization system (caching, conditional calcs)
- VIX Fear Index integration
- Previous Day High/Low auto-detection
- Candlestick pattern recognition with interactive tooltips
- Smart label and visual management
- All UI/UX design and table architecture
 ### DEVELOPMENT PROCESS 
 **AI Assistance:**  This indicator was developed over 2+ months with AI assistance (ChatGPT/Claude) used for:
- Writing Pine Script code based on design specifications
- Optimizing performance and fixing bugs
- Ensuring Pine Script v6 compliance
- Generating documentation
 **Author's Role:**  All trading concepts, system design, feature selection, integration logic, and strategic decisions are original work by the author. The AI was a coding tool, not the system designer.
 **Transparency:**  We believe in full disclosure - this project demonstrates how AI can be used as a powerful development tool while maintaining creative and strategic ownership.
---
 1. WHY THIS INDICATOR IS DIFFERENT 
Most traders use multiple separate indicators on their charts, leading to cluttered screens, conflicting signals, and analysis paralysis. The Suite solves this by integrating proven technical tools into a single, cohesive system.
 Key Advantages: 
 
 All-in-One Design:  Instead of loading 5-10 separate indicators, you get everything in one optimized script. This reduces chart clutter and improves TradingView performance.
 Multi-Timeframe Bias Table:  Unlike standard indicators that only show the current timeframe, the Bias Table aggregates trend signals across multiple timeframes simultaneously. See at a glance whether 1m, 5m, 15m, 1h are aligned bullish or bearish - no more switching between charts.
 Smart Confirmations:  The indicator doesn't just give signals - it shows you WHY. Every entry has multiple layers of confirmation (MA cross, MACD momentum, ADX strength, RSI pullback, volume, etc.) that you can toggle on/off.
 Dynamic Stop Loss System:  Instead of static ATR stops, the SL is calculated from multiple support/resistance layers: UT trailing line, Supertrend, VWAP, swing structure, and MA levels. This creates more intelligent, price-action-aware stops.
 R-Multiple Take Profits:  Built-in TP system calculates targets based on your initial risk (1R, 1.5R, 2R, 3R). Lines freeze when touched with visual checkmarks, giving you a clean audit trail of partial exits.
 Educational Tooltips Everywhere:  Every single input has detailed tooltips explaining what it does, typical values, and how it impacts trading. You're not guessing - you're learning as you configure.
 Performance Optimized:  Smart caching, conditional calculations, and modular design mean the indicator runs fast despite having 15+ features. Turn off what you don't use for even better performance.
 No Repainting:  All signals respect bar close. Alerts fire correctly. What you see in history is what you would have gotten in real-time.
 
  
 What Makes It Unique: 
Integrated UT Bot + Bias Table: No other indicator combines UT Bot's ATR trailing system with a live multi-timeframe dashboard. You get precision entries with macro trend context.
Candlestick Pattern Recognition with Interactive Tooltips: Patterns aren't just marked - hover over any emoji for a full explanation of what the pattern means and how to trade it.
Opening Range Breakout Tracker: Built-in ORB system for intraday traders with customizable session times and real-time status updates in the Bias Table.
Previous Day High/Low Auto-Detection: Automatically plots PDH/PDL on intraday charts with theme-aware colors. Updates daily without manual input.
Dynamic Row Labels in Bias Table: The table shows your actual settings (e.g., "EMA 10 > SMA 20") not generic labels. You know exactly what's being evaluated.
Modular Filter System: Instead of forcing a fixed methodology, the indicator lets you build your own strategy. Start with just UT Bot, add filters one at a time, test what works for your style.
---
 2. WHO WHOULD USE THIS 
Designed For:
 
 Intermediate to Advanced Traders: You understand basic technical analysis (MAs, RSI, MACD) and want to combine multiple confirmations efficiently. This isn't a "one-click profit" system - it's a professional toolkit.
 Multi-Timeframe Traders: If you trade one asset but check multiple timeframes for confirmation (e.g., enter on 5m after checking 15m and 1h alignment), the Bias Table will save you hours every week.
 Trend Followers: The indicator excels at identifying and following trends using UT Bot, Supertrend, and MA systems. If you trade breakouts and pullbacks in trending markets, this is built for you.
 Intraday and Swing Traders: Works equally well on 5m-1h charts (day trading) and 4h-D charts (swing trading). Scalpers can use it too with appropriate settings adjustments.
 Discretionary Traders: This isn't a black-box system. You see all the components, understand the logic, and make final decisions. Perfect for traders who want tools, not automation.
 
 Works Across All Markets: 
Stocks (US, international)
Cryptocurrency (24/7 markets supported)
Forex pairs
Indices (SPY, QQQ, etc.)
Commodities
 NOT Ideal For :
 
 Complete Beginners: If you don't know what a moving average or RSI is, start with basics first. This indicator assumes foundational knowledge.
 Algo Traders Seeking Black Box: This is discretionary. Signals require context and confirmation. Not suitable for blind automated execution.
 Mean-Reversion Only Traders: The indicator is trend-following at its core. While VWAP bands support mean-reversion, the primary methodology is trend continuation.
 
---
 3. CORE COMPONENTS OVERVIEW 
 The indicator combines these proven systems: 
 
 Trend Analysis: 
 Moving Averages:  Four customizable MAs (Fast, Medium, Medium-Long, Long) with six types to choose from (EMA, SMA, WMA, VWMA, RMA, HMA). Mix and match for your style.
 Supertrend:  ATR-based trend indicator with unique gradient fill showing trend strength. One-sided ribbon visualization makes it easier to see momentum building or fading.
 ZLSMA : Zero-lag linear-regression smoothed moving average. Reduces lag compared to traditional MAs while maintaining smooth curves.
 Momentum & Filters: 
 MACD:  Standard MACD with separation filter to avoid weak crossovers.
 RSI:  Pullback zone detection - only enter longs when RSI is in your defined "buy zone" and shorts in "sell zone".
 ADX/DMI:  Trend strength measurement with directional filter. Ensures you only trade when there's actual momentum.
 Volume Filter:  Relative volume confirmation - require above-average volume for entries.
 Donchian Breakout:  Optional channel breakout requirement.
 
 Signal Systems: 
 
 UT Bot:  The primary signal generator. ATR trailing stop that adapts to volatility and gives clear entry/exit points.
 Base Signals:  MA cross system with all the above filters applied. More conservative than UT Bot alone.
 Market Bias Table:  Multi-timeframe dashboard showing trend alignment across 7 timeframes plus macro bias (3-day, weekly, monthly, quarterly, VIX).
 Candlestick Patterns:  Six major reversal patterns auto-detected with interactive tooltips.
 ORB Tracker:  Opening range high/low with breakout status (intraday only).
 PDH/PDL:  Previous day levels plotted automatically on intraday charts.
 VWAP + Bands : Session-anchored VWAP with up to three standard deviation band pairs.
 
  
---
 4. THE UT BOT TRADING SYSTEM 
The UT Bot is the heart of the indicator's signal generation. It's an advanced ATR trailing stop that adapts to market volatility.
Why UT Bot is Superior to Fixed Stops:
Traditional ATR stops use a fixed multiplier (e.g., "stop = entry - 2×ATR"). UT Bot is smarter:
It TRAILS the stop as price moves in your favor
It WIDENS during high volatility to avoid premature stops
It TIGHTENS during consolidation to lock in profits
It FLIPS when price breaks the trailing line, signaling reversals
 Visual Elements You'll See: 
Orange Trailing Line: The actual UT stop level that adapts bar-by-bar
Buy/Sell Labels: Aqua triangle (long) or orange triangle (short) when the line flips
ENTRY Line: Horizontal line at your entry price (optional, can be turned off)
Suggested Stop Loss: A composite SL calculated from multiple support/resistance layers:
- UT trailing line
- Supertrend level
- VWAP
- Swing structure (recent lows/highs)
- Long-term MA (200)
- ATR-based floor
Take Profit Lines: TP1, TP1.5, TP2, TP3 based on R-multiples. When price touches a TP, it's marked with a checkmark and the line freezes for audit trail purposes.
Status Messages: "SL Touched ❌" or "SL Frozen" when the trade leg completes.
 How UT Bot Differs from Other ATR Systems: 
Multiple Filters Available: You can require 2-bar confirmation, minimum % price change, swing structure alignment, or ZLSMA directional filter. Most UT implementations have none of these.
Smart SL Calculation: Instead of just using the UT line as your stop, the indicator suggests a better SL based on actual support/resistance. This prevents getting stopped out by wicks while keeping risk controlled.
Visual Audit Trail: All SL/TP lines freeze when touched with clear markers. You can review your trades weeks later and see exactly where entries, stops, and targets were.
Performance Options: "Draw UT visuals only on bar close" lets you reduce rendering load without affecting logic or alerts - critical for slower machines or 1m charts.
 Trading Logic: 
UT Bot flips direction (Buy or Sell signal appears)
Check Bias Table for multi-timeframe confirmation
Optional: Wait for Base signal or candlestick pattern
Enter at signal bar close or next bar open
Place stop at "Suggested Stop Loss" line
Scale out at TP levels (TP1, TP2, TP3)
Exit remaining position on opposite UT signal or stop hit
  
---
 5. UNDERSTANDING THE MARKET BIAS TABLE 
This is the indicator's unique multi-timeframe intelligence layer. Instead of looking at one chart at a time, the table aggregates signals across seven timeframes plus macro trend bias.
 Why Multi-Timeframe Analysis Matters: 
 
 Professional traders check higher and lower timeframes for context:
 Is the 1h uptrend aligning with my 5m entry?
 Are all short-term timeframes bullish or just one?
 Is the daily trend supportive or fighting me?
 
Doing this manually means opening multiple charts, checking each indicator, and making mental notes. The Bias Table does it automatically in one glance.
 Table Structure: 
 Header Row: 
On intraday charts: 1m, 5m, 15m, 30m, 1h, 2h, 4h (toggle which ones you want)
On daily+ charts: D, W, M (automatic)
Green dot next to title = live updating
 Headline Rows - Macro Bias: 
These show broad market direction over longer periods:
3 Day Bias: Trend over last 3 trading sessions (uses 1h data)
Weekly Bias: Trend over last 5 trading sessions (uses 4h data)
Monthly Bias: Trend over last 30 daily bars
Quarterly Bias: Trend over last 13 weekly bars
VIX Fear Index: Market regime based on VIX level - bullish when low, bearish when high
Opening Range Breakout: Status of price vs. session open range (intraday only)
These rows show text: "BULLISH", "BEARISH", or "NEUTRAL"
Indicator Rows - Technical Signals:
These evaluate your configured indicators across all active timeframes:
Fast MA > Medium MA (shows your actual MA settings, e.g., "EMA 10 > SMA 20")
Price > Long MA (e.g., "Price > SMA 200")
Price > VWAP
MACD > Signal
Supertrend (up/down/neutral)
ZLSMA Rising
RSI In Zone
ADX ≥ Minimum
These rows show emojis: GREEB (bullish), RED (bearish), GRAY/YELLOW (neutral/NA)
 AVG Column: 
Shows percentage of active timeframes that are bullish for that row. This is the KEY metric:
AVG > 70% = strong multi-timeframe bullish alignment
AVG 40-60% = mixed/choppy, no clear trend
AVG < 30% = strong multi-timeframe bearish alignment
 How to Use the Table: 
 For a long trade: 
Check AVG column - want to see > 60% ideally
Check headline bias rows - want to see BULLISH, not BEARISH
Check VIX row - bullish market regime preferred
Check ORB row (intraday) - want ABOVE for longs
Scan indicator rows - more green = better confirmation
 For a short trade: 
Check AVG column - want to see < 40% ideally
Check headline bias rows - want to see BEARISH, not BULLISH
Check VIX row - bearish market regime preferred
Check ORB row (intraday) - want BELOW for shorts
Scan indicator rows - more red = better confirmation
 When AVG is 40-60%: 
Market is choppy, mixed signals. Either stay out or reduce position size significantly. These are low-probability environments.
 Unique Features: 
 
 Dynamic Labels: Row names show your actual settings (e.g., "EMA 10 > SMA 20" not generic "Fast > Slow"). You know exactly what's being evaluated.
 Customizable Rows: Turn off rows you don't care about. Only show what matters to your strategy.
 Customizable Timeframes: On intraday charts, disable 1m or 4h if you don't trade them. Reduces calculation load by 20-40%.
 Automatic HTF Handling: On Daily/Weekly/Monthly charts, the table automatically switches to D/W/M columns. No configuration needed.
 Performance Smart: "Hide BIAS table on 1D or above" option completely skips all table calculations on higher timeframes if you only trade intraday.


---
 6. CANDLESTICK PATTERN RECOGNITION 
The indicator automatically detects six major reversal patterns and marks them with emojis at the relevant bars.
 Why These Six Patterns: 
These are the most statistically significant reversal patterns according to trading literature:
High win rate when appearing at support/resistance
Clear visual structure (not subjective)
Work across all timeframes and assets
Studied extensively by institutions
 The Patterns: 
 
 Bullish Patterns (appear at bottoms):
 Bullish Engulfing: Green candle completely engulfs prior red candle's body. Strong reversal signal.
 Hammer: Small body with long lower wick (at least 2× body size). Shows rejection of lower prices by buyers.
 Morning Star: Three-candle pattern (large red → small indecision → large green). Very strong bottom reversal.
 Bearish Patterns (appear at tops):
 Bearish Engulfing: Red candle completely engulfs prior green candle's body. Strong reversal signal.
 Shooting Star: Small body with long upper wick (at least 2× body size). Shows rejection of higher prices by sellers.
 Evening Star: Three-candle pattern (large green → small indecision → large red). Very strong top reversal.
 
 Interactive Tooltips: 
Unlike most pattern indicators that just draw shapes, this one is educational:
Hover your mouse over any pattern emoji
A tooltip appears explaining: what the pattern is, what it means, when it's most reliable, and how to trade it
No need to memorize - learn as you trade
 Noise Filter: 
"Min candle body % to filter noise" setting prevents false signals:
Patterns require minimum body size relative to price
Filters out tiny candles that don't represent real buying/selling pressure
Adjust based on asset volatility (higher % for crypto, lower for low-volatility stocks)
  
 How to Trade Patterns: 
Patterns are NOT standalone entry signals. Use them as:
 
 Confirmation: UT Bot gives signal + pattern appears = stronger entry
 Reversal Warning: In a trade, opposite pattern appears = consider tightening stop or taking profit
 Support/Resistance Validation: Pattern at key level (PDH, VWAP, MA 200) = level is being respected
 
 Best combined with: 
 
 UT Bot or Base signal in same direction
 Bias Table alignment (AVG > 60% or < 40%)
 Appearance at obvious support/resistance
 
---
 7. VISUAL TOOLS AND FEATURES 
 VWAP (Volume Weighted Average Price): 
Session-anchored VWAP with standard deviation bands. Shows institutional "fair value" for the trading session.
Anchor Options: Session, Day, Week, Month, Quarter, Year. Choose based on your trading timeframe.
Bands: Up to three pairs (X1, X2, X3) showing statistical deviation. Price at outer bands often reverses.
Auto-Hide on HTF: VWAP hides on Daily/Weekly/Monthly charts automatically unless you enable anchored mode.
 Use VWAP as: 
 
 Directional bias (above = bullish, below = bearish)
 Mean reversion levels (outer bands)
 Support/resistance (the VWAP line itself)
 
 Previous Day High/Low: 
Automatically plots yesterday's high and low on intraday charts:
Updates at start of each new trading day
Theme-aware colors (dark text for light charts, light text for dark charts)
Hidden automatically on Daily/Weekly/Monthly charts
These levels are critical for intraday traders - institutions watch them closely as support/resistance.
 Opening Range Breakout (ORB): 
Tracks the high/low of the first 5, 15, 30, or 60 minutes of the trading session:
Customizable session times (preset for NYSE, LSE, TSE, or custom)
Shows current breakout status in Bias Table row (ABOVE, BELOW, INSIDE, BUILDING)
Intraday only - auto-disabled on Daily+ charts
ORB is a classic day trading strategy - breakout above opening range often leads to continuation.
 Extra Labels: 
Change from Open %: Shows how far price has moved from session open (intraday) or daily open (HTF). Green if positive, red if negative.
ADX Badge: Small label at bottom of last bar showing current ADX value. Green when above your minimum threshold, red when below.
RSI Badge: Small label at top of last bar showing current RSI value with zone status (buy zone, sell zone, or neutral).
These labels provide quick at-a-glance confirmation without needing separate indicator windows.
---
 8. HOW TO USE THE INDICATOR 
 Step 1: Add to Chart 
Load the indicator on your chosen asset and timeframe
First time: Everything is enabled by default - the chart will look busy
Don't panic - you'll turn off what you don't need
 Step 2: Start Simple 
Turn OFF everything except:
UT Bot labels (keep these ON)
Bias Table (keep this ON)
Moving Averages (Fast and Medium only)
Suggested Stop Loss and Take Profits
Hide everything else initially. Get comfortable with the basic UT Bot + Bias Table workflow first.
 Step 3: Learn the Core Workflow 
UT Bot gives a Buy or Sell signal
Check Bias Table AVG column - do you have multi-timeframe alignment?
If yes, enter the trade
Place stop at Suggested Stop Loss line
Scale out at TP levels
Exit on opposite UT signal
Trade this simple system for a week. Get a feel for signal frequency and win rate with your settings.
 Step 4: Add Filters Gradually 
If you're getting too many losing signals (whipsaws in choppy markets), add filters one at a time:
Try: "Require 2-Bar Trend Confirmation" - wait for 2 bars to confirm direction
Try: ADX filter with minimum threshold - only trade when trend strength is sufficient
Try: RSI pullback filter - only enter on pullbacks, not chasing
Try: Volume filter - require above-average volume
Add one filter, test for a week, evaluate. Repeat.
 Step 5: Enable Advanced Features (Optional) 
Once you're profitable with the core system, add:
Supertrend for additional trend confirmation
Candlestick patterns for reversal warnings
VWAP for institutional anchor reference
ORB for intraday breakout context
ZLSMA for low-lag trend following
 Step 6: Optimize Settings 
Every setting has a detailed tooltip explaining what it does and typical values. Hover over any input to read:
What the parameter controls
How it impacts trading
Suggested ranges for scalping, day trading, and swing trading
Start with defaults, then adjust based on your results and style.
 Step 7: Set Up Alerts 
Right-click chart → Add Alert → Condition: "Luxy Momentum v6" → Choose:
"UT Bot — Buy" for long entries
"UT Bot — Sell" for short entries
"Base Long/Short" for filtered MA cross signals
Optionally enable "Send real-time alert() on UT flip" in settings for immediate notifications.
 Common Workflow Variations: 
Conservative Trader:
UT signal + Base signal + Candlestick pattern + Bias AVG > 70%
Enter only at major support/resistance
Wider UT sensitivity, multiple filters
 Aggressive Trader: 
UT signal + Bias AVG > 60%
Enter immediately, no waiting
Tighter UT sensitivity, minimal filters
 Swing Trader: 
Focus on Daily/Weekly Bias alignment
Ignore intraday noise
Use ORB and PDH/PDL less (or not at all)
Wider stops, patient approach
---
 9. PERFORMANCE AND OPTIMIZATION 
The indicator is optimized for speed, but with 15+ features running simultaneously, chart load time can add up. Here's how to keep it fast:
 Biggest Performance Gains: 
Disable Unused Timeframes: In "Time Frames" settings, turn OFF any timeframe you don't actively trade. Each disabled TF saves 10-15% calculation time. If you only day trade 5m, 15m, 1h, disable 1m, 2h, 4h.
Hide Bias Table on Daily+: If you only trade intraday, enable "Hide BIAS table on 1D or above". This skips ALL table calculations on higher timeframes.
Draw UT Visuals Only on Bar Close: Reduces intrabar rendering of SL/TP/Entry lines. Has ZERO impact on logic or alerts - purely visual optimization.
 Additional Optimizations: 
Turn off VWAP bands if you don't use them
Disable candlestick patterns if you don't trade them
Turn off Supertrend fill if you find it distracting (keep the line)
Reduce "Limit to 10 bars" for SL/TP lines to minimize line objects
 Performance Features Built-In: 
Smart Caching: Higher timeframe data (3-day bias, weekly bias, etc.) updates once per day, not every bar
Conditional Calculations: Volume filter only calculates when enabled. Swing filter only runs when enabled. Nothing computes if turned off.
Modular Design: Every component is independent. Turn off what you don't need without breaking other features.
 Typical Load Times: 
5m chart, all features ON, 7 timeframes: ~2-3 seconds
5m chart, core features only, 3 timeframes: ~1 second
1m chart, all features: ~4-5 seconds (many bars to calculate)
If loading takes longer, you likely have too many indicators on the chart total (not just this one).
---
 10. FAQ 
Q: How is this different from standard UT Bot indicators?
A: Standard UT Bot (originally by @QuantNomad) is just the ATR trailing line and flip signals. This implementation adds:
- Volume weighting and momentum adjustment to the trailing calculation
- Multiple confirmation filters (swing, %, 2-bar, ZLSMA)
- Smart composite stop loss system from multiple S/R layers
- R-multiple take profit system with freeze-on-touch
- Integration with multi-timeframe Bias Table
- Visual audit trail with checkmarks
Q: Can I use this for automated trading?
A: The indicator is designed for discretionary trading. While it has clear signals and alerts, it's not a mechanical system. Context and judgment are required.
Q: Does it repaint?
A: No. All signals respect bar close. UT Bot logic runs intrabar but signals only trigger on confirmed bars. Alerts fire correctly with no lookahead.
Q: Do I need to use all the features?
A: Absolutely not. The indicator is modular. Many profitable traders use just UT Bot + Bias Table + Moving Averages. Start simple, add complexity only if needed.
Q: How do I know which settings to use?
A: Every single input has a detailed tooltip. Hover over any setting to see:
What it does
How it affects trading
Typical values for scalping, day trading, swing trading
Start with defaults, adjust gradually based on results.
Q: Can I use this on crypto 24/7 markets?
A: Yes. ORB will not work (no defined session), but everything else functions normally. Use "Day" anchor for VWAP instead of "Session".
Q: The Bias Table is blank or not showing.
A: Check:
"Show Table" is ON
Table position isn't overlapping another indicator's table (change position)
At least one row is enabled
"Hide BIAS table on 1D or above" is OFF (if on Daily+ chart)
Q: Why are candlestick patterns not appearing?
A: Patterns are relatively rare by design - they only appear at genuine reversal points. Check:
Pattern toggles are ON
"Min candle body %" isn't too high (try 0.05-0.10)
You're looking at a chart with actual reversals (not strong trending market)
Q: UT Bot is too sensitive/not sensitive enough.
A: Adjust "Sensitivity (Key×ATR)". Lower number = tighter stop, more signals. Higher number = wider stop, fewer signals. Read the tooltip for guidance.
Q: Can I get alerts for the Bias Table?
A: The Bias Table is a dashboard for visual analysis, not a signal generator. Set alerts on UT Bot or Base signals, then manually check Bias Table for confirmation.
Q: Does this work on stocks with low volume?
A: Yes, but turn OFF the volume filter. Low volume stocks will never meet relative volume requirements.
Q: How often should I check the Bias Table?
A: Before every entry. It takes 2 seconds to glance at the AVG column and headline rows. This one check can save you from fighting the trend.
Q: What if UT signal and Base signal disagree?
A: UT Bot is more aggressive (ATR trailing). Base signals are more conservative (MA cross + filters). If they disagree, either:
Wait for both to align (safest)
Take the UT signal but with smaller size (aggressive)
Skip the trade (conservative)
There's no "right" answer - depends on your risk tolerance.
---
 FINAL NOTES 
The indicator gives you an edge. How you use that edge determines results.
For questions, feedback, or support, comment on the indicator page or message the author.
 Happy Trading! 
Digital RPM HUD — 4 Feeds + Confidence + Timeline (v3)🏎️ Digital RPM HUD — 4 Feeds + Confidence + Timeline (v3)
A performance-style trading dashboard for momentum-driven traders.
The Digital RPM HUD gives you an instant visual readout of market “engine speed” — combining four customizable data feeds (Trend, Momentum, Volume, Volatility) into a single confidence score (0–100) and a color-coded timeline of regime changes.
Think of it as a racing-inspired control panel: you only “hit the throttle” when confidence is high and all systems agree.
🔧 Key Features
4 Data Feeds – assign your own logic (EMA, RSI, RVOL, ATR, etc.).
Confidence Meter – blends the four feeds into one smooth 0–100 reading.
Timeline Strip – shows recent bullish / bearish / neutral states at a glance.
Visual Trade Cues – optional on-chart LONG / SHORT / EXIT markers.
Fully Customizable – thresholds, weights, smoothing, colors, layout.
HUD Overlay – clean, minimal, and adjustable to any corner of your chart.
💡 How to Use
Configure each feed to reflect your preferred signals (e.g., trend EMA 200, momentum RSI 14, volume RVOL 20, volatility ATR 14).
Watch the Confidence gauge:
✅ Above Bull Threshold → Market acceleration / long bias.
❌ Below Bear Threshold → Momentum loss / short bias.
⚪ Between thresholds → Neutral zone; stay patient.
Use the Timeline to confirm trend consistency — more green = bullish regime, more red = bearish.
⚙️ Recommended Setups
Scalping: Trend EMA 50 + RSI 7 + RVOL 10 + ATR 7 → Fast response.
Intraday: EMA 200 + RSI 14 + RVOL 20 + ATR 14 → Balanced signal.
Swing: Multi-TF Trend + MACD + RVOL + ATR → Smooth and steady.
⚠️ Disclaimer
This script is not a trading strategy and does not execute trades.
All signals are visual aids — always confirm with your own analysis and risk management.
50% Fib Trend Cloud + ATR BandsThis indicator plots two structural 50% fibonacci midpoints from recent confirmed 'left/right' swings that form a *cloud* of equilibrium, then adds a rolling 50% fibonacci range midpoint based on a lookback window that's wrapped in ATR bands. Importantly, it solves a specific trading problem:
Structural midpoints (macro context) are powerful but can lag when price escapes prior ranges. Enter rolling 50% fib + ATR ➡️ which restores real-time balance & tolerance (micro context). Together they show where price is balanced structurally, where it’s balanced right now, and how much volatility to tolerate before acting.
➖➖➖
🔑 Why this is different
Most tools either draw a single midpoint (ex., daily 50%) or ATR bands around a moving average. This script fuses dual swing-based 50% midpoints (structure) + a rolling 50% with ATR (flow), so you don’t lose context when price escapes prior ranges. The cloud tells you who’s in control (fast vs. slow structure). The rolling 50% + ATR tells you how far is “too far” now.
➖➖➖
🧠 What it does (at a glance)
🔸Structural Equilibrium × 2 (Fib1/Fib2)  
Two independent 50% midpoints formed from swing pivots (configurable Left/Right bars + optional smoothing). Their gap is the Midpoint Cloud = structural “fair value” zone.
🔸Rolling 50% + ATR Bands
A rolling highest/lowest window computes an always-current 50% rolling midpoint plot; ±ATR × length envelopes define a soft value area and over-stretch boundaries.
🔸Actionable Visuals 
Optional fill between Fib1/Fib2, labels, and candle-overlay modes to instantly read regime (above both / below both / between).
🔸Smart Defaults  
 Timeframe-aware presets for L/R pivots & smoothing; full manual overrides available.
➖➖➖
⚙️ Calculations (plain-English)
🔸Pivot midpoints (Fib1 & Fib2):
  1) Detect a swing using `Left/Right` bars  
  2) Take the swing’s high/low → compute 50%
  3) (Optional) Smooth the line (SMA) to stabilize on noisy TFs  
  4) Repeat with a different sensitivity to get two distinct midpoints  
🔸Rolling midpoint:
  Highest High / Lowest Low over the last *N* bars → (HH + LL) / 2
🔸ATR levels:
  `Upper = Rolling50 + ATR × Mult`, `Lower = Rolling50 − ATR × Mult`  
  (Typical: ATR length 14–21; Multipliers 2.236 for L1, 5.382 for L2)
➖➖➖
🤖 Auto-Configured Presets (with Manual Override)
💡Goal: make the midpoints “just work” on common timeframes while still letting you dial them in.
💡How Auto Presets work
When Auto Presets = ON, the script picks sensible L/R/S (Left bars / Right bars / Smoothing) for Fib Trend 1 and Fib Trend 2 based on chart timeframe.  
🔸Fib 1 (fast) emphasizes *micro-structure* for quicker bias shifts.  
🔸Fib 2 (slow) emphasizes *macro-structure* for anchor/bias context.  
These defaults keep Fib 1 responsive without jitter and Fib 2 stable without lag.
➡️ Turn Auto Presets = OFF to take full control with the manual inputs described below.
➖➖➖
🛠 Manual Fib Midpoint Settings (when Auto = OFF)
💡Each midpoint uses three knobs:
🔸Pivot Left (L): bars to the left that must be lower/higher to qualify a swing  
🔸Pivot Right (R): bars to the right that must be lower/higher to confirm the swing  
🔸Smoothing (S): SMA period applied to the raw 50% midpoint (stabilizes noise)
5-Minute optimized defaults
🔸Fib Trend 1: `L21 / R5 / S55` → responsive local structure (entries/exits, re-balancing zones)
🔸Fib Trend 2: `L55 / R13 / S89` → broader structure (trend context, anchors/stops)
Timeframe guidance
🔸1m–3m: may feel a touch laggy → consider ~`L13 / R3 / S34`
🔸15m–1h: defaults remain strong → optionally ~`L34 / R8 / S89`
🔸4h+ : increase span for stability → `L89–144 / R13–21 / S144–233`
➡️ Rule of thumb: shorter L/R = faster detection, longer S = smoother line. Tune until Fib 1 captures the “active swing” and Fib 2 captures the “dominant swing” without whipsaw.
➖➖➖
 🎛 Inputs (quick reference)
🔸Fib Trend 1/2: Source (High/Low/Close), Left/Right bars, Smoothing length, Show/Hide, Cloud fill toggle  
🔸Rolling 50%: Lookback length, Price basis (Wicks/Close/HLC3/OHLC4), Plot scope (Full / Last N / None)  
🔸ATR Bands: ATR length, Multipliers (L1/L2), Plot scope, Line width/colors  
🔸Overlay & Labels: Candle overlay mode, Label padding/size, 50% centerline toggle, Plot widths
➖➖➖
🖍️ Candle Coloring & Overlay Modes
💡Purpose: make trend instantly visible on the candles and ATR levels.
1) Color Logic (dropdown)
🔸 Fib Midpoints — Colors by position of price vs. Fib 1 & Fib 2  
🔸ATR Zones — Colors by which ATR zone price is in relative to the Rolling 50%  
➡️ Price Reference: Choose the input used for the decision (Close, HL2, OHLC3, OHLC4).  
➡️Tip: Close is crisp; HL2/OHLC variants are smoother.
2) Overlay Style (dropdown)
🔸 None — No visual change to candles  
🔸 Bar Color — Uses `barcolor()` to tint built-in candles (this takes into account your Trading View settings, for instance if you have wicks set to white, they will show up as white with this setting)  
🔸 PlotCandles — Draws unified custom candles (body, wick, border) with the same color for maximum clarity
💡Practical use
🔸 Pick Fib Midpoints to read structural bias at a glance (above/below/between the cloud).  
🔸 Pick ATR Zones to read value vs. stretch around the Rolling 50% (mean-reversion vs. trend extension).
➖➖➖
📘 How to use
A) Trend confirmation
- Strong bullish bias when price holds above both structural mids; strong bearish when below both.  
- Use the Rolling 50% + ATR as a dynamic re-entry zone: pullbacks that respect ATR(L1) often continue the prevailing trend.
B) Transition / mean reversion  
- Inside the Cloud (between Fib1 & Fib2) treat behavior as neutralization/re-balancing; range tactics tend to outperform momentum plays.  
- In ranges, fades near ±ATR around the rolling 50% can mark short-term edges.
C) Breakout context  
- When price leaves the Cloud, the Rolling 50% keeps you anchored so price never feels “floating.” A clean hold outside ATR(L1/L2) suggests regime strength; quick re-entries hint at traps.
➖➖➖
🖼 Chart examples 
➡️ Each snapshot shows how the Cloud (structure) and the Rolling 50% + ATR (flow) work together.
1) 1-Minute Downtrend – Cloud as Dynamic Ceiling
   - The Cloud slopes down; pullbacks repeatedly fail under the Cloud’s underside.  
   - Rolling 50% (dashed mid) + ATR(L1) act as a reversion band: rallies stall near upper ATR and rotate lower.
     
2) 15-Minute Persistent Drift – Structure Guides, Flow Times Entries
   - Long drift lower with Cloud overhead.  
   - Consolidations near the rolling mid resolve in the trend direction; ATR bands frame risk on each attempt.
     
3) 15-Minute Uptrend (BTC) – From Cloud Escape to Value Stair-Step
   - After escaping the prior Cloud, rolling 50% + ATR establish a new higher value area.  
   - Pullbacks into ATR(L1) produce orderly stair-steps; Cloud remains supportive on deeper dips
     
4) 5-Minute BTC – Pullback to Value then Rotate
   - Strong leg up; retrace tags lower ATR band and rotates back toward the rolling mid.  
   - Labels (Fib1/Fib2) make the structural context explicit for decision-making.
    
➖➖➖
🧪 Starter presets
- Intraday (5–15m): Fib1 ~ L21/R5 (smooth 5), Fib2 ~ L55/R13 (smooth 9) • Rolling = 55 • ATR = 14 • L1 = 2.5x, L2 = 5.0x  
- Scalping: Shorten lookbacks & smoothing; keep ATR multipliers similar, or tighten L1.  
- Swing: Lengthen all lookbacks; consider ATR length 21–28.
➖➖➖
🏁Final Word
This script is not just a visual tool, it’s a complete trend and structure framework. Whether you're looking for clean trend alignment, dynamic support/resistance, or early warning signs of a reversal, this system is tuned to help you react with confidence — not hindsight.
Rembember, no single indicator should be used in isolation. For best results, combine it with price action analysis, higher-timeframe context, and complementary tools like trendlines, moving averages etc Use it as part of a well-rounded trading approach to confirm setups — not to define them alone.
---
💡Turn logic into clarity. Structure into trades. And uncertainty into confidence.
“VWAP Precision Suite — EMA Cloud + RTH Anchored Zones”🧠 “VWAP Precision Suite — EMA Cloud + RTH Anchored Zones”
(Alternative titles for testing engagement)
“VWAP Zone Pro — EMA Cloud + RTH Levels”
“VWAP Fusion System — EMA Bias & Daily Anchors”
“Session Flow Pro — VWAP + EMA Trend Matrix”
📜 Description 
🔹 Overview
The VWAP Precision Suite is an all-in-one market structure indicator built for intra-day precision and trend confirmation.
It combines institutional-grade tools — VWAP bands, EMA trend zones, and RTH high/low anchors — to help traders identify momentum shifts, session extremes, and volume-weighted fair value zones in real time.
Whether you’re a scalper, swing trader, or futures/day trader, this tool adapts to any trading style with fully customizable inputs.
⚙️ Core Features
✅ Dynamic VWAP Bands — plots ±1/2 ATR deviation zones around the VWAP for intraday fair-value mean reversion and trend extension tracking.
✅ EMA Cloud Zone (9/21 by default) — identifies short-term bias shifts using a color-coded cloud between EMAs.
✅ RTH High/Low Mapping — tracks live session high/low levels plus the previous day’s anchors.
✅ Anchored VWAP (Daily Reset) — plots rolling session VWAP using volume-weighted price action for precision mean tracking.
✅ Trend Color Background — visually highlights bias direction for quick momentum reads.
✅ Customizable Everything — modify EMA lengths, VWAP ATR multipliers, visibility toggles, and background colors to fit your playbook.
🧩 Suggested Starter Settings
Use these settings to begin, then fine-tune to your strategy:
Setting	Recommended	Description
VWAP Bands	✅ On	±1×ATR for precision zones
EMA Zone	✅ On	Fast EMA: 9 / Slow EMA: 21
Anchored VWAP	✅ On	Daily reset for new session
RTH High/Low	✅ On	Shows live and prior session levels
Trend Background	✅ On	Visual bias filter
Color Scheme	Green = Bullish Bias / Red = Bearish Bias	
💡 Tip:
Scalpers can tighten ATR multipliers (0.8–1.2).
Swing traders can widen ATR multipliers (1.5–2.0).
Adjust EMA 9/21 to faster (5/13) or slower (20/50) based on volatility.
📊 Use Case Examples
📈 Fade the VWAP deviation band and ride back to mean.
🔁 Trade reversals using EMA cloud color flips.
🕒 Mark confluence between Anchored VWAP + RTH highs/lows for breakout zones.
💹 Combine with order-flow or volume profile for higher conviction.
⚠️ Disclaimer
This indicator is for educational purposes only and does not constitute financial advice.
Trading involves risk and may result in losses.
The author is not responsible for any financial decisions made using this tool.
Always use sound risk management and back test before trading live.
© 2025. All rights reserved. Redistribution or resale of this indicator, in full or in part, is strictly prohibited without the author’s written consent.
TTM Squeeze Screener [Pineify]TTM Squeeze Screener for Multiple Crypto Assets and Timeframes 
 
This advanced TradingView Pine script, TTM Squeeze Screener, helps traders scan multiple crypto symbols and timeframes simultaneously, unlocking new dimensions in momentum and volatility analysis.
 
 Key Features 
 
 Screen up to 8 crypto symbols across 4 different timeframes in one pane
 TTM Squeeze indicator detects volatility contraction and expansion (“squeeze”) phases
 Momentum filter reveals potential breakout direction and strength
 Visual screener table for intuitive multi-asset monitoring
 Fully customizable for symbols and timeframes
 
 How It Works 
The heart of this screener is the  TTM Squeeze  algorithm—a hybrid volatility and momentum indicator leveraging Bollinger Bands, Keltner Channels, and linear momentum analysis. The script checks whether Bollinger Bands are “squeezed” inside Keltner Channels, flagging periods of low volatility primed for expansion. Once a squeeze is released, the included momentum calculation suggests the likely breakout direction.
For each selected symbol and timeframe, the screener runs the TTM Squeeze logic, outputs “SQUEEZE” or “NO SQZ”, and tags momentum values. A table layout organizes the results, allowing rapid pattern recognition across symbols.
 Trading Ideas and Insights 
 
 Spot multi-symbol volatility clusters—ideal for finding synchronized market moves
 Assess breakout potential and direction before entering trades
 Scalping and swing trading decisions are enhanced by cross-timeframe momentum filtering
 Portfolio managers can quickly identify which assets are about to move
 
 How Multiple Indicators Work Together 
This screener unites three essential concepts:
 
 Bollinger Bands : Measure volatility using standard deviation of price
 Keltner Channels : Define expected price range based on average true range (ATR)
 Momentum : Linear regression calculation to evaluate the direction and intensity after a squeeze
 
By combining these, the indicator not only signals when volatility compresses and releases, but also adds directional context—filtering false signals and helping traders time entries and exits more precisely.
 Unique Aspects 
 
 Multi-symbol, multi-timeframe architecture—optimized for crypto traders and market scanners
 Advanced table visualization—see all signals at a glance, minimizing cognitive overload
 Modular calculation functions—easy to adapt and extend for other asset classes or strategies
 Real-time, low-latency screening—built for actionable alerts on fast-moving markets
 
 How to Use 
 
 Add the script to a TradingView chart (works on custom layouts)
 Select up to 8 symbols and 4 timeframes using input fields (defaults to BTCUSD, ETHUSD, etc.)
 Monitor the screener table; “SQUEEZE” highlights assets in potential breakout phase
 Use momentum values to judge if the squeeze is likely bullish or bearish
 Combine screener insights with manual chart analysis for optimal results
 
 Customization 
 
 Symbols: Easily set any ticker for deep market scanning
 Timeframes: Adjust to match your trading horizon (scalping, swing, long-term)
 Indicator parameters: Refine Bollinger/Keltner/Momentum settings for sensitivity
 Visuals: Personalize table layout, color codes, and formatting for clarity
 
 Conclusion 
In summary, the TTM Squeeze Screener is a robust, original TradingView indicator designed for crypto traders who demand a sophisticated multi-symbol, multi-timeframe edge. Its combination of volatility and momentum analytics makes it ideal for catching explosive breakouts, managing risk, and scanning the market efficiently. Whether you’re a scalper or swing trader, this screener provides the insights needed to stay ahead of the curve.


