HaP MACDHaP MACD - Advanced DEMA Assisted Signal Indicator
Overview
The HaP MACD is an evolution of the classic MACD, designed for traders who demand faster response times and clearer trend visualisations. By integrating DEMA (Double Exponential Moving Average) logic into the standard MACD framework, this indicator filters out noise and highlights momentum shifts with a unique color-coded dot system.
How It Works
The indicator calculates two types of MACD: a standard one for the main lines and a DEMA-based one for signal generation. This dual approach ensures you stay in the trend while being alerted the moment the momentum starts to fade.
Visual Guide & Color Logic
The signal dots are placed directly on the MACD line to guide your decisions:
🔵 Blue Dot: The Entry Signal. Appears when DEMA conditions first align for a bullish move.
🟢 Green Dot: Strong Momentum. The trend is active and the MACD value is increasing.
🟠 Orange Dot: Warning Signal. The bullish trend is still active, but the momentum is slowing down (MACD is lower than the previous bar).
🔴 Red Dot: Exit Signal. The bullish condition has ended. It’s time to consider closing the position or tightening stops.
Key Features
Reduced Lag: DEMA integration provides earlier signals than standard EMA-based MACDs.
Trend Monitoring: Easily distinguish between a healthy trend (Green) and a tiring trend (Orange).
Customizable: Choose between EMA and SMA for both the oscillator and signal calculations.
Crossover Markers: Optional triangle markers for classic MACD crossovers (can be enabled in settings).
Oscillateurs centrés

Market Exhaustion [WavesUnchained]Market Exhaustion
Multi-oscillator exhaustion detector combining MFI + optional CCI, HTF bias, StochRSI timing, and a divergence engine with an Exhaustion Score (0-100).
CORE CONCEPT
- Detects exhaustion via regular divergences anchored on price pivots
- Scores each divergence (0-100) using 5 components
- Line width = quality, color = direction (never thicker than main line)
OSCILLATOR MODES
- MFI : Engine uses MFI only
- CCI : Engine uses CCI mapped to 0-100
- MFI+CCI : Both plotted, engine source selectable (MFI or CCI)
EXHAUSTION SCORE (0-100)
1. Sequence (Div 1/2/3...) - repeated attempts increase score
2. Fatigue - no new oscillator extreme over lookback
3. Formation Time - bars between pivots
4. Reaction - post-divergence bounce/drop vs ATR
5. Impulse - MFI/CCI delta + swing size
DIVERGENCE ENGINE
- Price-pivot anchored (LL/HH) with osc confirmation (HL/LH)
- OS/OB gating with dynamic zones + fallback to 20/80
- Tolerant direction checks (price + osc eps)
- Auto cleanup (max objects)
HTF CONTEXT
- Auto-HTF MFI bias label
- Optional HTF filter for signals
- Bias bonus (optional) for Exhaustion Score
SIGNALS & TIMING
- StochRSI timing + MFI zone confirmation
- Context + timing signals (L/S markers)
- Zone confirm bars
VISUALIZATION
- Color-coded MFI line (OB/OS/neutral)
- Optional CCI (mapped 0-100) line
- Divergence line width = quality, endpoint markers
- Optional mid-label with score
- Dynamic zones + optional fill
BEST USE CASES
- Reversal scouting at extremes
- Filtering weak swings
- 15M-4H swing exhaustion reads
- HTF bias + divergence confluence
Version: 1.0.0
Author: WavesUnchained
Pine Script: v6

CSA / Infinity MKR / Final Pro [NPR21}Title: CSA – Precision Infinity MKR & Confluence Dashboard
The Institutional Edge: Multi-Kernel Smoothing & Real-Time Confluence
The CSA Precision Infinity MKR is an advanced trend-following suite that replaces traditional, lagging EMAs with a high-performance Multi-Kernel Regression (MKR) engine. Designed for the "Top Center" of the chart, this script features our proprietary Infinity Bridge —a logic system that ensures your trend signal never breaks or snaps, tracking price action with surgical precision directly to the live candle.
Key Technical Features
1
7-Kernel Smoothing Engine: Unlike standard indicators, you can cycle through 17 different mathematical kernels (Sinc, Gaussian, Lorentzian, etc.) to match the specific volatility of any asset class, from high-cap Stocks to volatile Crypto.
The Infinity Bridge: We solved the "broken line" issue. Our script bridges historical regression math with live price data, providing a continuous, seamless trend line that never lags behind the current price.
15-Indicator Confluence HUD: A professional "Heads-Up Display" tracks 15 momentum and trend metrics (Heikin Ashi, SuperTrend, TTM, RSI, etc.) simultaneously. It does the heavy lifting so you can focus on execution.
High-Vis Neon Aesthetics: Built for dark-mode traders. Featuring Neon Fluorescent Green and Bright Red trend lines with a high-contrast dark green dashboard for zero eye strain.
Trader’s Manual: How to Trade the Suite
Step 1: Identify the Regime (The MKR Line)
Bullish: When the MKR line is Neon Green , you are in a buy-only regime.
Bearish: When the MKR line is Bright Red , you are in a sell-only regime.
The Curve: Watch the "hook" of the line. When the line begins to curve toward price, a trend shift is imminent.
Step 2: Confirm Confluence (The Dashboard)
Look at the CONFIRMED tally on the far right of the HUD:
Strong Buy (11/15 – 15/15): Deep green signal. High-probability entry.
Caution (7/15 – 10/15): Orange signal. The trend is weakening or consolidating.
No Trade (Below 7/15) : Red signal. High risk of "chop" or reversal. Avoid new entries.
Step 3: Check the "Non-Trending" Filter
Look for the Non-Trending cell. If it is Dark Blue , the market has officially entered a "Trending State." If it is Gray, the market is sideways, and signals should be taken with caution.
Settings & Customization
Thickness: Defaulted to 3px for a strong chart presence.
Styles: Fully adjustable Solid, Dashed, and Dotted options in the Inputs tab.
Alerts: Built-in alert conditions for Strong Confluence (11/15) and State Flips (Long to Short).

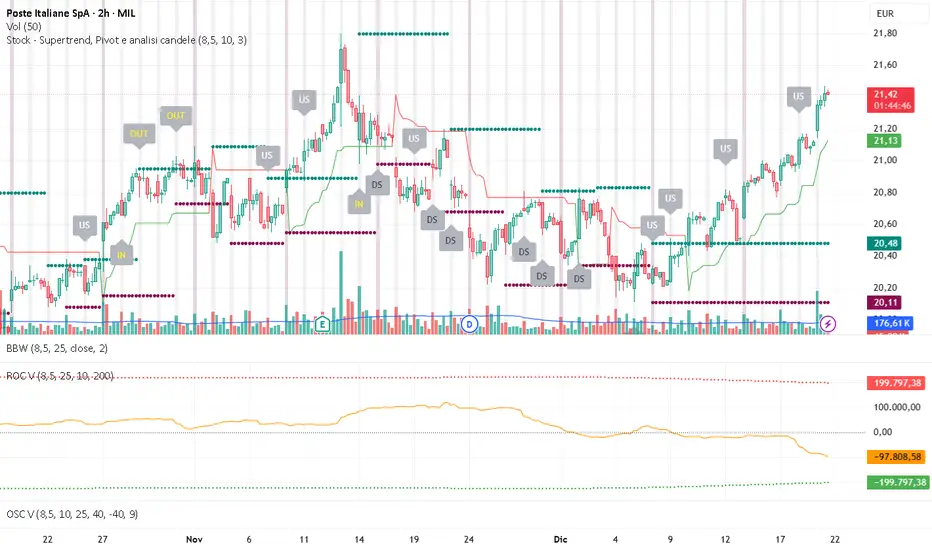
Volume OscillatorDescription
The Volume Oscillator measures the momentum of trading volume by calculating the percentage difference between a fast and a slow Simple Moving Average (SMA) of daily volume. It helps traders identify periods of increasing or decreasing market participation, often signaling potential trend strength or exhaustion.
Key Features:
Adaptive to Trading Session:
Automatically adjusts SMA periods based on the actual trading session length (default: 8.5 hours for FTSEMIB, customizable for any market — e.g., 6.5h for US stocks, 24h for crypto).
Fast & Slow SMAs:
Compares a short-term SMA (default 10 days) with a longer-term SMA (default 25 days) of volume.
Oscillator Formula:
100 × (Fast SMA / Slow SMA - 1)
→ Positive values = increasing volume momentum (bullish)
→ Negative values = decreasing volume momentum (bearish)
Signal Line (optional):
A moving average of the oscillator (default 7 days) for smoother trend identification and crossover signals.
Overbought/Oversold Levels:
User-defined horizontal lines (default +40 / -40) to highlight extreme volume conditions.
Customizable Colors:
Change the oscillator and signal line colors to match your chart style.
How to Interpret:
Bullish Conditions:
Oscillator crosses above the zero line
Oscillator crosses above the signal line
Readings near or above +40 may indicate strong buying pressure (watch for possible exhaustion if too extreme)
Bearish Conditions:
Oscillator crosses below the zero line
Oscillator crosses below the signal line
Readings near or below -40 may indicate selling pressure or capitulation
Divergences:
Look for divergences between price and the Volume Oscillator (e.g., price makes new highs but oscillator fails to confirm with higher highs) — a classic sign of weakening momentum.
Best Use Cases:
Indices (FTSEMIB, DAX, CAC, SPX, etc.), stocks and futures with defined trading hours, crypto (set session duration to 24 hours).
Works well on intraday (e.g., 15m, 30m, 1h) and daily charts.
Customization Tips:
- Shorten fast/slow lengths for faster signals (more noise)
- Lengthen them for smoother, longer-term analysis
- Adjust session duration for non-standard market hours
- Enable/disable the signal line in the settings
Note: Volume data quality can vary by symbol and exchange. Always combine this indicator with price action and other tools. Use proper risk management.

Volume ROC (smoothed)Description
The Volume ROC (Rate of Change) indicator is designed to measure the momentum of trading volume over a user-defined period, adjusted for the trading session length of the symbol (e.g., 8.5 hours for the FTSEMIB index). This makes it particularly useful for intraday charts where standard daily calculations might not align with actual trading days.
By focusing on volume changes rather than price, it helps identify potential shifts in market participation, such as accumulation, distribution, or unusual activity that could precede price movements.
How It Works:
Session Adjustment:
The indicator calculates the number of candles per trading day based on the input session duration (in hours) and the chart's timeframe. This ensures that the ROC and other calculations are based on "trading days" rather than calendar days, making it adaptable to markets with non-standard hours like European indices (e.g., FTSEMIB).
Daily Data Fetch:
It retrieves daily high, low, close, and volume data using "request.security" to ensure consistency across timeframes.
ROC Calculation:
The Rate of Change (ROC) is computed on volume using "ta.change" over the specified length (in days), multiplied by the candles-per-day factor for timeframe independence. By chosing the subtraction method instead of the division method we avoid distortions of the ROC below the zero line (method ok for timespans inferior to two years).
Smoothing with SMA:
A Simple Moving Average (SMA) is applied to the ROC to reduce noise and highlight trends in volume momentum.
Standard Deviation Bands:
The standard deviation of the smoothed ROC is calculated over a lookback period. Bands are plotted at +2σ (overbought) and -2σ (oversold) to provide context for extreme volume changes, similar to Bollinger Bands but applied to volume ROC.
Key Plots:
SMA Line (Orange): The smoothed ROC value. Positive values indicate increasing volume momentum; negative values suggest decreasing momentum.
Zero Line (Black Dotted): A reference line at 0, separating positive and negative ROC territories.
+2σ Band (Red Dotted): Upper overbought threshold. Crossings above this may signal excessive buying volume.
-2σ Band (Green Dotted): Lower oversold threshold. Dips below this could indicate capitulation or low interest.
Usage and Interpretation:
Trend Confirmation:
Use the SMA crossing above/below zero to confirm price trends with volume backing. For example, a rising price with positive Volume ROC suggests strong conviction.
Divergences:
Look for divergences between price and Volume ROC (e.g., price making new highs but ROC weakening), which can signal reversals.
Overbought/Oversold Signals:
The ±2σ bands act as dynamic levels. Volume ROC spiking above +2σ might precede pullbacks, while below -2σ could indicate buying opportunities.
Best Applied To:
European indices (like FTSEMIB or DAX), stocks, or futures with defined session hours. Test on intraday (e.g., 2h) and combine with price-based indicators like RSI or MACD for confluence.
Customization:
Adjust the ROC/SMA lengths for sensitivity (shorter for scalping, longer for swings). The STDEV lookback affects band width—longer periods create smoother bands.
Limitations:
Volume data can be noisy in low-liquidity symbols. This indicator assumes consistent session lengths; irregular holidays may affect accuracy. Always backtest and use with risk management.
This indicator is original and built for educational/trading purposes.
Williams %RDescription
This is a modified version of the classic Williams %R oscillator, adapted for markets with defined trading sessions (e.g., FTSEMIB, DAX, US stocks, etc.). It adjusts the lookback period based on the actual trading session length, making it more accurate on intraday timeframes.
Key Features
Session Adjustment:
Automatically scales the period to trading days (default: 8.5 hours for FTSEMIB, DAX, CAC; customizable for any market).
Formula (classic Williams %R):
%R = 100 × (Close - Highest High) / (Highest High - Lowest Low)
over a user-defined period (default 14 days).
Standard Levels:
-20 (overbought)
-50 (middle line)
-80 (oversold)
Visual Enhancements:
- Customizable colors for the line, levels, and background fill
- Shaded overbought/oversold zone
How to Use:
Overbought (above -20):
Potential sell signal or reversal (especially after a prolonged uptrend).
Oversold (below -80):
Potential buy signal or reversal (especially after a downtrend).
Divergences:
Look for bullish/bearish divergences between price and %R for early reversal warnings.
Best Markets:
Indices (FTSEMIB, DAX, SPX), stocks, futures. For 24/7 markets (crypto), set session duration to 24 hours.
Timeframes:
Works on intraday (15m, 1h, etc.) and daily charts.
Customization Tips:
- Adjust the period (shorter = more sensitive, longer = smoother).
- Change session duration for different markets.
- Customize colors to match your chart theme.
Note: Williams %R is a momentum oscillator and should be used in combination with other tools (trendlines, support/resistance, volume). Always practice proper risk management.

Market Pressure Regime [Interakktive]The Market Pressure Regime (MPR) is a 4-state market classifier that models how structural forces create "pressure zones" — regions where price movement is either supported (Release) or suppressed (Pinned) by market microstructure.
It combines compression analysis, follow-through efficiency, and stress detection into a composite pressure score, classifying markets into Release, Suppressed, Transition, or Trap states — helping traders understand WHY price is moving (or not moving) in the current environment.
█ USAGE
MPR addresses a core question traders face: Is the market in a regime where directional moves are likely to follow through, or is it structurally pinned?
For swing traders, MPR identifies Release phases where momentum strategies work best, and Suppressed phases where mean reversion dominates.
For day traders, it highlights Trap conditions — high effort with no follow-through — where reversals are probable and trend entries fail.
🔹 The 4-State Model
The indicator classifies markets into four distinct regimes:
• Release (Teal): Pressure score ≥ +5. Directional flow dominates. Price moves efficiently with follow-through. Favor trend continuation.
• Suppressed (Grey): Pressure score ≤ -5. Compression dominates. Price is range-bound or pinned. Fade extremes, expect reversion.
• Transition (Amber): Score between thresholds OR instability detected. Regime is uncertain — wait for confirmation before committing.
• Trap (Magenta): High stress + low follow-through. Effort without result. Expect reversals.
🔹 Reading the Pressure Histogram
The histogram displays the composite Pressure Score (range approximately -100 to +100):
• Positive values: Follow-through exceeds compression. Market is "releasing" — directional moves are supported.
• Negative values: Compression exceeds follow-through. Market is "suppressed" — price movement is constrained.
• Color reflects confirmed state: The histogram uses persistence filtering — a state must hold for N bars before the color changes, preventing false signals from noise.
🔹 The 5-Stage Calculation
MPR synthesizes five analytical stages into the final state:
1. Compression Score: Measures how tight the current range is relative to ATR. High compression suggests structural forces are pinning price.
2. Follow-Through Score: Measures price path efficiency (MER-style). Efficient moves indicate genuine directional flow, not chop.
3. Stress Score: Detects effort-without-result (ERD-style). High volume or range with no price progress = absorption.
4. Composite Pressure: Combines follow-through and compression into a single directional score.
5. Persistence Filter: Requires states to hold for configurable bars before confirming, eliminating flickering.
█ SETTINGS
Core Settings
• ATR Length: Period for volatility normalization. Default 14.
• Baseline Lookback: Period for compression and efficiency baselines. Default 20.
• Volume Average Length: Period for stress calculation baseline. Default 20.
State Classification
• Release Threshold: Pressure score above this = Release. Default +5.
• Suppressed Threshold: Pressure score below this = Suppressed. Default -5.
• Trap Threshold: Stress score above this (with low follow-through) = Trap. Default 30.
• Persistence Bars: Bars required to confirm state change. Default 3.
• Stability Lookback: Period for stability calculation. Default 20.
• Stability Threshold: Below this = forced Transition state. Default 0.5.
Visual Settings
• Show Pressure Histogram: Display the main pressure score histogram.
• Show Zero Line: Display the zero reference line.
• Show Background Tint: Subtle background color by state (default OFF).
Data Window
• Show Data Window Values: Export all calculated scores for analysis.
█ INTERPRETATION GUIDE
When to Use Trend Strategies (Release):
• Histogram tall and positive
• Teal coloring confirmed
• Price making efficient higher highs or lower lows
When to Use Mean Reversion (Suppressed):
• Histogram flat or negative
• Grey coloring confirmed
• Price oscillating without follow-through
When to Wait (Transition):
• Amber coloring
• Mixed signals — don't force trades
• Wait for state to resolve
When to Expect Reversals (Trap):
• Magenta coloring
• High volume moves that don't stick
• Often occurs at structural inflection points
█ COMPLEMENTARY TOOLS
MPR pairs well with:
• Volatility State Index (VSI) — Confirms whether volatility is expanding into the pressure regime
• Effort-Result Divergence (ERD) — Provides bar-by-bar absorption/vacuum detection
• Market Efficiency Ratio (MER) — Validates follow-through quality
█ SUITABLE MARKETS
Works across all liquid markets:
• Equities: SPY, QQQ, liquid single stocks
• Futures: ES, NQ, CL, GC
• Crypto: BTC, ETH
• Forex: Major pairs
Works on any timeframe, but 1H–Daily provides cleanest regime classification. Intraday (5m–15m) useful for session-level tactical decisions.
█ OPEN SOURCE
This indicator is open-source for educational purposes. Review the code to understand the full calculation methodology.
█ DISCLAIMER
This indicator is for educational and informational purposes only. It does not constitute financial advice. Past performance does not guarantee future results. Always conduct your own analysis and use proper risk management.

MACD Master Suite [Kodexius]The MACD Master Suite is an advanced momentum and trend framework that takes the familiar MACD concept and wraps it in a modern, trader oriented environment. Instead of a single line + histogram combination, it turns MACD into a structured decision layer with enhanced visualization, confluence and context.
The engine is built around a MACD style core with refined smoothing and normalization, designed to keep shifts in momentum clear while avoiding the noisy flicker that standard settings often produce. On top of this core, the suite adds multi timeframe confirmation, adaptive histogram behavior, trend and exhaustion mapping, divergence detection and a compact visual dashboard so you can read momentum structure at a glance rather than bar by bar.
The goal is not to create a “magic signal”, but to make MACD behave like a proper momentum map: highlighting when trend strength is building, when a leg is stretching into exhaustion, where momentum is quietly rolling over beneath price, and how different timeframes are lining up before major continuation or reversal moves.
This is not classic everyday MACD. This suite extends the standard MACD through normalization and integrated features, designed to assist in analyzing momentum patterns, identifying potential reversals, and supporting multi timeframe strategies. It processes MACD data into structured outputs for use in various market conditions.
⚠️ Note:
This is not a traditional MACD, it uses normalized values, enhanced visual feedback, and a multi timeframe dashboard engine for superior signal quality and clarity.
🔹 Features
🔸 Enhanced MACD Core
- Custom MACD style oscillator that combines classic fast/slow smoothing with an internal normalization step, keeping the main wave readable even when volatility or scale changes.
- Flexible inputs for source, lengths and smoothing type so you can adapt the engine to different instruments and trading styles.
- Optional histogram + line combination, giving you both bar based impulse and a smoother line for regime changes and crossovers.
- Gradient colored oscillator line that visually shifts from red (weak momentum) through yellow (neutral) to green (strong momentum), providing at a glance regime identification.
🔸 Gradient Zones & Regime Context
- Configurable “overextended” zones around the MACD baseline, shaded with gradient fills rather than only hard lines.
- Visual emphasis on when the MACD engine is building a persistent push in one direction vs simply oscillating around the midline.
- The mid region is kept deliberately clearer so you can quickly distinguish between trending pushes, mean reverting swings and neutral chop.
🔸 MACD Channel & Break Behaviour
- Optional channel overlay built directly on top of the MACD oscillator, using volatility style bands (e.g., Bollinger-type or Keltner-type) in MACD space instead of price space.
- Helps you see when MACD is expanding strongly away from its recent equilibrium versus compressing inside a narrow band.
- Channel touches and pushes beyond the band edges can act as an additional cue for exhaustion type behaviour or strong continuation bursts.
🔸 Reversal Signal Markers
- Swing aware reversal markers that trigger when MACD conditions suggest a possible shift after stretching into your defined zones.
- Signals use the relationship between the MACD wave and its internal smoothing, aiming to highlight turning points that stand out from ordinary noise and try to filter out noise, focusing on confirmed shifts that align with broader market context.
- Markers are drawn on the MACD plot instead of the price chart to keep structure and signals in one place.
🔸 Divergence Mapping (Regular & Hidden, with MTF Dashboard Support)
- Automatic detection of regular bullish/bearish and hidden bullish/bearish divergences between price and the oscillator.
- Separate visibility toggles for each divergence type so you can focus only on the signals that fit your approach.
- "Wait for candle close" option ensures conservative confirmation, reducing false positives in fast moving markets.
🔸 Multi-Timeframe Custom MACD Dashboard
- Compact dashboard that summarizes MACD Engine state over multiple user defined timeframes in a small table.
Per timeframe cells can show:
– whether MACD is sitting in overbought/oversold style zones or in the neutral core,
– presence of recent bullish/bearish reversal signals,
– the current divergence bias (bullish, bearish or none),
– simple channel break information (upside/downside, or quiet).
Timeframe labels are formatted into familiar units (e.g., 15m, 1H, 4H, 1D) and the table is designed to be readable even when collapsed to a small area.
🔸 Oscillator Trendlines & Break Detection
- Automatically draws trendlines directly on the MACD oscillator, using momentum swing pivots instead of only price highs and lows, so you see structure shifts where they actually start in the underlying momentum.
- Lines adapt to bullish or bearish phases and are anchored only to “clean” pivots with minimal internal violations, making sustained impulse legs and corrective phases much easier to distinguish.
- When MACD momentum closes through one of these oscillator trendlines, the break is highlighted with labels, providing an additional structural confirmation layer on top of standard signal line crossovers or histogram flips.
🔸 Alerts
- Integrated alert conditions for MACD based reversals and all four divergence types (regular/hidden, bullish/bearish).
- Designed so you can create alerts directly from the indicator, turning key MACD events into actionable notifications.
- Altogether, MACD Master Suite consolidates multiple momentum tools into one cohesive interface, helping you read the “story” of MACD and its derivatives more intuitively and efficiently.
🔹 How To Use
▶ Reading the Core Momentum Engine
The main line serves as the primary momentum indicator: positions held above the midline suggest a bullish environment, whereas those below indicate a bearish setting. The gradient zones for overbought and oversold areas help identify when momentum is becoming extended or starting to ease back, offering a smoother view compared to rigid thresholds.
The channels provides an extra information for context:
• Momentum pushing toward or beyond the outer edges shows extension based on recent patterns.
• When it stays nearer to the center, it often points to balanced or corrective phases.
The histogram adds further detail to the picture: upward bars in varying green tones reflect positive momentum buildup, while downward bars in red tones show negative shifts. Diminishing bar sizes can hint at upcoming changes in direction, making it useful for spotting transitions.
Overall, focus on how these elements interact sustained positions, zone interactions, and histogram patterns to build a sense of the current momentum flow without overcomplicating the read.
▶ Working With Reversals & Divergences
Reversal markers show up after momentum enters extreme zones and starts to shift, acting as flags for areas where direction might change. They're best used as highlights for further review rather than standalone triggers.
For divergences, the tool examines how price movements align or differ from the momentum line:
• Regular types (bullish or bearish) point out possible weakening when price hits new levels but momentum doesn't follow suit.
• Hidden types (bullish or bearish) suggest ongoing trends when price retraces but momentum holds its ground.
Customize by selecting which divergences to show and opting for confirmation only after bars close this reduces clutter and promotes a steadier perspective. Experiment with these settings to match your preferred level of detail, such as enabling all types for in depth scans or limiting to regulars for simpler overviews.
In practice, combine reversals with divergences for layered insights: a reversal marker near a divergence line could strengthen the case for monitoring that area closely.
▶ Reading the Multi-Timeframe Dashboard
This dashboard packs insights from various timeframes into a compact table, allowing quick checks of alignment without switching views. Columns represent each timeframe you select, while rows cover aspects like divergence types, extreme states, general signals, and channel interactions.
A straightforward method is to:
• Look for consistency, such as matching patterns across higher frames signaling a unified trend.
• Spot differences, like shorter frames showing pullbacks while longer ones stay in extremes, which might indicate temporary adjustments.
• Use color cues greens for positive leans, reds for negative to get an at a glance feel before diving deeper.
Treat it as a quick reference tool: before focusing on a specific chart, scan the dashboard to see if broader contexts support or contradict your observations, helping refine your approach across scales.
▶ Trendlines, Breaks & Structure
Trendlines are generated from key swings in the momentum line, mapping out bullish or bearish patterns directly on the panel. This helps visualize hidden structures in momentum that might not be obvious from price alone.
Upward sloping lines often align with building positivity, downward ones with negativity. Breaks in these lines, marked on the display, can indicate when an established pattern is giving way to something different.
It's common to leave this feature disabled for routine checks and activate it for deeper examinations, such as during volatile periods or when confirming longer term shifts.
To get the most out, observe how trendlines evolve over time persistent lines might reinforce a regime, while frequent breaks could signal choppy or transitional conditions, adding another dimension to your momentum assessment.

LY IntraDay Crypto Pro CLEAN v6LY IntraDay Crypto Pro is a universal intraday indicator designed for cryptocurrency markets, including spot and perpetual futures (e.g. Bybit, Binance, OKX).
This indicator combines trend direction, momentum, and market participation to help traders identify high-probability intraday opportunities while filtering out low-quality signals.
🔧 Core Components
EMA Trend Structure (21 / 50 / 200)
Identifies short-, mid-, and long-term trend alignment.
VWAP (Session Based)
Provides institutional reference for intraday bias.
RSI Momentum Filter
Confirms bullish or bearish momentum strength.
ADX + DMI (DI+ / DI−)
Measures trend strength and directional dominance.
Visual Trend Bias
Background color highlights bullish or bearish conditions.
Clear Entry Signals
Green ▲ for LONG opportunities
Red ▼ for SHORT opportunities
📈 How to Use
Best suited for intraday trading on 5m, 15m, and 1h timeframes.
Works on all cryptocurrencies and all exchanges supported by TradingView.
Signals are generated only when trend, momentum, and strength conditions align.
⚠️ Disclaimer
This indicator is not financial advice.
Always apply proper risk management and confirm signals with your own analysis.
Past performance does not guarantee future results.

EAB: RS Rating (Table) vs BenchmarkEAB: RS Rating (Table) vs Benchmark displays a compact table showing the Relative Strength (RS) Rating (1–99) of the current symbol compared to a selected benchmark (default: S&P 500).
The RS Rating is calculated using a weighted multi-period performance model inspired by IBD-style relative strength methodology, helping to quickly assess a stock’s performance versus the broader market.
Features
• Relative Strength Rating (1–99) vs benchmark.
• Comparison across multiple lookback periods (current, previous day, previous week and previous month).
• Fully customizable table colors, borders and on-chart location.
• Clean, table-based display designed for quick visual reference.
Notes
• The RS Rating is an informational metric and does not provide entry or exit signals.
• This indicator is intended for market analysis and relative performance comparison only.

Beast Mode - Flux OscillatorBeast Mode – Flux Oscillator (BM-FLUX) is a momentum + volatility-compression oscillator designed to help traders visualize (1) directional momentum shifts and (2) “pressure build-up” periods where volatility contracts and expansion risk increases. It combines a MACD-style momentum core with a Bollinger Bands vs. Keltner Channels squeeze filter, displayed in a clean oscillator pane (overlay=false).
---
What makes it useful/original:
1) You can switch the smoothing method between EMA and VWMA. When VWMA is enabled, the fast/slow averages are volume-weighted, which can help emphasize momentum moves that occur on higher participation.
2) It includes built-in volatility squeeze context by detecting when Bollinger Bands are inside Keltner Channels and marking those compression periods on the zero line, helping you interpret momentum signals differently during contraction vs. expansion regimes.
---
How it works (overview):
Momentum core:
- The script calculates a fast MA and slow MA from close (EMA or VWMA depending on the “Weight with Volume?” setting).
- The Fast Flux (MACD line) is: fast_ma − slow_ma
- The Slow Flux (signal line) is: EMA(macd_line, Signal Length)
- The Flux Histogram is: macd_line − signal_line
Squeeze detection:
- Bollinger Bands are calculated using BB Length and BB Mult.
- Keltner Channels are built using the same basis and a True Range average over KC Length scaled by KC Mult.
- A squeeze is active when the Bollinger Bands are fully inside the Keltner Channels.
---
How to read it:
Histogram colors (direction + acceleration):
- Bright green = above zero and rising (bullish momentum strengthening)
- Dark green = above zero but falling (bullish momentum weakening)
- Bright red = below zero and falling (bearish momentum strengthening)
- Dark red = below zero but rising (bearish momentum weakening)
Lines:
- Teal line = MACD line (Fast Flux)
- Orange line = Signal line (Slow Flux)
Squeeze dots:
- A white dot on the zero line indicates “Squeeze Active” (volatility compression).
---
Alerts:
- Flux Cross UP: MACD crosses above signal (momentum turns bullish)
- Flux Cross DOWN: MACD crosses below signal (momentum turns bearish)
- Squeeze Active: volatility compression detected (BB inside KC)
Alerts are informational conditions and do not guarantee outcomes.
---
Limitations / notes:
- This is an indicator (not a strategy) and does not provide backtest results.
- Like most momentum tools it can whipsaw in ranging markets.
- Squeeze conditions highlight volatility compression but do not predict direction by themselves.
- Always use proper risk management and confirm signals with your broader trading plan.

MarketMind LITEM🜁rketMind LITE ────────────────────
Essential Market Awareness, Reduced to Its Core
M🜁rketMind LITE is a lightweight market awareness tool designed to display essential situational context .
It provides basic orientation and movement awareness without interpretation, risk framing, diagnostics, or decision guidance.
This script is designed as a standalone awareness layer. It does not evaluate trade quality, issue signals, or influence decision-making.
WHAT IT DOES ────────────────────
M🜁rketMind LITE presents a minimal, static view of current market conditions focused entirely on awareness rather than analysis.
The system displays only essential context, allowing traders to stay oriented without introducing judgment, noise, or implied direction.
The script provides visibility into:
Time-of-day session context
Basic market regime classification (trending, range-bound, mixed)
Short-term momentum direction only (up, down, neutral)
A clean, static HUD display
M🜁rketMind LITE also includes a minimal visual state indicator that reflects recent price responsiveness, intended to be observed over time alongside the trader’s own experience.
The goal is to support awareness without influence .
HOW TO USE IT ────────────────────
M🜁rketMind LITE is not a signal generator.
It is designed to remain visible in the background of any chart, offering quiet orientation while traders rely entirely on their own process for analysis and execution.
Common use cases include:
Maintaining session awareness
Preserving context during focused trading periods
Reducing cognitive load while monitoring markets
M🜁rketMind LITE does not evaluate risk, alignment, or opportunity.
It simply shows what is happening.
DESIGN PHILOSOPHY ────────────────────
M🜁rketMind LITE is intentionally minimal.
It includes only essential awareness elements and excludes all interpretive or evaluative logic:
Situational context only
Directional momentum (up / down / neutral)
No diagnostics, confidence, or conviction framing
No process, risk, or quality assessment
Presentation controls only (HUD on/off, size, position)
Nothing is inferred.
Nothing is suggested.
This script shows market state without interpretation.
WHO IT IS FOR ────────────────────
M🜁rketMind LITE is suited for traders who:
Want passive situational awareness
Prefer minimal on-chart information
Already operate with a defined decision process
It is not designed for:
Analytical or diagnostic use
Risk evaluation or context synthesis
Traders seeking guidance or confirmation
IMPORTANT NOTES ────────────────────
M🜁rketMind LITE does not provide financial advice
No system can predict future price behavior
This tool is designed for awareness only
Used appropriately, M🜁rketMind LITE helps traders stay oriented without interference.

ADX-CCI Trend Entry Signals ADX-driven to understand intensity of move.
CCI-cross over/under "0-line" indicator.
Simple yet effective.

CRSI-TSA Colored RSI Entry Exit Signals [TheScalpingAnt]
CRSI-TSA – Colored RSI Entry/Exit Signals
Credit: LuxAlgo (Original RSI Concept & Foundation)
Developed / Implemented by: The Scalping Ant
Overview
CRSI-TSA is a professional momentum-based trading tool designed to visually enhance RSI-based trading and simplify decision-making. Built for traders who want clear directional bias, clean entry/exit signals, and a premium institutional look, this indicator transforms traditional RSI into a structured, actionable trading system.
Whether you scalp, day trade, or swing trade, CRSI-TSA helps you quickly identify momentum shifts, trend continuation, and exhaustion points with intuitive visual cues and highly optimized design logic.
Concepts
This indicator is built on the enhanced RSI framework conceptualized by LuxAlgo, then strategically implemented and redesigned by The Scalping Ant to improve:
• Readability
• Practical trade execution usability
• Signal visual clarity
• Professional presentation quality
CRSI-TSA blends:
• RSI momentum evaluation
• Signal line smoothing
• Mid-zone structure analysis
• Visual confidence zones
• Entry/Exit trigger confirmations
The result: A clearer RSI designed for real trading, not just analysis.
Features
✔️ Advanced RSI Momentum Engine
✔️ Dynamic Signal Line with Multiple MA Options
✔️ Bull/Bear Ribbon Fill for Instant Bias Recognition
✔️ Clean Mid-Zone Structure for Market Phase Clarity
✔️ Entry & Exit Markers with Optimized Visibility
✔️ Optional Top/Bottom Panel Background
✔️ Fully Adaptive to Any Asset / Any Timeframe
✔️ Alerts for Bullish & Bearish Cross Conditions
✔️ Minimalistic Yet Highly Informative Design
Customization
CRSI-TSA is intentionally flexible while remaining structured.
You can customize:
• RSI Length
• Source Input
• Signal Method (EMA / SMA / RMA / TMA)
• Ribbon Colors (Bullish & Bearish)
• Background Panel Visibility & Colors
• Default Visual Preferences
This allows full personalization without breaking the core logic.
Usage
Recommendation for:
• Scalping
• Day Trading
• Swing Trading
• Trend Confirmation
• Momentum Trading
• Pullback Entries
• Reversal Timing
Bullish Bias
When RSI crosses above the Signal Line → Momentum Strengthening
Bullish background ribbon turns active → Buy Bias
Bearish Bias
When RSI crosses below Signal Line → Momentum Weakening
Bearish ribbon activates → Sell Bias
Use additional confluence such as:
• Price structure
• Key levels
• Market session behavior
• Trend direction
Example Trading Logic
Simple Strategy Concept
1️⃣ Wait for signal cross
2️⃣ Confirm ribbon color bias
3️⃣ Enter in direction of signal
4️⃣ Manage position per your own risk model
This indicator is NOT a “magic arrow”. It is a professional trading tool to support disciplined strategy execution.
Settings
Inputs
• RSI Length (default 21)
• Signal Length (default 14)
• Signal Type: EMA / SMA / RMA / TMA
Visual
• Bull Ribbon Color
• Bear Ribbon Color
• Optional Top/Bottom Panel Background
Alerts
• Bullish RSI Crossover
• Bearish RSI Crossunder
Conclusion
CRSI-TSA delivers:
• Simplicity
• Professional execution clarity
• Enhanced RSI visualization
• Powerful trading confidence
Built for traders who demand precision and a visually refined interface.
If you value structured charts, cleaner decision-making, and professional-grade trading tools, this indicator belongs in your toolkit.
Disclaimer
This tool does NOT guarantee profits. It is an analytical decision-support tool.
Trading involves risk. Past performance does not guarantee future results.
Always use risk management and proper trading discipline.
You alone are responsible for trading decisions.

A+ / A- Radar + BUY/SELL (VWAP & EMA9 & M2/T3)simple script with vwap and m9 and displacement create by m2/t3 code.
best timeframe to use 5m

Tether Dynamics - Statistical Exhaustion EngineOverview
This strategy detects statistical exhaustion in price movement by modeling price as a particle tethered to a dynamic anchor. When price stretches too far from equilibrium and multiple independent statistical detectors confirm anomalous behavior, the strategy identifies high-probability mean-reversion opportunities.
Unlike simple oversold/overbought indicators, this system fuses concepts from classical mechanics , stochastic filtering , multivariate statistics , and statistical process control into a unified detection framework.
━━━━━━━━━━━━━━━━━━━━━━━━━━━━━━━━━━━━━━━━
THEORETICAL FOUNDATION
1. The Tethered Particle Model
The framework draws inspiration from Polyak's heavy ball method in optimization theory, where a particle with momentum navigates a loss landscape. Here, price is modeled as a particle connected to a moving anchor (adaptive EMA) by an elastic "chain" whose length scales with volatility (ATR). This creates a natural physics framework:
Displacement (x) : Distance from anchor, normalized by chain length
Velocity (v) : Rate of change of displacement
Acceleration (a) : Rate of change of velocity
This state vector defines the system's "phase space" — a complete description of price dynamics relative to equilibrium.
2. Adaptive Anchor (Kaufman Efficiency)
The anchor uses an adaptive smoothing approach inspired by Perry Kaufman's Adaptive Moving Average. The Efficiency Ratio measures trend strength:
ER = |Direction| / Volatility = |Price - Price | / Σ|ΔPrice|
High efficiency (trending) → faster adaptation
Low efficiency (choppy) → slower, more stable anchor
This prevents whipsaws in ranging markets while staying responsive in trends.
━━━━━━━━━━━━━━━━━━━━━━━━━━━━━━━━━━━━━━━━
DETECTION ARCHITECTURE
The strategy employs three independent statistical detectors , each grounded in distinct mathematical frameworks. A signal fires when price shows extended tension AND any detector confirms anomalous behavior AND momentum is decelerating (exhaustion).
Detector 1: Mahalanobis Distance (Multivariate Outlier Detection)
The Mahalanobis distance measures how "unusual" the current state vector is, accounting for correlations between displacement, velocity, and acceleration:
D² = (x - μ)ᵀ Σ⁻¹ (x - μ)
Where Σ is the full 3×3 covariance matrix. Under multivariate normality, D² follows a chi-squared distribution with 3 degrees of freedom:
χ²(3, 0.90) = 6.25 → 10% of observations exceed this
χ²(3, 0.95) = 7.81 → 5% of observations exceed this
This detector identifies states that are jointly extreme — even if no single variable looks unusual alone.
Why it matters: A price might have moderate displacement and moderate velocity, but the combination could be highly improbable. Mahalanobis captures this multivariate structure that univariate indicators miss.
Detector 2: CUSUM Change-Point Detection
Cumulative Sum (CUSUM) is a sequential analysis technique from statistical process control. It accumulates standardized deviations from the mean:
S⁺ₜ = max(0, S⁺ₜ₋₁ + zₜ - drift)
S⁻ₜ = min(0, S⁻ₜ₋₁ + zₜ + drift)
When either cumulative sum breaches a threshold, a "change point" is detected — the process has shifted from its baseline regime.
Why it matters: CUSUM detects subtle, persistent shifts that might not trigger on any single bar. It's sensitive to regime changes that precede reversals.
Detector 3: Kalman Innovation Filter (Ornstein-Uhlenbeck Model)
This detector models displacement as an Ornstein-Uhlenbeck process — the continuous-time analog of AR(1) mean-reversion:
dx = θ(μ - x)dt + σdW
A Kalman filter tracks the expected displacement and computes the innovation (prediction error):
νₜ = (yₜ - x̂ₜ|ₜ₋₁) / √Sₜ
Under correct model specification, normalized innovations should be ~N(0,1). Large innovations indicate the mean-reversion model is breaking down — price is behaving "unexpectedly" relative to equilibrium dynamics.
Adaptive Q Estimation: The filter continuously adjusts its process noise estimate based on innovation autocorrelation, maintaining calibration across different volatility regimes.
━━━━━━━━━━━━━━━━━━━━━━━━━━━━━━━━━━━━━━━━
SIGNAL LOGIC
Long Signal Requirements:
Z-Displacement < -σ threshold (price stretched below anchor)
ANY detector fires (Mahalanobis outlier OR CUSUM change OR Kalman innovation < -2σ)
Z-Acceleration > 0 (downward momentum decelerating)
Short Signal Requirements:
Z-Displacement > +σ threshold (price stretched above anchor)
ANY detector fires
Z-Acceleration < 0 (upward momentum decelerating)
The deceleration requirement ensures we're catching exhaustion rather than fighting momentum.
━━━━━━━━━━━━━━━━━━━━━━━━━━━━━━━━━━━━━━━━
RISK MANAGEMENT
Scale-Out Exit Strategy
Rather than all-or-nothing exits, the strategy takes profits at multiple R-levels:
Scale 1: 20% at 0.5R
Scale 2: 20% at 1.0R
Scale 3: 10% at 1.5R (optional)
Remainder: Trailing stop
This locks in gains while allowing winners to run.
Adaptive Trailing Stop
After reaching the activation threshold (default 1R), the stop trails from the highest high (longs) or lowest low (shorts) at a configurable ATR multiple.
Reversal Logic
When an opposite signal fires while in position, the strategy can close and flip direction rather than waiting for a stop-out.
━━━━━━━━━━━━━━━━━━━━━━━━━━━━━━━━━━━━━━━━
PARAMETER GUIDANCE
Anchor Period (24) : Base period for adaptive anchor
ATR Period (14) : Volatility measurement
Chain Length Mult (2.5) : Tether elasticity — higher = more stretch allowed
Long Tension σ (1.5) : Lower = more signals
Short Tension σ (2.0) : Higher threshold for shorts (trend asymmetry)
Mahalanobis Threshold (6.25) : χ²(3, 0.90) — adjust for signal frequency
CUSUM Threshold (3.0) : Lower = more sensitive to regime shifts
Lookback Window (100) : Statistical estimation window
━━━━━━━━━━━━━━━━━━━━━━━━━━━━━━━━━━━━━━━━
BACKTEST NOTES
Historical testing on NQ (2020-2025) suggests:
Long signals show stronger edge than shorts in equity indices
1H and 30-min timeframes balance signal quality vs. frequency
"Long Only" mode recommended for equity index futures
Important: Past performance does not guarantee future results. This strategy involves significant risk of loss.
━━━━━━━━━━━━━━━━━━━━━━━━━━━━━━━━━━━━━━━━
MATHEMATICAL REFERENCES
Polyak, B.T. (1964). "Some methods of speeding up the convergence of iteration methods" (Heavy ball method)
Bertsekas, D.P. (1999). "Nonlinear Programming" (Heavy ball method / momentum dynamics)
Mahalanobis, P.C. (1936). "On the generalized distance in statistics"
Page, E.S. (1954). "Continuous inspection schemes" (CUSUM)
Kalman, R.E. (1960). "A new approach to linear filtering and prediction problems"
Uhlenbeck, G.E. & Ornstein, L.S. (1930). "On the theory of Brownian motion"
Kaufman, P. (1995). "Smarter Trading" (Adaptive Moving Average)
━━━━━━━━━━━━━━━━━━━━━━━━━━━━━━━━━━━━━━━━
DISCLAIMER
This strategy is provided for educational and research purposes. Trading futures involves substantial risk of loss. The statistical methods employed do not guarantee profitable outcomes. Always use appropriate position sizing and risk management.

BK AK-Momentum Pivot Wolf🐺⚔️ BK AK–Momentum Pivot Wolf — The Court of Price. ⚔️🐺
Not prophecy. Procedure. Not prediction. Judgment.
Most indicators sell you a feeling: “it’s going up.”
Pivot Wolf is built to do the opposite: make the market prove it—under rules.
Price lies. Not maliciously—mechanically.
It prints motion whether there’s intent behind it or not. That’s why traders get slaughtered: they treat movement like truth.
Pivot Wolf treats movement like a defendant.
⚖️ The Law of the Tool (What It Refuses to Do)
This script does not exist to “call tops and bottoms.”
It exists to remove the sin that ruins traders:
answering before hearing.
If you trade before testimony, you’re not trading—you’re volunteering.
So Pivot Wolf is designed to withhold permission until three things line up:
Pivots = Boundary Stones
Where price must answer. Where excuses die. Where decisions become visible.
Momentum = Witness
Not what price did—what it carried. Force behind the move, not the costume of the candle.
Acceleration = Confession
The moment intent leaks. The early tell that strength is arriving—or that strength is bleeding out.
You’re not hunting “signals.”
You’re watching a case get built.
🪨 Solomon’s Hidden Layer (Why This Is a Wisdom Tool)
Solomon’s world wasn’t obsessed with forecasting. It was obsessed with right judgment.
He didn’t ask, “What do I want to happen?”
He asked, “What’s true—and what is counterfeit?”
That’s why his writing keeps returning to the same themes:
Weights & measures (standardization over vibes)
Witnesses (confirmation over impulse)
Gates & boundaries (permissioned action over chaos)
Silence (restraint as intelligence)
Pivot Wolf is built in that spirit: it’s a weights-and-witness engine disguised as an indicator.
It’s trying to keep you from trading counterfeit strength at the edge of a boundary.
🐺 How to Use It Like You Actually Respect Capital
1) Campaign Mode (Trend):
Boundaries tell you where business is allowed. Momentum/acceleration tell you whether business is justified. You press when testimony is clean—not when price is exciting.
2) Verdict Mode (Turns):
Reversals aren’t vibes. They’re a collapse of testimony: momentum fails at the boundary, acceleration flips, and the move confesses exhaustion.
3) Stand-Down Mode (The Feature Tourists Hate):
When the script goes quiet, it’s not “missing trades.”
It’s telling you: the court is not in session.
That’s the part that keeps your P&L alive.
🏷️ BK / AK
BK is the mark I’m building.
AK is honor—my mentor’s standard: clarity, patience, no shortcuts.
Above that: gratitude to Gd, the true source of wisdom, restraint, and endurance.
📜 King Solomon Lens
“Solomon didn’t predict. He judged. He built tests that made truth show itself. Pivot Wolf is that: pivots as boundary stones, momentum as witness, acceleration as the confession. No hammer in the Temple — rules are cut before entry. When it’s quiet, it’s saving you. When it speaks, it’s a ruling.”
This is not financial advice. This is structure.
If you wanted a fortune teller, you’ll hate this script.
If you wanted a system that makes the market prove itself before you strike—welcome to the Wolf.

Effort-Result Divergence [Interakktive]The Effort-Result Divergence (ERD) measures whether volume effort is producing proportional price result. It quantifies the classic Wyckoff principle: when price moves easily, momentum is real; when price struggles despite heavy volume, absorption is occurring.
Think of ERD as "energy efficiency" for price movement — green means price is gliding, red means price is grinding.
█ WHAT IT DOES
• Measures volume EFFORT relative to average volume
• Measures price RESULT relative to ATR-normalized movement
• Computes ERD = Result minus Effort (each scaled 0-100)
• Flags statistical divergences via Z-score analysis
• Absorption events: high effort, low result (negative ERD)
• Vacuum events: low effort, high result (positive ERD)
█ WHAT IT DOES NOT DO
• NO buy/sell signals
• NO entry/exit recommendations
• NO alerts (v1 is educational only)
• NO performance claims or guarantees
This is a context tool for understanding market participation quality.
█ HOW IT WORKS
The ERD analyzes two dimensions of market activity and compares them.
EFFORT (Volume Intensity)
Compares current volume to a moving average baseline:
Effort Ratio = Volume ÷ SMA(Volume, Length)
Effort Score = clamp(100 × Effort Ratio ÷ Effort Cap)
High effort means above-average volume participation.
Low effort means below-average volume participation.
RESULT (Price Efficiency)
Measures how much price moved relative to expected volatility:
Result Ratio = |Close − Previous Close| ÷ ATR
Result Score = clamp(100 × Result Ratio ÷ Result Cap)
High result means price moved significantly for the volatility regime.
Low result means price barely moved despite market activity.
ERD SCORE
ERD = Result − Effort
• Positive ERD: Result exceeds effort → price moved easily (vacuum/thin liquidity)
• Negative ERD: Effort exceeds result → price struggled (absorption/accumulation)
• Near zero: Balanced effort-to-result relationship
STATISTICAL DIVERGENCE DETECTION
Z-score analysis identifies statistically significant extremes:
Z = (ERD − Mean) ÷ StdDev
• Absorption Event: Z ≤ −threshold (extreme negative ERD)
• Vacuum Event: Z ≥ +threshold (extreme positive ERD)
█ INTERPRETATION
GREEN BARS (Positive ERD)
Price moved with relatively little volume effort. This suggests:
• Thin liquidity / low resistance
• Strong directional interest
• Momentum is "real" — not forced
RED BARS (Negative ERD)
Heavy volume was used but price barely moved. This suggests:
• Absorption / accumulation occurring
• Large players opposing the move
• Inefficiency — someone is working hard for little result
THE KEY INSIGHT
When you see:
• Down moves = high effort (red spikes)
• Up moves = low effort (green bars)
This means: It's easier for price to go up than down.
That is asymmetric strength — classic bullish pressure.
The reverse (red on up moves, green on down moves) signals bearish pressure.
PRACTICAL RULES
Without any other indicators:
• Avoid shorting when ERD is mostly green and red spikes appear only on down candles
• Be cautious buying when ERD turns red on up candles (signals absorption of buying pressure)
• Vacuum events (extreme green) often precede continuation or pause — not violent reversal
• Absorption events (extreme red) often precede reversals or range formation
█ VOLUME DATA NOTE
This indicator uses the volume variable which represents:
• Exchange volume on stocks and futures
• Tick volume on Forex and CFD instruments
Tick volume is a proxy for activity, not actual exchange volume. The indicator remains useful on Forex as relative volume comparisons are still meaningful, but interpretation should account for this limitation.
█ INPUTS
Core Settings
• Volume Average Length: Baseline period for effort calculation (default: 20)
• ATR Length: Volatility normalization period (default: 14)
• Effort Cap: Volume ratio that maps to 100% effort (default: 3.0)
• Result Cap: ATR multiple that maps to 100% result (default: 1.0)
Divergence Detection
• Z-Score Lookback: Statistical analysis window (default: 100)
• Z-Score Threshold: Standard deviations for event flags (default: 2.0)
Visual Settings
• Show ERD Histogram: Toggle main display
• Show Zero Line: Toggle reference line
• Show Divergence Markers: Toggle event circles
• Show Effort/Result Lines: Display component breakdown
█ ORIGINALITY
While Wyckoff's effort-versus-result principle is well-established, existing implementations are typically:
• Purely visual with no quantification
• Pattern-based requiring subjective interpretation
• Not statistically normalized for comparison across instruments
ERD is original because it:
1. Normalizes both effort and result to 0-100 scales for direct comparison
2. Uses ATR for result normalization (adapts to volatility regime)
3. Applies statistical Z-score for objective divergence detection
4. Provides quantified output suitable for systematic analysis
█ DATA WINDOW EXPORTS
When enabled, the following values are exported:
• Effort (0-100)
• Result (0-100)
• ERD Score
• Z-Score
• Absorption Event (1/0)
• Vacuum Event (1/0)
█ SUITABLE MARKETS
Works on: Stocks, Futures, Forex, Crypto
Best on: Instruments with reliable volume data (stocks, futures, crypto)
Timeframes: All timeframes — interpretation adapts accordingly
█ RELATED
• Market Efficiency Ratio — measures price path efficiency
• Wyckoff Volume Spread Analysis — conceptual foundation
█ DISCLAIMER
This indicator is for educational purposes only. It does not constitute financial advice. Past performance does not guarantee future results. Always conduct your own analysis before making trading decisions.

Mystic Scales Dual Energy PRO [Destiny Quant]Mystic Scales Dual Energy PRO - Destiny Quant | 【天機衡】雙向能量
English Description
Balancing Momentum and Structure. Mystic Scales Dual Energy PRO utilizes a unique split-axis design to evaluate the balance between Market Momentum (WE2) and Market Health (WH1/WH2). It ensures you only execute trades when momentum is supported by a healthy market structure.
Custom Thresholds: Fully adjustable Entry/Exit score triggers with built-in hysteresis logic to prevent whipsaws.
Structural Health: Monitors DMI flows and Volume Ratios (VR) across Daily, Weekly, and Monthly timeframes.
Strategic Confluence: The perfect companion for the Celestial Mirror to confirm high-conviction entries.
中文說明
權衡動能與結構的平衡之衡 【天機衡】雙向能量 PRO 採用獨特的雙軸分離設計,同時權衡 「市場動能 (WE2)」 與 「市場健康度 (WH1/WH2)」。它確保您只在市場結構健康的前提下發動動能交易。
自訂門檻觸發:具備可調式進場/出場分數門檻,並內建遲滯邏輯 (Hysteresis) 有效過濾頻繁洗盤。
結構健康偵測:即時監控日、週、月線級別的 DMI 流向與成交量比率 (VR)。
策略共振:作為【天機鏡】的最佳拍檔,用來確認高勝率的共振進場時機。
🚀 Get Access / 獲取授權 This is an Invite-only script. To unlock the Celestial Mirror, please:
Visit the link in my profile.
Send a direct message for subscription details.
本指標為 僅限邀請 (Invite-only)。欲獲取授權,請:
點擊我個人主頁的連結(官網/商店)。
透過 TradingView 私訊聯繫我了解訂閱詳情。

Celestial Mirror AI Score PRO - Destiny QuantCelestial Mirror AI Score PRO - Destiny Quant | 【天機鏡】AI 評分系統
English Description
The Strategic Brain of Quantitative Trading. The Celestial Mirror AI Score PRO is a multi-factor weighting engine designed by Destiny Quant Lab. It acts as a digital "Mirror," revealing the hidden truth of market quality. By integrating over 10+ quantitative factors, including the proprietary Zanger Explosion Algorithm, it provides a real-time AI Score (0-99).
Institutional Detection: Uses advanced VSA logic to track "Smart Money" footprints.
Dual Engine: Switch between "Factor Analysis" (Swing) and "Explosion" (Momentum) modes.
Quant Dashboard: Real-time monitoring of momentum, volume structure, and pivot hierarchy.
中文說明
量化交易的策略大腦 【天機鏡】AI 評分系統 PRO 是由 天機量化實驗室 開發的多因子加權引擎。它如同數位之鏡,照見市場體質的虛實。本指標結合了 10 多項量化因子與獨家 Zanger 爆發演算法,將複雜盤面轉化為 0-99 的即時評分。
機構追蹤:透過進階量價分析 (VSA) 偵測大戶資金流向。
雙模式引擎:提供適合波段的「因子分析」與捕捉飆股噴發的「爆發預測」模式。
天機數據面板:即時監測動能、量能與樞軸位置,讓數據一目了然。
🚀 Get Access / 獲取授權 This is an Invite-only script. To unlock the Celestial Mirror, please:
Visit the link in my profile.
Send a direct message for subscription details.
本指標為 僅限邀請 (Invite-only)。欲獲取授權,請:
點擊我個人主頁的連結(官網/商店)。
透過 TradingView 私訊聯繫我了解訂閱詳情。

BK AK-IED💥 Introducing BK AK-IED — Volatility Ignition / Expansion / Detonation 💥
A pressure-to-release weapon system for traders who want timing, not noise.
Markets don’t move clean because they “feel like it.” They load, they ignite, and then they detonate into expansion. BK AK-IED is built to expose that sequence in real time—so you stop trading randomness and start trading regime shifts.
⚔️ What BK AK-IED is
BK AK-IED is a 3-speed VWMA energy oscillator that blends price movement + volume into a single pressure readout:
Fast (5) = ignition energy (range-driven)
Medium (21) = core pressure engine
Slow (55) = structural volatility backdrop
It’s not a “direction oracle.” It’s an energy meter that tells you when the market is coiling, when it’s waking up, and when it’s breaking out with force.
🧠 Core Weapon Systems
✅ Dynamic Scaling
Keeps the oscillator readable across symbols (no ridiculous y-axis blowouts).
✅ Volatility State Bar (Bottom Strip) — Your War Room
🟨 CONTRACTION = VWMA convergence / coil / pressure loading
🟩 EXPANSION = energy spike begins
🟥 BREAKOUT = expansion without contraction (release phase)
⬜ NEUTRAL = dead zone, don’t force it
✅ Breakout Peak Icons (Crown markers)
Crowns print only when there’s true breakout energy and the move hits major peak territory versus recent extremes. Translation:
tighten risk, scale-out, stop getting greedy. These are exhaustion warnings—not automatic reversals.
Timeframe-adaptive peak filtering is built in:
< 1H: stricter peak requirement
≥ 1H: more realistic swing threshold
🧭 How to use it (execution, not opinions)
1) 🟨 Contraction = don’t bleed.
This is the chop factory. You wait. You map levels. You stalk.
2) 🟩 Expansion = prepare.
Start aligning with structure: trend framework, VWAP, key levels, HTF bias.
3) 🟥 Breakout = engage.
This is where moves pay. Trade the direction your structure supports and manage risk like a professional.
4) 👑 Peak during breakout = harvest / protect.
Scale. Tighten stops. Don’t turn winners into donations.
🧱 Inputs that matter (what you’re actually tuning)
Amplitude Multiplier = how aggressive the energy read is
VWMA Spread Contraction Threshold = how tight “coil” must be to count
Scale Lookback = how far back the dynamic scaling references
Peak Thresholds = how selective peaks are (auto-switches based on timeframe)
The “AK” in the name is an acknowledgment of my mentor A.K. His standards (patience, precision, clarity, and emotional control) are a major reason I build tools with structure instead of hype.
And above all: all praise to Gd — the true source of wisdom, restraint, and right timing.
👑 King Solomon Lens — ZENITH Discipline
Solomon didn’t build greatness by impulse. He built it by measure, order, and restraint.
When the Temple was built, the stones were prepared away from the site—so the structure went up with precision, not chaos. That is the market lesson: the decisive moment is loud, but the preparation is silent. If you only show up for the noise, you will always arrive late.
BK AK-IED is that Solomon blueprint on a chart:
🟨 Contraction is the quarry.
The market is cutting the stones in silence. This is where the undisciplined burn money “doing something.” The wise do the opposite: they reduce noise, define levels, and wait.
🟩 Expansion is the line being set.
Pressure starts to move. This is where you bring structure online—bias, levels, risk plan. Not excitement.
🟥 Breakout is the placement.
The stone drops into position. This is the only phase where aggression is righteous—because it’s backed by a real shift, not hope.
👑 Peak icons are ZENITH—crown-of-the-move logic.
Zenith is where force and momentum reach their highest point before decay begins. The crown is not “celebrate and add.” The crown is govern yourself: harvest, tighten, protect. Solomon’s edge wasn’t prediction—it was rule over the self. That’s what separates profit from punishment.
This is what wisdom looks like in trading: not guessing the future—governing your exposure when the present is telling you the truth. And may Gd bless your restraint as much as your entries, because restraint is where survival becomes power.
✅ Final
BK AK-IED is your volatility weapon for market warfare:
Load → Ignite → Detonate.
Use it with structure. Use it with discipline. And give praise to Gd for every protected loss, every clean entry, and every moment you didn’t force a trade. 🙏

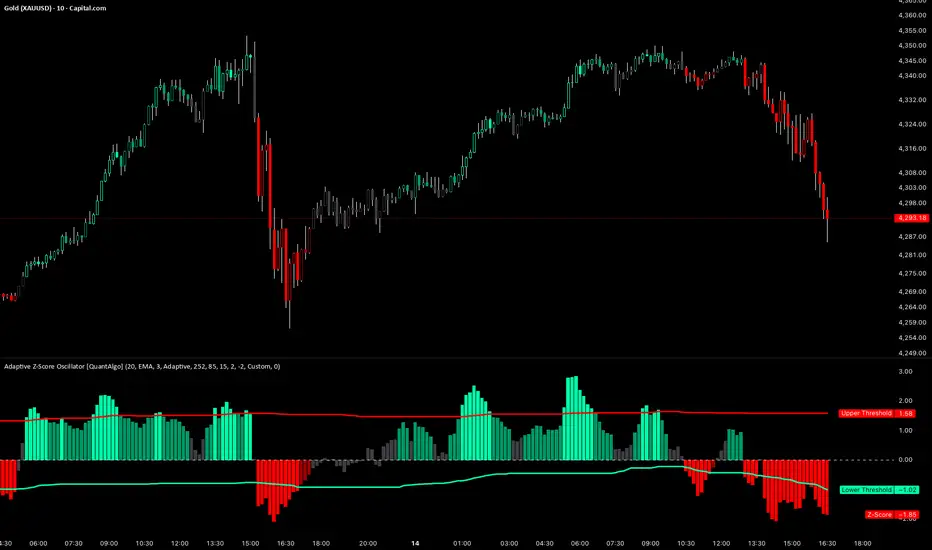
Adaptive Z-Score Oscillator [QuantAlgo]🟢 Overview
The Adaptive Z-Score Oscillator transforms price action into statistical significance measurements by calculating how many standard deviations the current price deviates from its moving average baseline, then dynamically adjusting threshold levels based on historical distribution patterns. Unlike traditional oscillators that rely on fixed overbought/oversold levels, this indicator employs percentile-based adaptive thresholds that automatically calibrate to changing market volatility regimes and statistical characteristics. By offering both adaptive and fixed threshold modes alongside multiple moving average types and customizable smoothing, the indicator provides traders and investors with a robust framework for identifying extreme price deviations, mean reversion opportunities, and underlying trend conditions through the visualization of price behavior within a statistical distribution context.
🟢 How It Works
The indicator begins by establishing a dynamic baseline using a user-selected moving average type applied to closing prices over the specified length period, then calculates the standard deviation to measure price dispersion:
basis = ma(close, length, maType)
stdev = ta.stdev(close, length)
The core Z-Score calculation quantifies how many standard deviations the current price sits above or below the moving average basis, creating a normalized oscillator that facilitates cross-asset and cross-timeframe comparisons:
zScore = stdev != 0 ? (close - basis) / stdev : 0
smoothedZ = ma(zScore, smooth, maType)
The adaptive threshold mechanism employs percentile calculations over a historical lookback period to determine statistically significant extreme zones. Rather than using fixed levels like ±2.0, the indicator identifies where a specified percentage of historical Z-Score readings have fallen, automatically adjusting to market regime changes:
upperThreshold = adaptive ? ta.percentile_linear_interpolation(smoothedZ, percentilePeriod, upperPercentile) : fixedUpper
lowerThreshold = adaptive ? ta.percentile_linear_interpolation(smoothedZ, percentilePeriod, lowerPercentile) : fixedLower
The visualization architecture creates a four-tier coloring system that distinguishes between extreme conditions (beyond the adaptive thresholds) and moderate conditions (between the midpoint and threshold levels), providing visual gradation of statistical significance through opacity variations and immediate recognition of distribution extremes.
🟢 How to Use This Indicator
▶ Overbought and Oversold Identification:
The indicator identifies potential overbought conditions when the smoothed Z-Score crosses above the upper threshold, indicating that price has deviated to a statistically extreme level above its mean. Conversely, oversold conditions emerge when the Z-Score crosses below the lower threshold, signaling statistically significant downward deviation. In adaptive mode (default), these thresholds automatically adjust to the asset's historical behavior, i.e., during high volatility periods, the thresholds expand to accommodate wider price swings, while during low volatility regimes, they contract to capture smaller deviations as significant. This dynamic calibration reduce false signals that plague fixed-level oscillators when market character shifts between volatile and ranging conditions.
▶ Mean Reversion Trading Applications:
The Z-Score framework excels at identifying mean reversion opportunities by highlighting when price has stretched too far from its statistical equilibrium. When the oscillator reaches extreme bearish levels (below the lower threshold with deep red coloring), it suggests price has become statistically oversold and may snap back toward the mean, presenting potential long entry opportunities for mean reversion traders. Symmetrically, extreme bullish readings (above the upper threshold with bright green coloring) indicate potential short opportunities or long exit points as price becomes statistically overbought. The moderate zones (lighter colors between midpoint and threshold) serve as early warning areas where traders can prepare for potential reversals, while exits from extreme zones (crossing back inside the thresholds) often provide confirmation that mean reversion is underway.
▶ Trend and Distribution Analysis:
Beyond discrete overbought/oversold signals, the histogram's color pattern and shape reveal the underlying trend structure and distribution characteristics. Sustained periods where the Z-Score oscillates primarily in positive territory (green bars) indicate a bullish trend where price consistently trades above its moving average baseline, even if not reaching extreme levels. Conversely, predominant negative readings (red bars) suggest bearish trend conditions. The distribution shape itself provides insight into market behavior, e.g., a narrow, centered distribution clustering near zero indicates tight ranging conditions with price respecting the mean, while a wide distribution with frequent extreme readings reveals volatile trending or choppy conditions. Asymmetric distributions skewed heavily toward one side demonstrate persistent directional bias, whereas balanced distributions suggest equilibrium between bulls and bears.
▶ Built-in Alerts:
Seven alert conditions enable automated monitoring of statistical extremes and trend transitions. Enter Overbought and Enter Oversold alerts trigger when the Z-Score crosses into extreme zones, providing early warnings of potential reversal setups. Exit Overbought and Exit Oversold alerts signal when price begins reverting from extremes, offering confirmation that mean reversion has initiated. Zero Cross Up and Zero Cross Down alerts identify transitions through the neutral line, indicating shifts between above-mean and below-mean price action that can signal trend changes. The Extreme Zone Entry alert fires on any extreme threshold penetration regardless of direction, allowing unified monitoring of both overbought and oversold opportunities.
▶ Color Customization:
Six visual themes (Classic, Aqua, Cosmic, Ember, Neon, plus Custom) accommodate different chart backgrounds and aesthetic preferences, ensuring optimal contrast and readability across trading platforms. The bar transparency control (0-90%) allows fine-tuning of visual prominence, with minimal transparency creating bold, attention-grabbing bars for primary analysis, while higher transparency values produce subtle background context when using the oscillator alongside other indicators. The extreme and moderate zone coloring system uses automatic opacity variation to create instant visual hierarchy, with darkest colors highlight the most statistically significant deviations demanding immediate attention, while lighter shades mark developing conditions that warrant monitoring but may not yet justify action. Optional candle coloring extends the Z-Score color scheme directly to the price candles on the main chart, enabling traders to instantly recognize statistical extremes and trend conditions without needing to reference the oscillator panel, creating a unified visual experience where both price action and statistical analysis share the same color language.
Freebird Flow MomentumHello, TradingView Comm;
This is a simple "3-Speed" Momentum Flow Tracker.
It is designed to give traders early signal to shifts of Buy/Sell Momentum-over-Time at all timeframes for the purpose of targeting accurate entry/exit on the micro, while still maintaining full integrity and viability while macro timeframe charting.
This indicator adds in a separate pane by default.
It can, and was designed to however, be combined with your Price Chart. IF you choose to do so:
- Fixed Center Alignment + Price Pan "Bonus": '0.00'-line acts as a "Net" indicator. When Zero line above median of pane, Sellers are the "Net" winners of the candles in view, and vice versa. The distance from center indicates Magnitude of Net Imbalance.
Recommended Opacity Settings:
- Histogram: 20-25%
- Cloud: 33-40%
